
The warm, inviting look of a wood floor can transform a bathroom from a purely functional space into a personal spa retreat. But for years, a single fear has held homeowners back: water. The dream of authentic wood often clashes with the reality of splashes, steam, and humidity, leading to worries about warped boards, permanent stains, and hidden mold. What if you could have the timeless beauty of wood without any of the risk?
The truth is, traditional hardwood and water are natural enemies. But modern flooring technology has created a new generation of solutions that deliver an incredibly authentic wood look with none of the water worries. This is your definitive, regret-proof guide to achieving an indestructible and beautiful wood-look bathroom. We will walk you through understanding the risks of moisture, comparing the top waterproof flooring solutions head-to-head, exploring stunning design ideas, and ensuring a flawless installation that will last for years to come.
- The Bathroom Flooring Dilemma: Why Real Wood Fails in High-Moisture Areas
- The Solution: A Head-to-Head Comparison of Waterproof Wood Alternatives
- Achieving an Authentic Look: Design Ideas for Your Wood-Look Bathroom
- Installation is Everything: Ensuring a Truly Waterproof System
- Long-Term Care and Troubleshooting
- Your Dream Bathroom Awaits
- References & Authoritative Sources
The Bathroom Flooring Dilemma: Why Real Wood Fails in High-Moisture Areas
Before exploring the solutions, it’s crucial to understand the core problem. A bathroom is the most challenging environment for any flooring material, and for traditional wood, it’s a battle it’s destined to lose. The constant exposure to moisture, both direct and airborne, leads to a cascade of issues that can ruin your investment and cause significant damage to your home.
From Splash to Steam: How Water Causes Irreversible Damage
Wood is a porous, organic material. When it absorbs water—from a spilled glass, a splash from the tub, a slow leak, or even just high ambient humidity—its cellular structure swells. As it dries, it shrinks. This constant cycle of expansion and contraction leads to devastating physical changes. According to the National Wood Flooring Association (NWFA), maintaining stable humidity levels is critical for hardwood’s longevity, a condition that is nearly impossible to guarantee in a bathroom environment.[1]
This moisture attack manifests in several ways:
- Cupping: The edges of the wood planks become higher than the center, creating a concave, wavy appearance. This happens when the bottom of the board absorbs more moisture than the top.
- Crowning: The opposite of cupping, where the center of the plank bows upward, higher than the edges. This often occurs when the surface is exposed to more moisture than the underside.
- Buckling: The most severe form of water damage, where the flooring pulls away from the subfloor entirely, creating large, dangerous peaks. This signifies a major water event and a complete flooring failure.
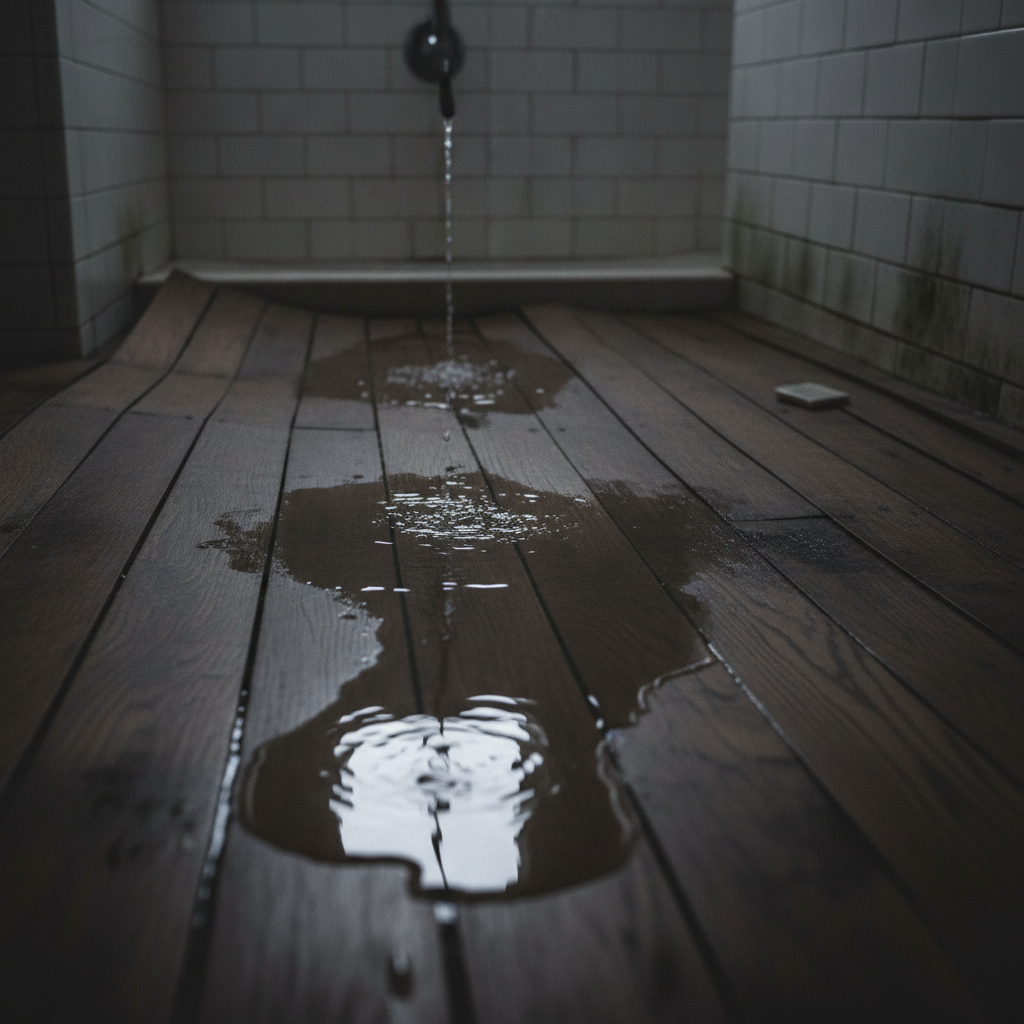
The Institute of Inspection, Cleaning and Restoration Certification (IICRC) sets industry standards for water damage restoration, and their guidelines highlight that once wood flooring is saturated, saving it without significant distortion is extremely difficult.[2] The damage isn’t just cosmetic; it compromises the structural integrity of your floor.
The Unseen Threat: Mold and Mildew Growth
Beyond the visible warping and damage lies a more insidious problem: mold. Mold requires three things to thrive: moisture, a food source, and the right temperature. A bathroom provides the perfect environment, and the organic material in wood flooring and the underlying subfloor serves as an all-you-can-eat buffet.
The Environmental Protection Agency (EPA) warns that mold exposure can cause a variety of health effects, from allergic reactions and asthma attacks to more severe responses in sensitive individuals.[3] The problem is that mold growth often starts out of sight—beneath the floorboards or trapped in the subfloor—making it difficult to detect until it has become a major infestation.
Signs of Hidden Water Damage and Mold in a Bathroom:
- A persistent musty or earthy smell that doesn’t go away with cleaning.
- Dark discoloration or staining appearing on baseboards, walls, or the flooring itself.
- Flooring that feels soft, spongy, or bouncy when you walk on it.
- Gaps appearing between floorboards or tiles.
- Peeling paint or wallpaper near the floor.
- Visible mold growth on any surface, which often indicates a larger, hidden problem.
The Solution: A Head-to-Head Comparison of Waterproof Wood Alternatives
Fortunately, you don’t have to abandon your dream of a wood-look bathroom. Today’s market offers incredible waterproof wood alternative flooring options that are specifically engineered to handle high-moisture areas. Let’s compare the three leading contenders.
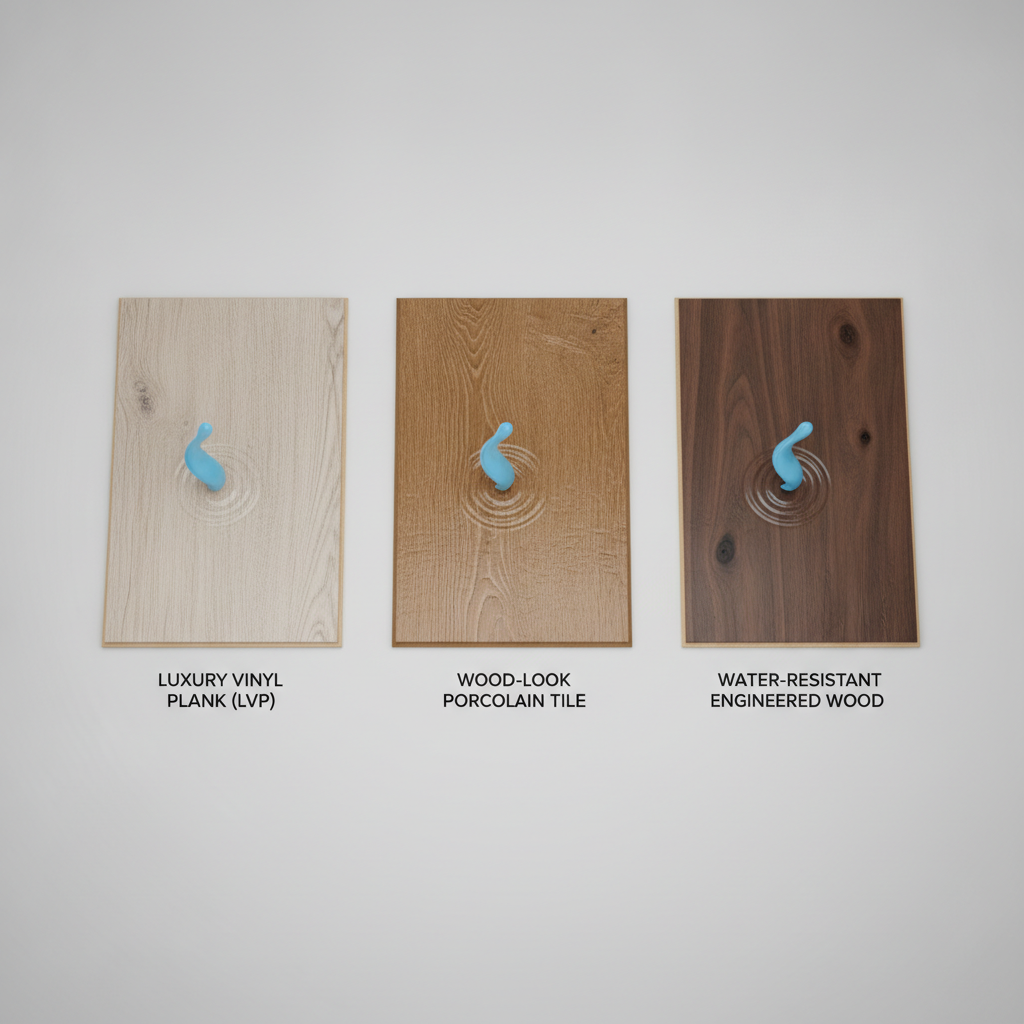
Master Comparison Matrix: Waterproof Bathroom Flooring
Here’s a quick overview of how the top three choices stack up against each other.
Luxury Vinyl Plank (LVP)
- Waterproofing: 100% Waterproof Core
- Durability: Very Good to Excellent (Depends on wear layer)
- Cost ($/sqft): $$
- Realism (1-5): 4.5
- DIY-Friendliness (1-5): 5
Wood-Look Porcelain Tile
- Waterproofing: 100% Waterproof
- Durability: Excellent (Check PEI Rating)
- Cost ($/sqft): $$$ (Installation can be costly)
- Realism (1-5): 4
- DIY-Friendliness (1-5): 2
Water-Resistant Engineered Wood
- Waterproofing: Water-Resistant Surface (Core may vary)
- Durability: Good to Very Good
- Cost ($/sqft): $$$$
- Realism (1-5): 5 (It’s real wood on top)
- DIY-Friendliness (1-5): 1 (Professional installation highly recommended)
Option 1: Luxury Vinyl Plank (LVP) – The Versatile Champion
Luxury Vinyl Plank, or LVP, has become the go-to choice for durable bathroom flooring, and for good reason. It is constructed in layers, with a high-definition printed visual layer that mimics wood grain and a solid, 100% waterproof core. This construction means that even if water sits on the surface or seeps between planks, it will not damage the flooring itself.
High-quality LVP, such as products in the Bravewood collection, offers stunningly realistic textures and visuals that can fool even a discerning eye. The key to its longevity is the wear layer—a clear top coat measured in mils. For a bathroom with regular foot traffic, look for a wear layer of 12 mil or higher for excellent scratch and scuff resistance. Furthermore, many premium LVP products carry a FloorScore Certification, which ensures they meet strict indoor air quality standards for low volatile organic compound (VOC) emissions.[4]
Pros:
- Completely waterproof and easy to clean.
- Warm and comfortable underfoot compared to tile.
- Extremely DIY-friendly with click-lock installation systems.
- Cost-effective compared to tile and engineered wood.
Cons:
- Can be dented by very heavy objects.
- While highly realistic, it is not real wood.
Option 2: Wood-Look Porcelain Tile – The Durability King
When it comes to being indestructible, nothing beats porcelain tile. Made from refined clay fired at high temperatures, porcelain has a water absorption rate of less than 0.5%, making it impervious to moisture. Modern printing technology allows manufacturers to create tiles that look remarkably like wood planks, complete with grain patterns and textured surfaces.
For durability, the Porcelain Enamel Institute (PEI) rating is your guide. This scale measures a tile’s resistance to abrasion and wear. For a residential bathroom floor, a PEI rating of 3 or 4 is more than sufficient.[5] While the tiles themselves are mold-proof, the grout lines can be a weak point. To create a truly mold resistant flooring system, it’s essential to use high-performance, mold-resistant grout and sealant. Following proper installation standards, like those outlined by the Tile Council of North America (TCNA), is non-negotiable for a waterproof result.[6]
Pros:
- Extremely durable and resistant to scratches, dents, and stains.
- Completely waterproof and will last a lifetime.
- Easy to clean and maintain.
Cons:
- Cold and hard underfoot (can be mitigated with radiant heating).
- Installation is complex, labor-intensive, and best left to professionals.
- Grout lines require periodic cleaning and sealing.
Option 3: Water-Resistant Engineered Wood – The Premium Hybrid
For those who want the authentic feel of real wood, water-resistant engineered wood is a compelling hybrid. This flooring is constructed with a thin top layer of real hardwood veneer over a highly stable, often waterproof, core. This construction makes it far more dimensionally stable than solid hardwood in humid environments.
It’s critical to understand the difference between “water-resistant” and “waterproof.” Most of these products feature a waterproof surface finish that can handle spills and splashes for a specified period (e.g., 24-72 hours) before damage occurs. However, they are not designed to withstand standing water or flooding. Their warranties often have strict clauses, and as one flooring expert notes, “For these hybrid products, professional installation is everything. An improperly sealed perimeter or a single installation mistake can void the warranty and lead to catastrophic failure in a bathroom.”
Pros:
- The most authentic look and feel because the top layer is real wood.
- More stable than solid hardwood in humid conditions.
Cons:
- Only water-resistant, not fully waterproof.
- The most expensive option.
- The real wood veneer can still be scratched or dented.
- Requires meticulous, professional installation to perform correctly in a bathroom.
Achieving an Authentic Look: Design Ideas for Your Wood-Look Bathroom
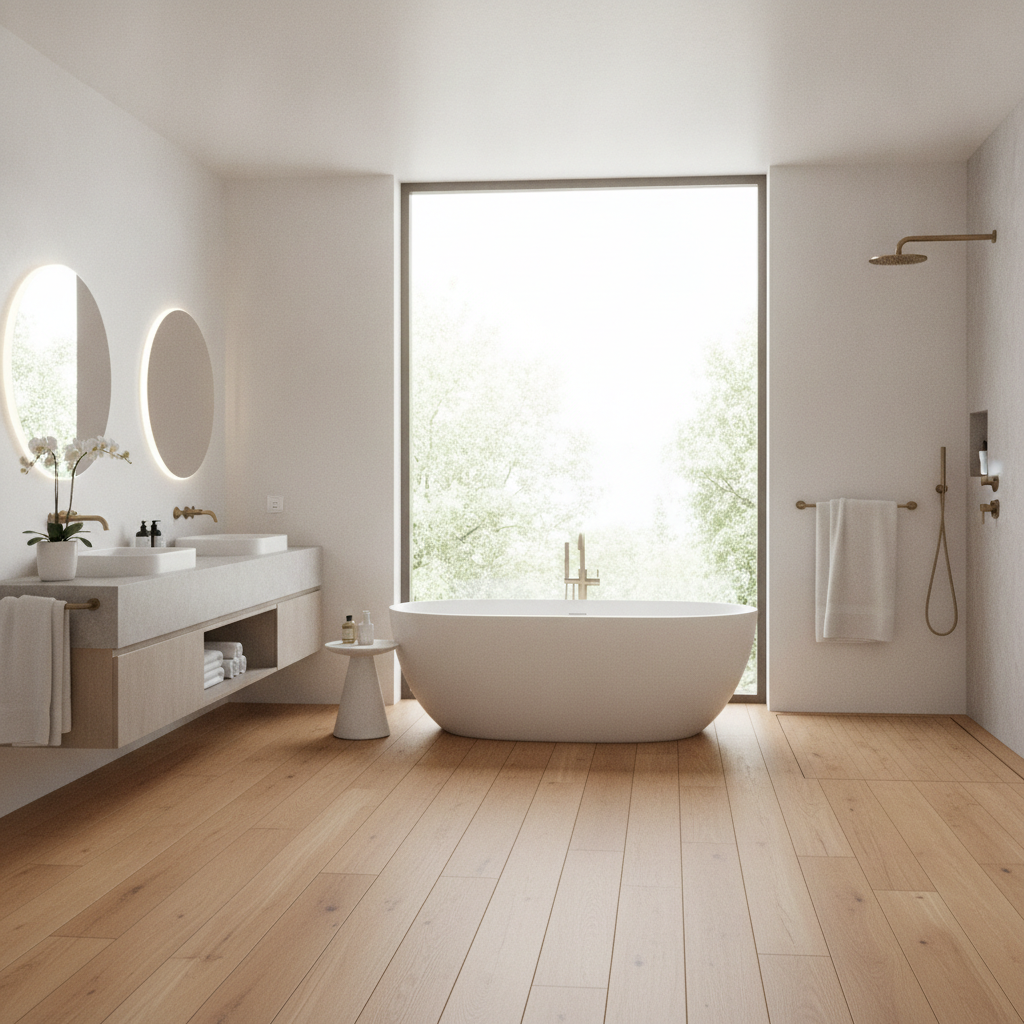
Choosing the right material is only half the battle. The next step is ensuring your waterproof wood look flooring contributes to a cohesive, high-end design. With the right choices, you can create a space that feels both timeless and personal.
An interior designer might advise, “The key to making wood-look flooring feel authentic is to consider the entire space. Pay attention to how the floor’s tone and texture interact with your vanity, tile, and especially your lighting.” Indeed, lighting plays a huge role; warmer light (around 2700K) can enhance the rich tones in the flooring, while cooler light (4000K+) can make it feel more modern and crisp.
Choosing the Right Color and Plank Style
The color and style of your planks set the tone for the entire room.
- Light Tones (Blonde, Whitewashed, Ashy Gray): These colors are perfect for Scandinavian or coastal designs. They make small bathrooms feel larger and brighter.
- Medium Tones (Natural Oak, Hickory, Walnut): A versatile and timeless choice that works well with modern farmhouse, transitional, and traditional styles. They provide warmth without overwhelming the space.
- Dark Tones (Espresso, Jacobean): These create a dramatic, luxurious feel ideal for industrial or high-contrast modern designs. Use them in bathrooms with ample natural light to avoid making the space feel too small.
The plank format also matters. Wide planks can make a room feel more expansive, while a herringbone or chevron pattern adds a touch of custom, sophisticated detail.
Beyond the Floor: Using Wood-Look Planks on Walls and Ceilings
Want to create a truly immersive, spa-like experience? Extend the wood look beyond the floor. Using wood-look planks on an accent wall behind the vanity or toilet can add texture and warmth. For shower enclosures, wood-look porcelain tile is the only safe option, allowing you to carry the aesthetic seamlessly into the wettest area of the room. A certified installer would advise that for any vertical application, using the correct adhesive and ensuring the wall substrate is properly prepared and waterproofed is absolutely critical for a safe and lasting installation.
Installation is Everything: Ensuring a Truly Waterproof System
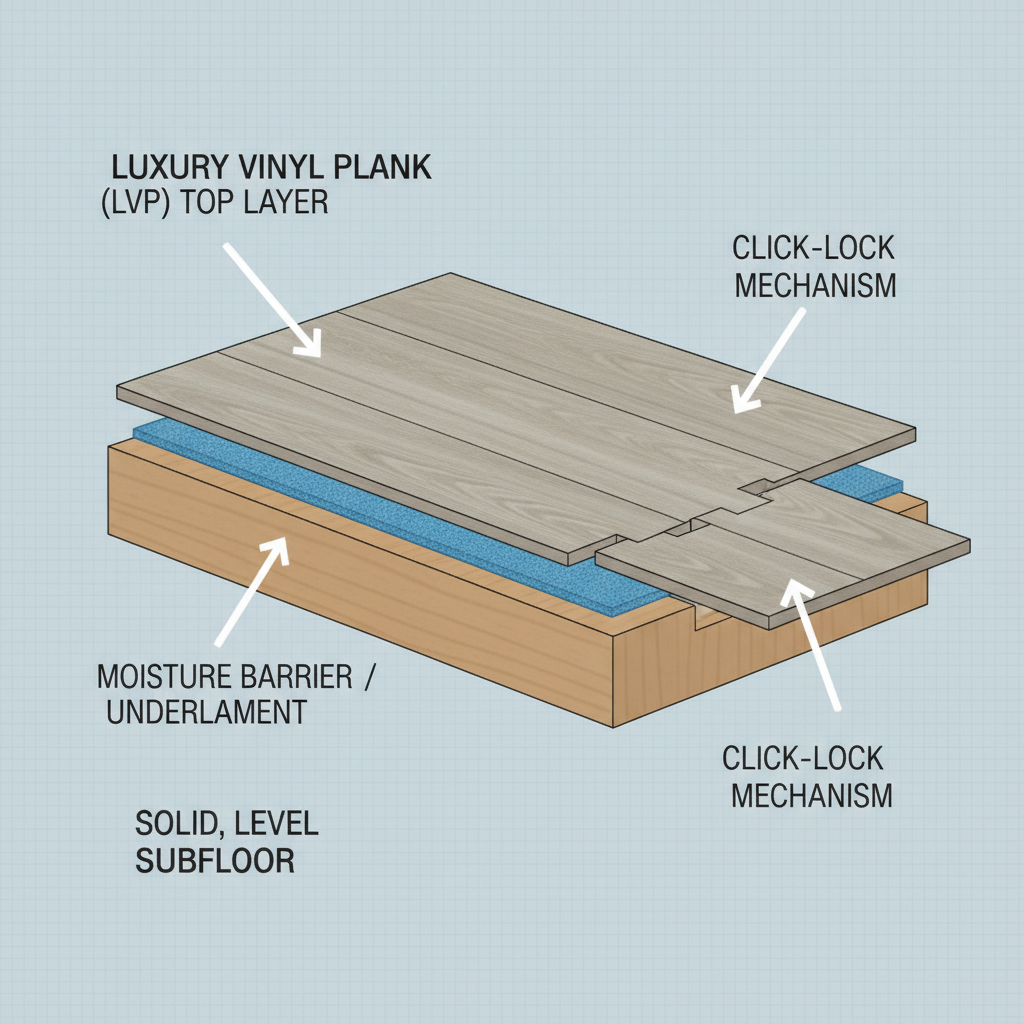
You can choose the best 100% waterproof flooring in the world, but if it’s installed improperly, it can still fail. A successful, long-lasting bathroom floor is a complete system, starting from the ground up. The most common DIY installation mistakes, such as failing to level the subfloor or not leaving an expansion gap, can lead to a warped bathroom floor and void your product warranty.
The Foundation: Subfloor Assessment and Preparation
Your subfloor is the foundation of your entire flooring project. Before a single plank is laid, the subfloor must be clean, flat, and structurally sound. According to inspection guidelines from the International Association of Certified Home Inspectors (InterNACHI), any signs of rot, water damage, or excessive movement in the subfloor must be addressed before proceeding.[7]
Subfloor Health Check:
- Is the subfloor level? Use a long level to check for high or low spots. Most flooring requires the subfloor to be flat within 3/16 of an inch over a 10-foot span.
- Is it solid? Walk across the entire floor. Does it feel spongy, bouncy, or make excessive noise? These could be signs of underlying structural issues.
- Is it dry? Use a moisture meter to ensure the subfloor is completely dry, especially if there was a previous leak.
Failing to properly prepare the subfloor is the number one cause of flooring failure.
Managing Moisture: Ventilation and Waterproofing Best Practices
A truly waterproof system manages moisture on all fronts. This starts with proper ventilation. An inadequate or non-functioning exhaust fan allows humid, steam-filled air to linger, leading to condensation on all surfaces and promoting mold growth.
According to ASHRAE (American Society of Heating, Refrigerating and Air-Conditioning Engineers), a bathroom fan should be powerful enough to properly ventilate the space.[8] To find the right size, you need to calculate the required CFM (cubic feet per minute). A simple rule of thumb is to have 1 CFM for every square foot of floor space. For example, an 8-foot by 10-foot bathroom (80 sq. ft.) needs a fan rated for at least 80 CFM. Investing in a fan with a humidity sensor that turns on and off automatically is a smart way to ensure your bathroom is always protected.
Long-Term Care and Troubleshooting
Once your beautiful new floor is installed, proper care will keep it looking its best for years. Luckily, both LVP and porcelain tile are incredibly low-maintenance.
Cleaning & Maintenance Cheat Sheet:
For LVP:
- DO: Regularly sweep or vacuum (use a hard floor setting without a beater bar). Mop with a pH-neutral cleaner and a microfiber mop.
- DON’T: Use steam cleaners, wax, or abrasive scrubbing pads, as these can damage the wear layer.
For Porcelain Tile:
- DO: Sweep or vacuum regularly. Mop with a mild detergent or a specialized tile cleaner.
- DON’T: Use harsh, acid-based cleaners or steel wool, which can damage the grout and the tile’s finish over time.
If you encounter a minor issue, like a scratch on an LVP plank, many can be repaired with a simple kit. For more significant problems, like a plank lifting or a tile cracking, it’s best to consult a professional. Attempting a DIY repair without the right tools or knowledge can often make the problem worse.
Your Dream Bathroom Awaits
Achieving the warm, authentic wood look in your bathroom is no longer a risky proposition. By choosing a high-quality waterproof alternative like Luxury Vinyl Plank or Wood-Look Porcelain Tile, you can create a stunning, spa-like retreat without compromising on durability or your peace of mind. The key is to understand the materials, focus on a high-quality installation, and manage moisture at every level. You can confidently move forward, knowing your beautiful new floor is built to last.
Ready to bring the timeless look of wood to your bathroom? Explore our Bravewood collection of 100% waterproof flooring and find the perfect style for your indestructible, dream bathroom today.
This article provides general information and guidance for home improvement projects. For specific issues, especially those involving potential water damage, subfloor integrity, or mold, it is essential to consult with a qualified and licensed professional, such as a flooring installer or water damage restoration specialist.
References & Authoritative Sources
- National Wood Flooring Association (NWFA). (N.D.). Technical Guidelines on Wood Flooring Installation and Moisture-Related Issues. Retrieved from the National Wood Flooring Association.
- Institute of Inspection, Cleaning and Restoration Certification (IICRC). (N.D.). ANSI/IICRC S500 Standard for Professional Water Damage Restoration. Retrieved from the Institute of Inspection, Cleaning and Restoration Certification.
- Environmental Protection Agency (EPA). (N.D.). A Brief Guide to Mold, Moisture, and Your Home. Retrieved from the Environmental Protection Agency.
- FloorScore Certification. (N.D.). SCS Global Services. FloorScore is a certification program for indoor air quality related to hard surface flooring materials.
- Porcelain Enamel Institute (PEI). (N.D.). PEI Rating System for Tile Abrasion Resistance. The PEI rating is the industry standard for measuring the durability of ceramic and porcelain tile.
- Tile Council of North America (TCNA). (N.D.). TCNA Handbook for Ceramic, Glass, and Stone Tile Installation. Retrieved from the Tile Council of North America.
- International Association of Certified Home Inspectors (InterNACHI). (N.D.). Home Inspection Standards of Practice. Retrieved from the International Association of Certified Home Inspectors.
- American Society of Heating, Refrigerating and Air-Conditioning Engineers (ASHRAE). (N.D.). Standard 62.2 – Ventilation and Acceptable Indoor Air Quality in Residential Buildings. Retrieved from the American Society of Heating, Refrigerating and Air-Conditioning Engineers.
