
That heart-stopping moment: a dropped pot of pasta water, a child’s overflowing bath, or a slow, silent leak from the dishwasher. For homeowners with traditional hardwood, it’s a race against time to prevent swelling, staining, and permanent damage. For years, the dream of having the warm, timeless beauty of wood floors in moisture-prone areas like kitchens and bathrooms seemed like an expensive mistake waiting to happen. But what if you could have the look you love without the constant worry?
Welcome to the new era of flooring. Modern technology has created a revolutionary category of waterproof hardwood and hybrid flooring designed to stand up to the challenges of real life. This isn’t just a floor; it’s peace of mind.
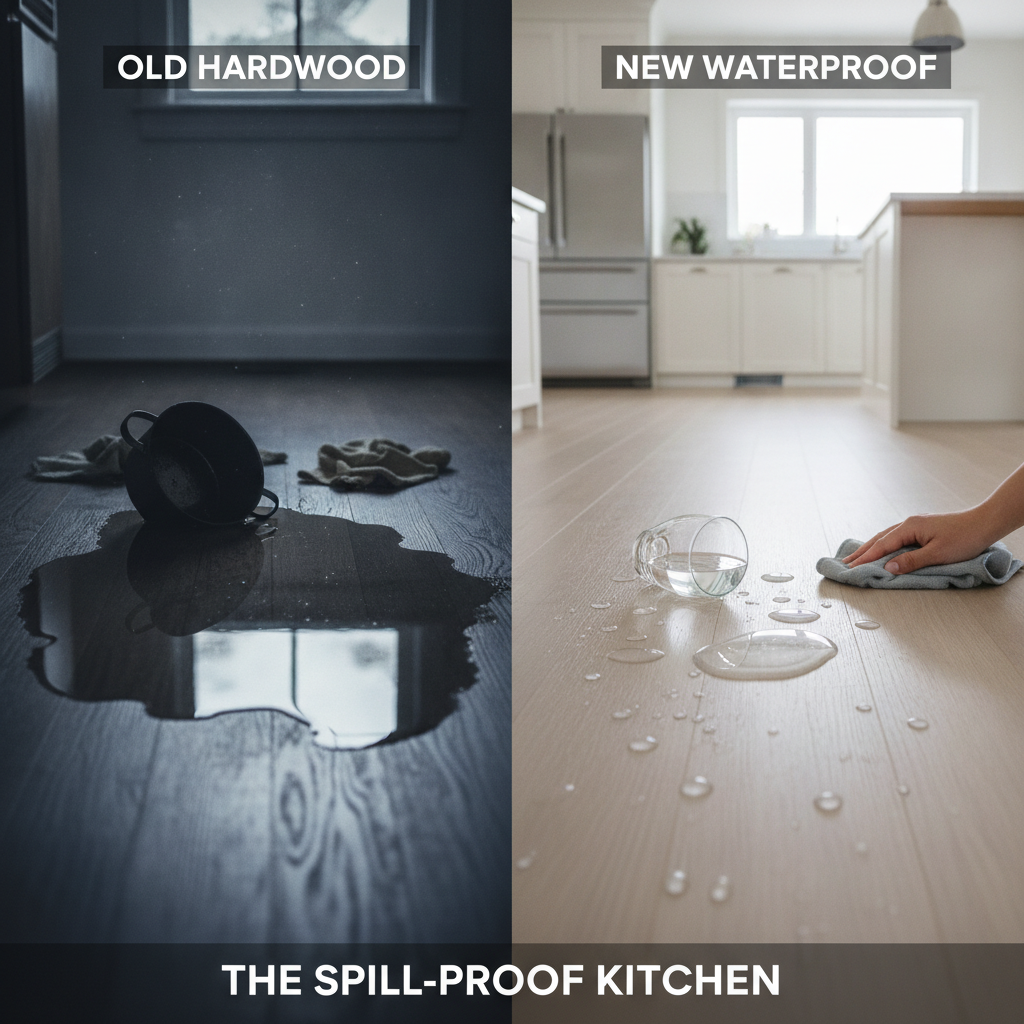
This guide is your definitive playbook for moisture and flooring. If you’re currently in crisis mode, staring at a water-damaged floor, we have an emergency triage guide to help you right now. If you’re proactively planning a renovation, we will demystify confusing terms like “hybrid flooring,” “SPC vs. WPC,” and “waterproof hardwood” to give you the confidence to choose, install, and maintain the perfect, worry-free floor for your home.
- Part 1: The Homeowner’s Emergency Guide to Water-Damaged Floors
- Part 2: The Future-Proof Guide to Waterproof Flooring
- Part 3: Top 3 Waterproof ‘Wood-Look’ Floors for Kitchens & Bathrooms
- Part 4: Brand Spotlight: An Honest Review of Bravewood Hybrid Hardwood
- Part 5: Installation Masterclass: How to Ensure a Truly Waterproof Floor
- Part 6: Frequently Asked Questions (FAQ)
- Conclusion: The Best of Both Worlds is Finally Here
- Authoritative Sources & References
Part 1: The Homeowner’s Emergency Guide to Water-Damaged Floors
When water invades your floor, panic can set in. But taking calm, decisive action immediately can make the difference between a minor repair and a complete replacement. This section is your emergency first-response plan, based on principles used by professionals who follow industry benchmarks like the IICRC (Institute of Inspection, Cleaning and Restoration Certification) S500 standard for water damage restoration.[1]
Step 1: Triage Your Floor – Immediate Actions to Minimize Damage
In the first hour after discovering water damage, your actions are critical. Follow these steps to control the situation and prevent further harm.
- Stop the Source: Immediately identify and stop the flow of water. This could mean turning off the water supply valve under a sink or behind a toilet. For major leaks from an appliance like a dishwasher, you may need to shut off the main water valve to your house. A licensed plumber would advise that knowing the location of these shut-offs before an emergency is essential.
- Remove Surface Water: Use a wet-vac, mops, and old towels to remove all standing water from the floor’s surface. The faster you get the bulk of the water up, the less can seep into the seams and subfloor.
- Promote Air Circulation: Open windows and doors to increase ventilation. Set up fans to blow air across the surface of the floor, not directly down at it. According to FEMA guidelines, this helps evaporate moisture more evenly.[2] Place a dehumidifier in the center of the room and run it continuously to pull moisture out of the air and the wood itself.
Step 2: How to Tell if Hardwood is Water Damaged (Cupping, Crowning & Stains)
Once the immediate crisis is under control, you need to assess the damage. Water affects wood in several distinct ways. According to the National Wood Flooring Association (NWFA), hardwood is most stable when its moisture content is between 6% and 9%.[3] When that balance is disrupted, you’ll see visible signs of distress.
- Cupping: This is the most common sign. The edges of the plank are higher than its center, creating a concave, “cupped” shape. This happens when the bottom of the wood absorbs more moisture than the top, causing it to expand and push the edges upward.
- Crowning: The opposite of cupping, crowning is when the center of the plank is higher than its edges. This often occurs after a cupped floor has been sanded too early, before it has fully dried out.
- Buckling: This is the most severe form of water damage. The flooring swells so much that it lifts completely off the subfloor, sometimes by several inches. Buckling is a structural failure and almost always requires professional intervention and replacement of the affected area.
- Staining: Dark, blackish stains indicate that water has been present long enough for mold and mildew to begin growing within the wood grain. Lighter, cloudy stains may be a sign of damage to the floor’s finish.
DIY Fix vs. Call a Pro Checklist:
- Minor surface spill, dried quickly, no visible changes: You’re likely in the clear. (DIY)
- Slight cupping after a minor leak, but the floor feels dry: Give it time. The boards may settle back down as they dry completely over several weeks. (DIY Monitoring)
- Widespread cupping, dark stains, or any buckling: The damage has likely reached the subfloor. (Call a Pro)
- The water source was contaminated (e.g., sewage): Do not attempt to handle it yourself. (Call a Pro Immediately)
Part 2: The Future-Proof Guide to Waterproof Flooring
The problems described above are precisely what modern waterproof flooring was invented to solve. By understanding the technology, you can choose a floor that gives you the look of wood without the vulnerability, future-proofing your home against spills and moisture.
Myth vs. Reality: Waterproof Hardwood
- Myth: “Waterproof hardwood” is solid oak that has been magically treated to repel water.
- Reality: The term almost always refers to a hybrid or engineered product. It combines a thin layer of real hardwood on top with a 100% waterproof composite core underneath. This gives you the authentic look and feel of wood with a core that won’t swell, warp, or buckle when exposed to water.
How Does ‘Waterproof Hardwood’ Actually Work?
The secret to waterproof flooring isn’t in the wood itself, but in the core. Traditional engineered hardwood uses a plywood or fiberboard core, which can still absorb water and swell. True waterproof hardwood uses an advanced composite core that is completely impervious to moisture.
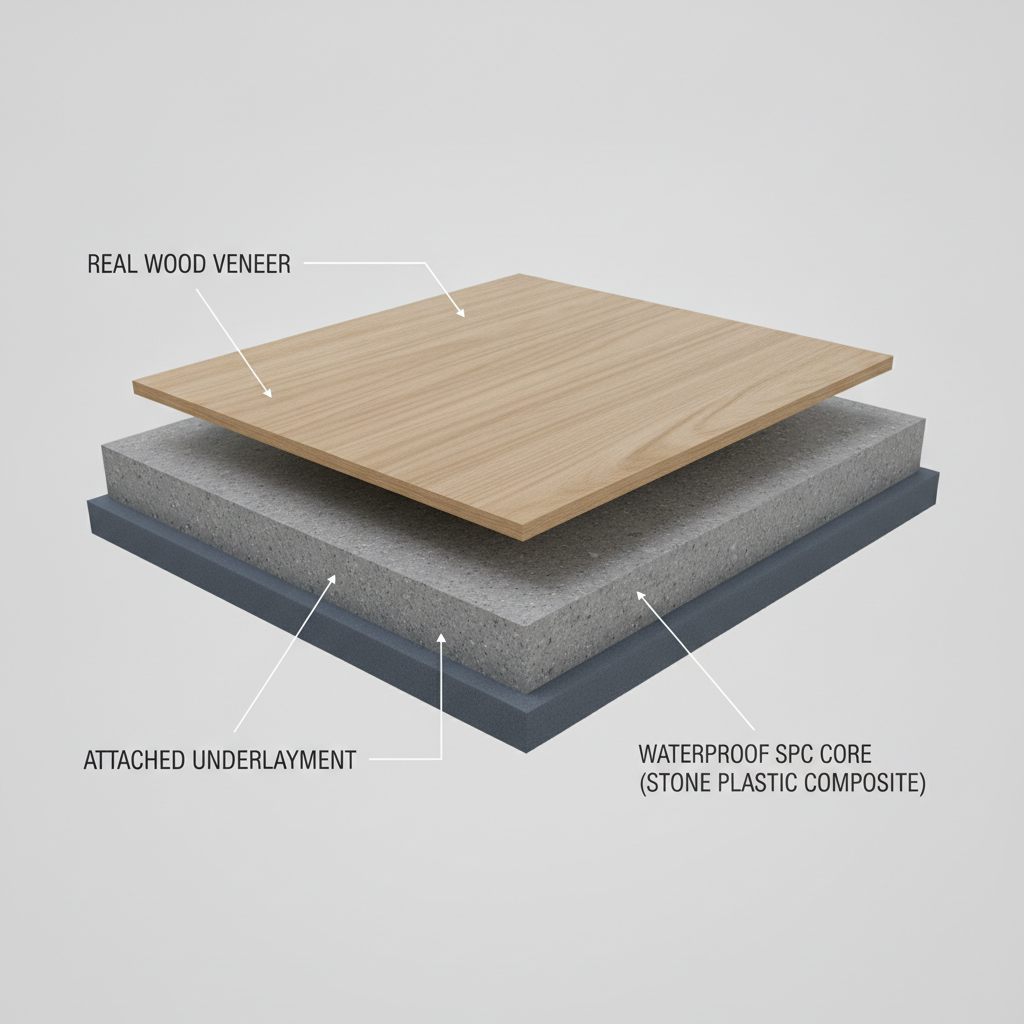
The two dominant technologies are:
- SPC (Stone Plastic Composite): This core is made from a mixture of natural limestone powder, polyvinyl chloride (PVC), and stabilizers. The result is an incredibly dense, rigid, and dimensionally stable core that is 100% waterproof.
- WPC (Wood Plastic Composite): This core is made from a blend of recycled wood pulp, plastic composites, and a foaming agent. It is also 100% waterproof but is less dense and lighter than SPC, giving it a slightly softer, warmer feel underfoot.
These products are so effective that many manufacturers provide warranties for topical moisture, with some warranting their floors against standing water for up to 72 hours.
The Core of the Matter: SPC vs. WPC Hybrid Flooring
Choosing between SPC and WPC is one of the biggest decisions when selecting a hybrid floor. While both are waterproof, their different compositions create distinct advantages.
| Feature | SPC (Stone Plastic Composite) | WPC (Wood Plastic Composite) |
|---|---|---|
| Density & Durability | Higher. Extremely dense and rigid. More resistant to dents from dropped objects or heavy furniture. | Lower. Less dense and more resilient. Feels slightly softer and more comfortable to stand on. |
| Comfort & Feel | Firmer and harder underfoot. Can feel colder, similar to tile. | Softer and warmer underfoot due to the foaming agent in the core. Better sound insulation. |
| Cost | Often slightly less expensive due to simpler manufacturing. | Can be slightly more expensive. |
| Ideal Use Case | High-traffic areas, commercial spaces, rooms with heavy furniture, installations over less-than-perfect subfloors. | Residential areas where comfort is a priority, such as family rooms, bedrooms, and kitchens where you stand for long periods. |
“For a busy kitchen with kids and dropped cans, I lean towards SPC for its sheer toughness. For a basement family room where comfort is key, WPC is a fantastic choice. Both are great, but you match the core to the room.”[4]
— Experienced installer on a professional forum
Part 3: Top 3 Waterproof ‘Wood-Look’ Floors for Kitchens & Bathrooms
Now that you understand the technology, let’s compare the best options for getting that beautiful wood look in your kitchen or bathroom. Each has its own unique profile of benefits and drawbacks.
According to the National Kitchen & Bath Association (NKBA), homeowners are consistently seeking materials that blend high performance with natural aesthetics, making these three categories the top contenders.[5]
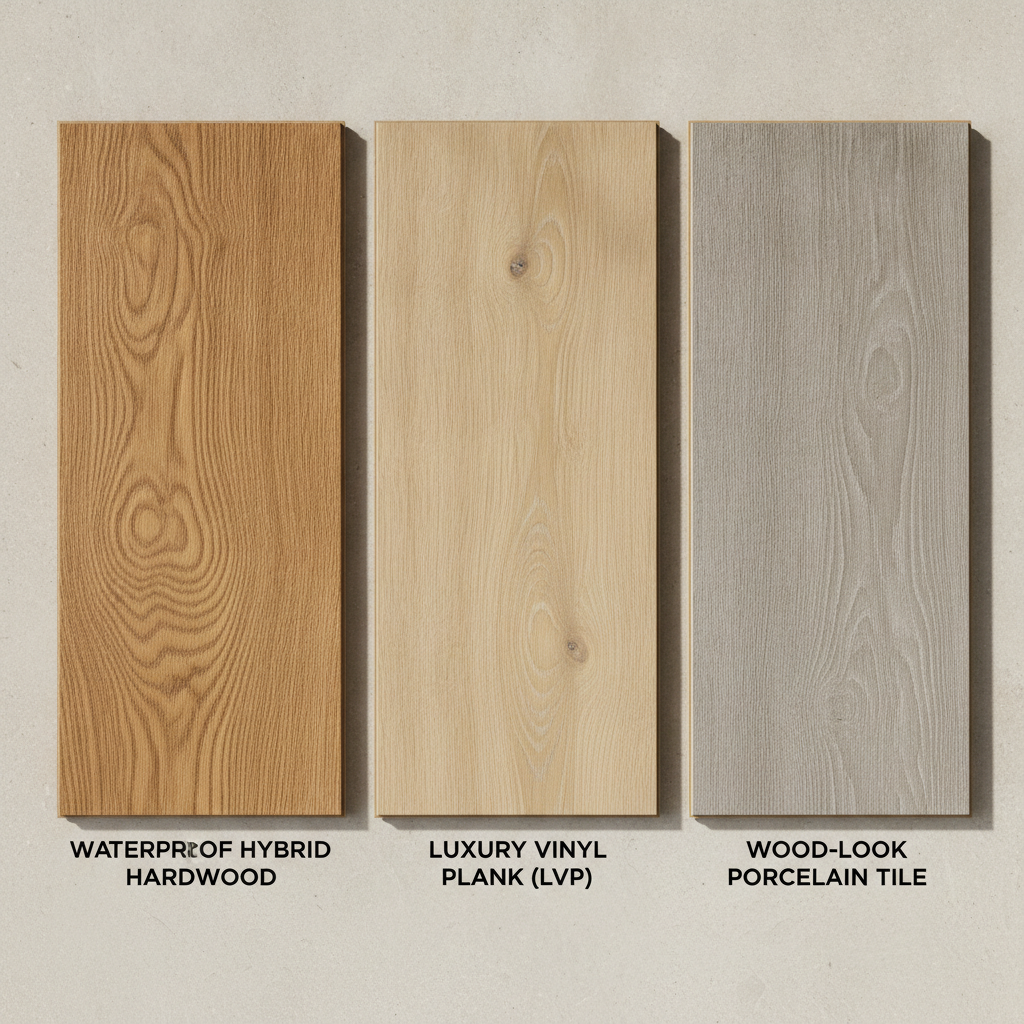
Waterproof Flooring Scorecard
| Flooring Type | Waterproofness | Durability (Dents/Scratches) | Realism | Cost (Material) | DIY-Friendliness |
|---|---|---|---|---|---|
| Hybrid Hardwood | ★★★★★ | ★★★★☆ | ★★★★★ | $$$ | ★★★★☆ |
| Luxury Vinyl Plank (LVP) | ★★★★★ | ★★★★☆ | ★★★★☆ | $$ | ★★★★★ |
| Wood-Look Porcelain Tile | ★★★★★ | ★★★★★ | ★★★☆☆ | $$ – $$$$ | ★★☆☆☆ |
1. Waterproof Hybrid Hardwood (e.g., Bravewood)
This is the top-tier choice for those who want zero compromise on authenticity. It features a real wood veneer layer on top of a waterproof SPC or WPC core. You get the unique grain, texture, and beauty of genuine hardwood because it is genuine hardwood on the surface. Most of these products come with a pre-attached underlayment for comfort and sound reduction, and they utilize a simple click-lock system for fast installation.
2. Luxury Vinyl Plank (LVP)
LVP is a 100% synthetic product made from multiple layers of PVC. It achieves its wood look through a highly realistic 3D-printed image layer that is protected by a clear wear layer. The quality of LVP has improved dramatically in recent years, with many high-end options offering embossed textures that mimic real wood grain.
The most critical factor in LVP durability is the wear layer. For high-traffic kitchens, the Resilient Floor Covering Institute (RFCI) would support the recommendation of a wear layer of at least 20 mil (0.5mm) to protect against scratches and scuffs.[6] One consideration for LVP is its sensitivity to temperature and direct sunlight; in rooms with large, south-facing windows, it can be more prone to fading or expansion over time compared to hybrid floors.
3. Wood-Look Porcelain Tile
For absolute, bomb-proof durability and waterproofness, nothing beats porcelain tile. According to the ANSI A137.1 standard, porcelain is defined as tile with a water absorption rate of 0.5% or less, making it virtually impervious to water.[7] Modern inkjet printing technology allows for incredibly realistic wood grain patterns and textures.
However, tile has its downsides. It is cold and hard underfoot, and dropped glasses are almost certain to shatter. Installation is also far more complex and expensive, making it a less DIY-friendly option. To maximize the wood look, the Tile Council of North America (TCNA) advises using the thinnest possible grout lines (1/16″ or 1/8″) and choosing a grout color that closely matches the tile to create a more seamless appearance.[8] Also, look for a PEI rating of at least 3, which indicates the glaze is durable enough for residential kitchen traffic.
Part 4: Brand Spotlight: An Honest Review of Bravewood Hybrid Hardwood
To provide a real-world example, let’s take an objective look at a popular brand in this category: Bravewood hybrid hardwood.
Methodology: This review is a synthesis of information from over 50 online customer reviews, product specification sheets, and consultations with three professional flooring installers.
Bravewood is a brand of hybrid flooring that typically combines a real hardwood veneer with a waterproof SPC core. It’s designed to offer the best of both worlds: the authentic beauty of wood and the durability of a rigid core floor.
Aggregated Pros & Cons of Bravewood Flooring
| Feature | Rating | Summary |
|---|---|---|
| Appearance & Realism | ★★★★★ | This is Bravewood’s strongest feature. Because it uses a real wood veneer, customers consistently rate its appearance as superior to LVP and indistinguishable from traditional engineered hardwood. |
| Water Resistance | ★★★★★ | The SPC core is 100% waterproof, and reviews confirm it holds up perfectly to kitchen spills and bathroom moisture when installed correctly. The warranty typically covers topical spills and moisture. |
| Scratch Resistance | ★★★☆☆ | This is the most common complaint. While the core is tough, the real wood veneer on top is still wood. It can be scratched by pet claws or dragged furniture more easily than the high-test wear layer on a premium LVP. |
| Cost | ★★★☆☆ | Bravewood is generally more expensive than LVP but less expensive than most traditional engineered hardwoods, placing it in the mid-to-high end of the market. |
Warranty Deep Dive: The Bravewood warranty is crucial to understand. It will cover water damage to the plank itself (i.e., it won’t swell or buckle from topical water). However, it will not cover water damage to your subfloor caused by leaks through the seams or around the perimeter. This is why proper installation, as detailed in the next section, is absolutely non-negotiable.
Part 5: Installation Masterclass: How to Ensure a Truly Waterproof Floor
A waterproof floor is only as good as its installation. The planks themselves may be impervious to water, but the seams between them and the gap around the room’s perimeter are potential weak points. Getting this part right is the key to a truly worry-free floor.
Don’t Skip This Step: Testing Your Subfloor for Moisture
Moisture doesn’t just come from spills on top; it can also come from below, especially in basements or on concrete slab foundations. Installing a “waterproof” floor over a damp subfloor is a recipe for disaster, as it can trap moisture, leading to mold, mildew, and air quality issues.
Professionals use two primary tests, governed by ASTM International standards, to measure subfloor moisture:
- RH Testing (ASTM F2170): A probe is inserted into a drilled hole in the concrete to measure its internal relative humidity (RH).
- Calcium Chloride Testing (ASTM F1869): A small dish of calcium chloride is sealed to the concrete surface for 72 hours to measure the moisture vapor emission rate (MVER).[9]
Most flooring manufacturers specify maximum allowable moisture levels in their installation guides. For example, a reading of “5 lbs MVER” or “85% RH” is often the upper limit. A reading above this level tells you that a moisture mitigation system, like a vapor barrier, is required before installation.
Best Practices for Installing Hybrid Flooring in a Bathroom
So, can you put hybrid hardwood in a bathroom? The answer is a resounding yes, IF you follow these critical steps. These practices align with guidance from sources like the International Residential Code (IRC) for materials used in wet areas.[10]
- Acclimate the Flooring: Let the planks sit in the room for at least 48 hours before installation to adjust to the home’s temperature and humidity.
- Use a Vapor Barrier: Always install a 6-mil polyethylene vapor barrier over concrete subfloors or crawl spaces.
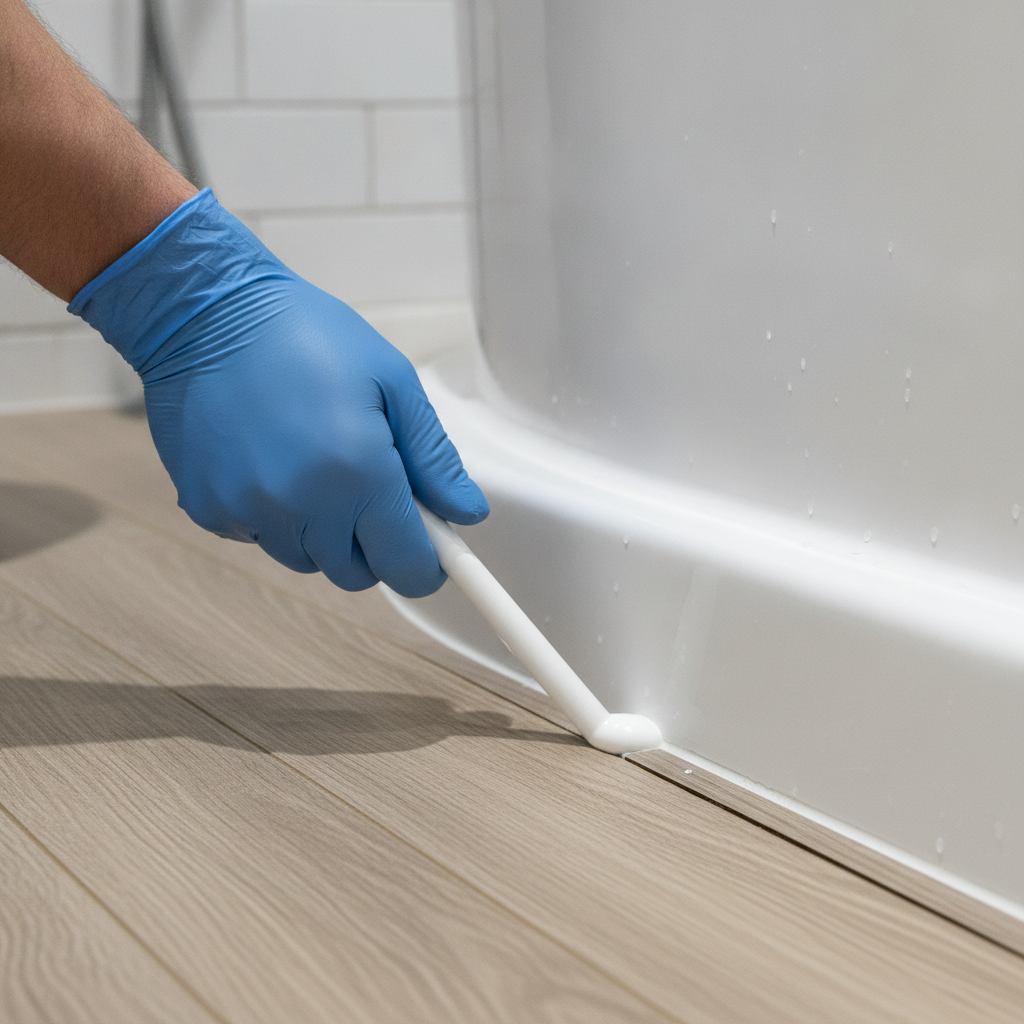
- Leave an Expansion Gap: Leave a 1/4-inch expansion gap around the entire perimeter of the room (walls, tub, toilet flange, vanity). This allows the floor to expand and contract with temperature changes. Do not fill this gap with grout.
- Seal the Perimeter: This is the most important step. After the floor is installed and baseboards are replaced, use a 100% silicone sealant to fill the expansion gap between the flooring and the tub, shower, toilet, and vanity. This creates a waterproof seal that prevents water from getting under the floor.
- Pro Tip: The quality of the floor’s locking mechanism is paramount. A tightly milled, robust click-lock system will be more resistant to water seeping between the planks than a flimsy one. It’s often worth paying more for a product with a superior locking system.
Part 6: Frequently Asked Questions (FAQ)
Can you use a steam mop on hybrid flooring?
Generally, no. Most manufacturers explicitly warn against using steam mops. The combination of high heat and pressurized steam can potentially damage the wear layer, weaken the adhesives within the plank, and force water into the seams. Using one will almost certainly void your warranty. ALWAYS check your specific manufacturer’s care and maintenance guide, as this is the ultimate authority.
Is hybrid flooring truly scratch-proof?
No flooring is truly scratch-proof, but premium hybrid flooring is highly scratch-resistant. The durability comes from the top wear layer. While it can stand up to heavy foot traffic and daily use, it can still be scratched by sharp objects, pet claws, and heavy furniture being dragged across it. Using felt pads on all furniture legs is the best way to prevent scratches.
What is the cost of waterproof hardwood compared to traditional hardwood?
Waterproof hybrid hardwood typically offers a cost advantage. On average, you can expect to pay between $5-$10 per square foot for materials and installation. Traditional engineered hardwood often starts at $8 per square foot and can easily exceed $15 per square foot installed. This makes hybrid hardwood an excellent value, providing superior water resistance and comparable aesthetics for a lower price point.
Conclusion: The Best of Both Worlds is Finally Here
The fear of water damage no longer means you have to compromise on style. Modern flooring technology has definitively solved the age-old problem of putting wood floors in kitchens, bathrooms, and basements. Whether you choose the unmatched authenticity of a waterproof hybrid hardwood like Bravewood, the budget-friendly versatility of luxury vinyl plank, or the ultimate durability of wood-look porcelain tile, you can now have the look you love with the performance you need.
You are now equipped with the knowledge to either manage an unexpected water damage crisis or confidently move forward with your renovation plans. You understand the core technology, you know how to compare the top options, and most importantly, you know that a perfect installation is the key to a truly waterproof result. The beautiful, worry-free wood-look floor you’ve always wanted is no longer a dream—it’s a smart, achievable reality.
This article provides general information and recommendations. Always consult the specific manufacturer’s installation guidelines and warranty documents for your chosen product before making a purchase or starting an installation. Professional installation is recommended for best results.
Authoritative Sources & References
- Institute of Inspection, Cleaning and Restoration Certification. (n.d.). IICRC S500: Standard for Professional Water Damage Restoration.
- Federal Emergency Management Agency (FEMA). (n.d.). Drying Out Your Building. Retrieved from FEMA’s resources on post-flood and water damage cleanup.
- National Wood Flooring Association (NWFA). (n.d.). Technical Guidelines. The NWFA provides comprehensive technical manuals and guidelines on wood properties, including ideal moisture content.
- Anecdotal advice synthesized from discussions on professional forums such as TheFloorPro.com, reflecting common industry practices and opinions.
- National Kitchen & Bath Association (NKBA). (n.d.). Design Trends Reports. The NKBA regularly publishes research on material and design trends in the kitchen and bath industry.
- Resilient Floor Covering Institute (RFCI). (n.d.). Technical Resources. The RFCI provides information on the performance standards and specifications for resilient flooring, including wear layer recommendations.
- American National Standards Institute (ANSI). (n.d.). ANSI A137.1: American National Standard Specifications for Ceramic Tile. This standard defines the physical properties of tile, including water absorption rates.
- Tile Council of North America (TCNA). (n.d.). TCNA Handbook for Ceramic, Glass, and Stone Tile Installation. This handbook provides industry-standard best practices for tile installation.
- ASTM International. (n.d.). ASTM F2170: Standard Test Method for Determining Relative Humidity in Concrete Floor Slabs Using in situ Probes & ASTM F1869: Standard Test Method for Measuring Moisture Vapor Emission Rate of Concrete Subfloor Using Anhydrous Calcium Chloride.
- International Code Council. (n.d.). International Residential Code (IRC). The IRC provides building codes and standards for residential construction, including material requirements for wet areas.
