
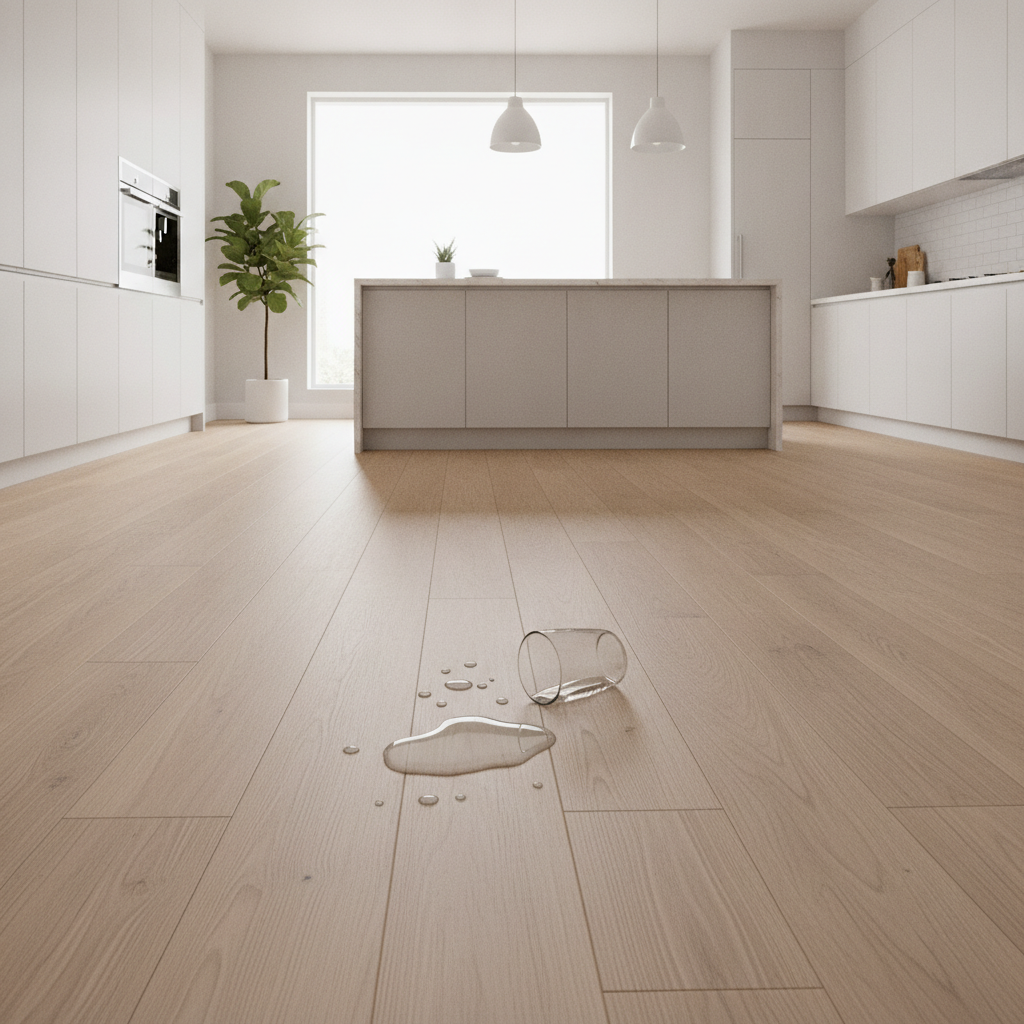
Dreaming of a stunning, durable, and waterproof hardwood floor that you can proudly say you installed yourself? You’re not alone. Waterproof hybrid hardwood offers the timeless beauty of real wood with the resilience to handle spills, pets, and busy family life. But for many homeowners, the excitement of a new floor is quickly overshadowed by a single, nagging fear: making a costly, irreversible mistake.
This isn’t just another “how-to” article. This is your complete project success system. We’ve designed this fail-proof blueprint to give you the confidence and expert knowledge needed to achieve a professional-grade result. We’ll guide you through every stage, from understanding the material and mastering subfloor preparation to the step-by-step installation process and, most importantly, how to prevent the common pitfalls that plague most DIY projects. Let’s build a floor you’ll love for years to come.
- First Things First: What Exactly is Waterproof Hybrid Hardwood?
- Phase 1: Your Project Blueprint for Success (Preparation & Planning)
- Phase 2: The Step-by-Step Hybrid Hardwood Installation Process
- Phase 3: Avoiding & Fixing Common DIY Installation Mistakes
- Advanced Topics: Basements, Stairs, and Long-Term Care
- Frequently Asked Questions (FAQ)
- You’re Ready to Transform Your Home
- References & Authoritative Sources
First Things First: What Exactly is Waterproof Hybrid Hardwood?
Before you open a single box, it’s crucial to understand the innovative material you’re working with. Waterproof hybrid hardwood is a marvel of modern flooring technology, engineered to give you the best of both worlds: the authentic look and feel of wood and the robust durability of a composite core. This section will demystify the product, set realistic expectations, and help you confirm it’s the right choice for your home.
Ask the Pro: “Is it real wood?”
We asked John Miller, a certified flooring installer with over 20 years of experience, to clarify. “Absolutely, the part you see and touch is real wood,” John explains. “It’s a thin layer, or veneer, of genuine hardwood like oak or hickory. The magic is what’s underneath. Unlike solid hardwood, which is wood all the way through, a hybrid’s core is a man-made composite that’s completely waterproof. This construction prevents the planks from warping or swelling like traditional wood when exposed to moisture.”
The Anatomy of a Hybrid Plank: How It’s Made
The secret to hybrid hardwood’s performance lies in its layered construction. While designs vary slightly by manufacturer, most planks consist of several key layers working in harmony.
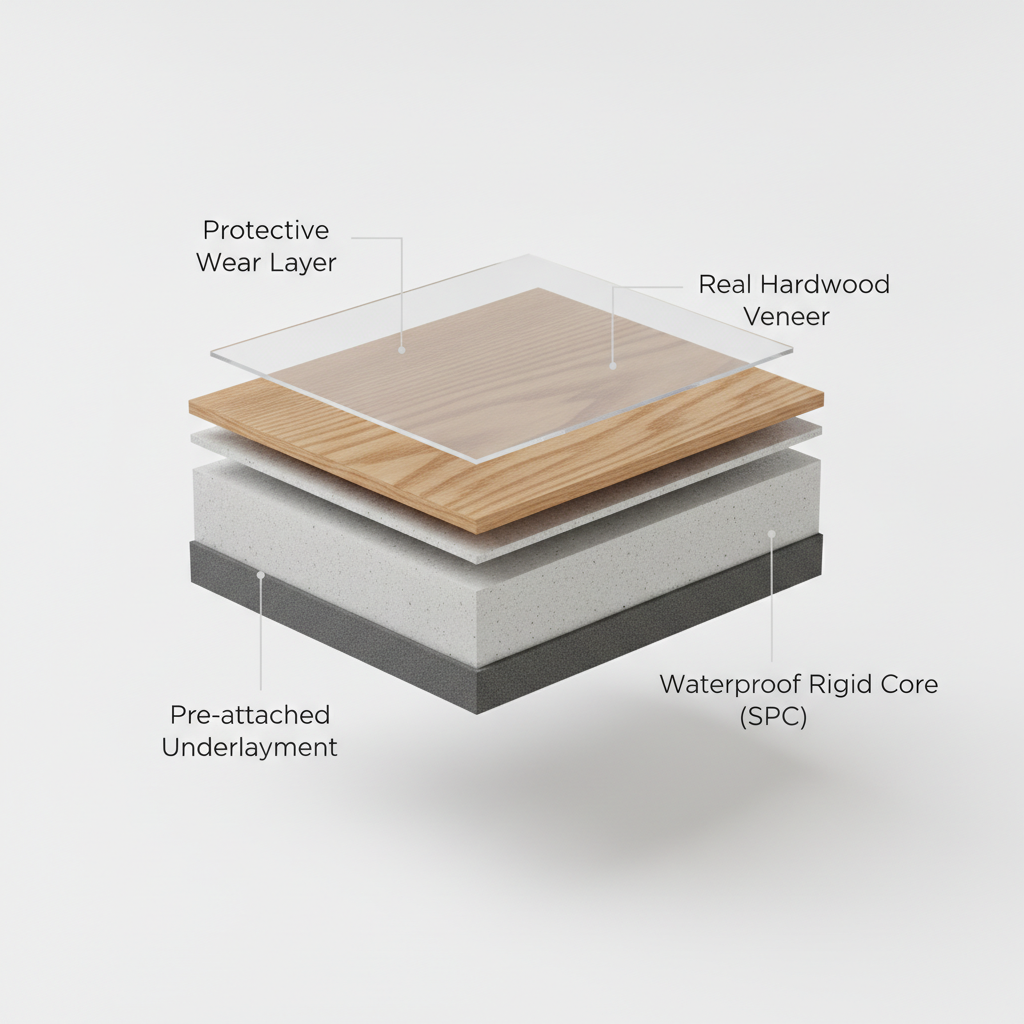
- Protective Wear Layer: A transparent, high-traffic top coat, often infused with aluminum oxide, that resists scratches, stains, and fading.
- Real Hardwood Veneer: This is the star of the show—a slice of authentic hardwood that gives the plank its unique grain, color, and character.
- Waterproof Rigid Core: The workhorse of the plank. This core is typically made from Stone Polymer Composite (SPC) or Wood Polymer Composite (WPC). This dense, rigid material is 100% waterproof and provides exceptional stability, preventing dents and structural damage from topical spills.
- Pre-attached Underlayment: Most hybrid hardwood products come with a built-in underlayment pad, usually made of cork or foam. This layer adds cushioning, absorbs sound, and can provide a minor thermal barrier.
It’s important to understand the limitations of the “waterproof” claim. The plank itself will not be damaged by topical water, meaning spills that are cleaned up in a reasonable time won’t cause the plank to swell or buckle. However, this does not mean your subfloor is protected. A major flood or persistent moisture wicking up from a concrete slab can still cause significant problems like mold and mildew beneath the flooring.
Pros and Cons: Is Hybrid Hardwood Right for Your Home?
Making an informed decision is key to any successful home improvement project. Here’s a balanced look at where waterproof hybrid hardwood shines and where it has limitations.
Pros:
- 100% Waterproof: Ideal for kitchens, bathrooms, laundry rooms, and basements where traditional hardwood is a risky choice.
- Exceptional Durability: The rigid core and tough wear layer make it highly resistant to dents, scratches, and daily wear and tear.
- Authentic Wood Beauty: You get the genuine look and feel of real hardwood because the top layer is real hardwood.
- DIY-Friendly Installation: Most products feature a click-lock system that makes for a straightforward, glue-free floating floor installation.
- Easy Maintenance: Simple sweeping and occasional mopping with a manufacturer-approved cleaner is all that’s required.
Cons:
- Cannot Be Refinished: Unlike solid hardwood that can be sanded and refinished multiple times, the veneer on hybrid flooring is too thin. A deep gouge that penetrates the wear layer cannot be sanded out.
- Higher Cost: It is often more expensive upfront than laminate or luxury vinyl plank (LVP) flooring.
- Veneer Thickness Varies: The thickness of the real wood layer can differ between products, which can affect its long-term appearance and durability.
To help you visualize its place in the market, here’s a quick comparison:
| Feature | Hybrid Hardwood | Solid Hardwood | Laminate Flooring | Luxury Vinyl Plank (LVP) |
|---|---|---|---|---|
| Water Resistance | Excellent (Waterproof) | Poor | Fair to Good | Excellent (Waterproof) |
| Durability (Dents) | Excellent | Fair to Good | Good | Good |
| Authenticity | Excellent (Real Wood) | Excellent (Real Wood) | Fair (Image Layer) | Good (Image Layer) |
| DIY Installation | Excellent (Click-Lock) | Poor (Nail-Down) | Excellent (Click-Lock) | Excellent (Click-Lock) |
| Refinishable | No | Yes (Multiple times) | No | No |
| Cost | High | Highest | Low | Medium |
Phase 1: Your Project Blueprint for Success (Preparation & Planning)
A professional-looking floor is born long before the first plank is laid. This preparation phase is the most critical part of the entire project. Rushing or skipping these steps is the number one cause of DIY flooring failures. By following this blueprint, you’ll build the solid foundation necessary for a flawless installation.
The Essential Toolkit: Good, Better, Best Options for Every Budget
Having the right tools makes the job easier, safer, and more precise. You don’t necessarily need professional-grade equipment, but some items are non-negotiable.
Good (Essential Basics):
- Tape Measure & Pencil
- Utility Knife
- Speed Square or Combination Square
- Jigsaw with a fine-tooth blade (for complex cuts)
- Flooring Installation Kit (includes a Tapping Block, Pull Bar, and Spacers)
- Rubber Mallet
- Safety Glasses & Gloves
Better (For a Faster, Cleaner Job):
- Miter Saw (for fast, perfectly square end cuts)
- Oscillating Multi-Tool (for easily undercutting doorjambs)
- Contour Gauge (for tracing irregular shapes)
- Knee Pads (your knees will thank you)
Best (Professional Efficiency):
- Flooring Saw or Guillotine-Style Cutter (for fast, dust-free cuts inside the room)
- Laser Level (for checking floor flatness over large areas)
A quality tapping block is essential. Never hit the edge of the plank directly with a hammer or mallet, as you will damage the delicate locking mechanism. Always use the tapping block as a buffer.
Mastering the Subfloor: How to Diagnose and Fix Unevenness
Your new hybrid hardwood floor is a floating system, meaning it will follow every contour of the subfloor beneath it. An uneven subfloor is the hidden enemy of a successful installation, leading to bouncing, clicking sounds, and eventual failure of the plank joints.
Ask the Pro: “Don’t skip this step!”
“I can’t stress this enough,” warns flooring pro John Miller. “90% of floor failures I’m called to fix are due to subfloor issues. A high spot will create a pivot point, and a low spot will allow the planks to flex and eventually break their locks. It’s the one thing you can’t afford to rush. A perfect subfloor means a perfect floor for life.”
1. Check for Flatness:
The industry standard, as outlined in the National Wood Flooring Association (NWFA) Installation Guidelines, is that the subfloor must be flat to within 3/16 of an inch over a 10-foot span [1]. The easiest way to check this is with a long, straight edge (like an 8-foot level or a straight 2×4). Lay the straightedge on the floor in various spots and directions. If you can slide a 3/16″ drill bit or a stack of three dimes under it at any point, that’s a low spot. If the straightedge rocks, you’ve found a high spot.
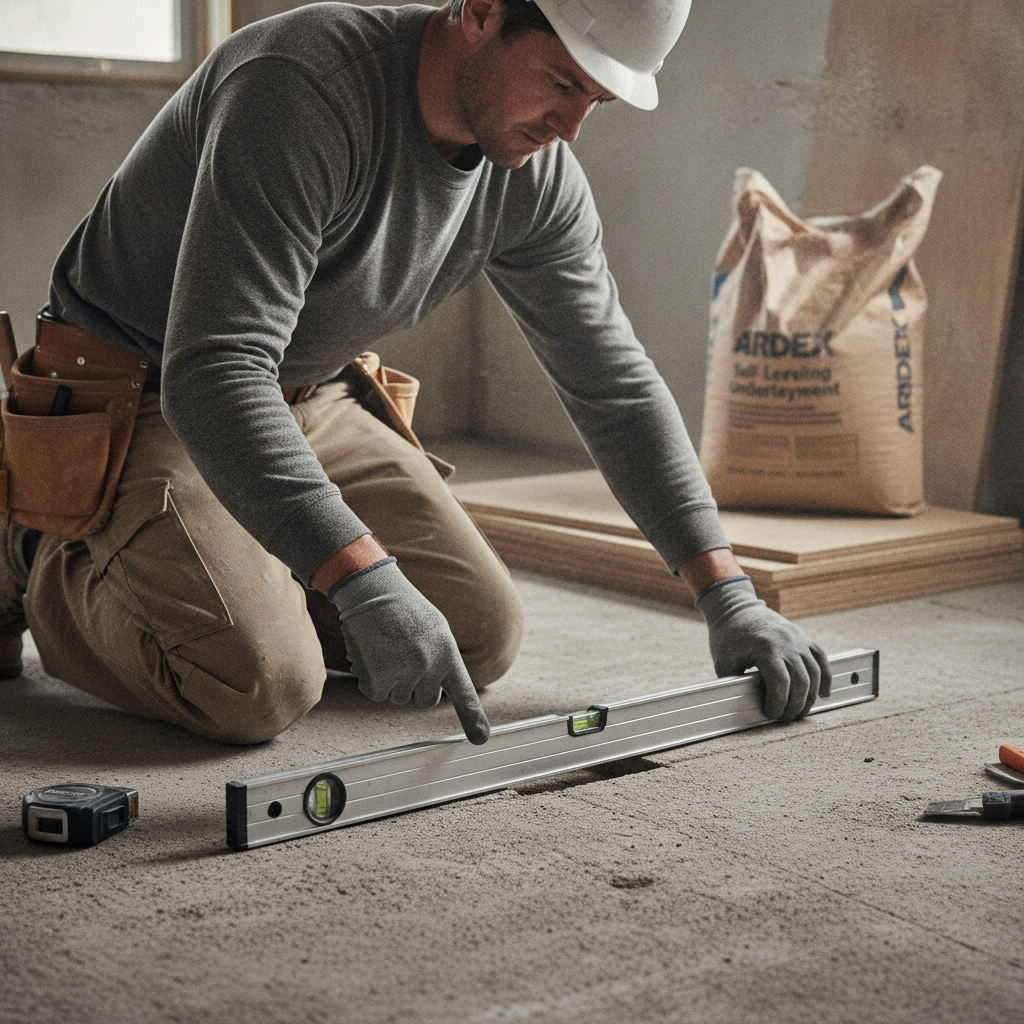
2. Fix the Problems:
- For Concrete Subfloors: High spots can be ground down with a concrete grinder (available for rent). Low spots are best filled with a self-leveling compound. This product is mixed with water to a pancake-batter consistency, poured over the low area, and it naturally seeks its own level, creating a perfectly flat, smooth patch. Always follow the manufacturer’s instructions for priming and mixing [3].
- For Wood Subfloors: High spots can be sanded or planed down. Low spots can be filled with a cement-based patching compound, or in more severe cases, a piece of plywood can be shimmed and screwed down.
Acclimation and Final Checks: The Last Step Before You Start
Hybrid hardwood, like any flooring containing wood products, needs to adjust to the temperature and humidity of its new environment. This process, called acclimation, is critical for preventing future expansion and contraction issues like buckling or gapping.
Most manufacturers, such as Shaw Floors, recommend letting the unopened boxes of flooring lie flat in the installation room for a minimum of 48 hours [2]. The room should be kept at the normal living temperature you plan to maintain year-round. This allows the planks to stabilize before they are locked together.
Once acclimation is complete, perform one final check:
- Open a few boxes and inspect the planks for any visible defects.
- Thoroughly sweep and vacuum the entire subfloor. Any debris left behind can interfere with the locking mechanism or create a pressure point under the new floor.
Phase 2: The Step-by-Step Hybrid Hardwood Installation Process
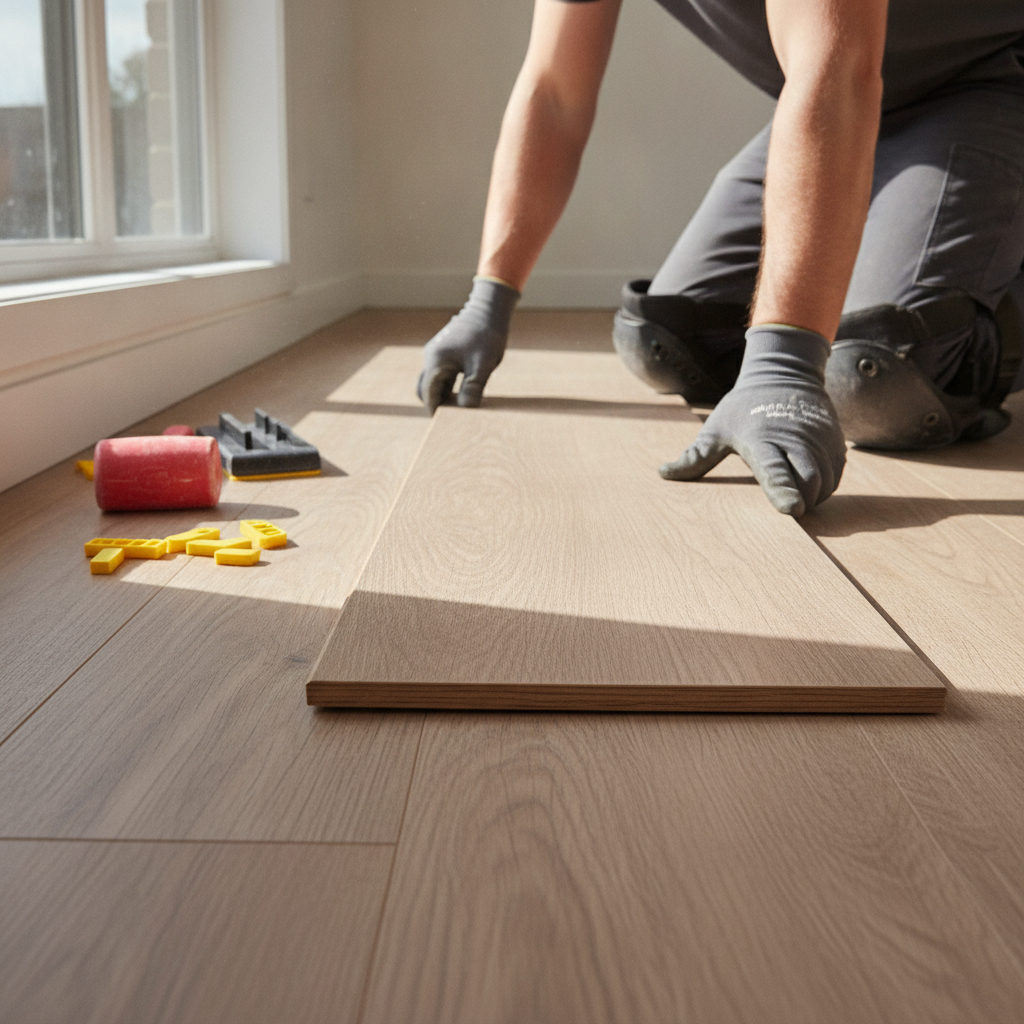
With your planning and preparation complete, you’re ready for the most rewarding part of the project. Work methodically, measure twice, and cut once. This process is designed for a floating, click-lock installation, which is the most common type for DIYers.
Step 1: Preparing the Room & Undercutting Doorjambs
First, carefully remove any baseboards or shoe molding from the perimeter of the room. Use a utility knife to score the caulk line first, then gently pry them away with a pry bar. Number the back of each piece so you can easily reinstall them later.
For a truly professional finish, you need to undercut your doorjambs. This allows the flooring to slide underneath the jamb instead of leaving an ugly gap that needs to be filled with caulk. To do this, lay a scrap piece of flooring (with its underlayment) on the subfloor next to the jamb. Rest a handsaw flat on top of the plank and carefully cut through the jamb.
Step 2: Planning Your Layout & Installing the First Row
A little planning prevents a lot of headaches. Measure the width of the room and divide it by the width of one plank. If your calculation shows that the last row will be less than one-third of a plank’s width, you should cut your first row narrower. This ensures you don’t end up with a tiny, difficult-to-install sliver against the final wall.
The first row is the foundation for the entire floor. It must be perfectly straight.
- According to NWFA guidelines, you should start on the longest, most visible exterior wall [1].
- Place 1/4″ to 3/8″ spacers against the wall. This creates the critical expansion gap.
- Lay your first plank in a corner with the tongue side facing the wall (for some products, you may need to trim the tongue off the first row).
- Connect the next plank by inserting its tongue into the groove of the first plank at a slight angle and lowering it into place. Continue across the room.
- Cut the last plank of the row to fit, remembering to leave an expansion gap at the far wall.
Step 3: Installing Subsequent Rows & Staggering Seams
The piece you cut off from the end of the first row can often be used to start the second row, provided it is at least 6-8 inches long. This creates the necessary stagger between the end joints of the planks. Staggering seams is crucial for both the floor’s structural integrity and its aesthetic appeal. Never align the seams from one row to the next.
- Start your second row with a plank that is at least 6-8 inches shorter or longer than the first plank in the previous row.
- Insert the long tongue edge of the new plank into the groove of the previous row at a slight angle.
- Slide the plank until its short end is close to the end of the preceding plank in the same row.
- Gently lower the plank while pushing it into place. You should feel it “click.”
- Use your rubber mallet and a tapping block on the long edge of the plank to ensure a tight, gap-free fit. Use the pull bar for the last plank in a row.
Step 4: Making Cuts for Obstacles and Walls
You will inevitably encounter obstacles like vents, pipes, or corners.
- End Cuts: For simple cuts at the end of a row, a miter saw provides the fastest, cleanest result. A jigsaw or handsaw also works.
- Rip Cuts: For cuts that run the length of a plank (like for the first or last row), a table saw is best, but a jigsaw with a straightedge guide can also be used.
- Complex Cuts: For L-shaped cuts around corners or circular cuts for pipes, use a jigsaw. A contour gauge is an invaluable tool for perfectly tracing these irregular shapes onto your plank before cutting.
Pro Tip: To minimize chipping of the real wood veneer when using a jigsaw or circular saw, place painter’s tape along your cut line before you begin.
Step 5: The Final Row and Finishing Touches
The last row is often the trickiest. You will likely need to rip-cut the planks lengthwise to fit.
- Lay a full plank directly on top of the last installed row.
- Place another full plank on top of that one, but with its edge pushed up against the wall (remember your spacers for the expansion gap).
- Trace a line on the middle plank along the edge of the top plank. This line is your cut line.
Use your pull bar and mallet to carefully tap this final row into place.
Once the floor is complete, remove all the spacers. Reinstall your baseboards and shoe molding to cover the expansion gap. Install transition strips in doorways that lead to other flooring types. For full bathrooms or other wet areas, apply a bead of 100% silicone caulk in the expansion gap before installing the baseboards to create a watertight perimeter seal.
Phase 3: Avoiding & Fixing Common DIY Installation Mistakes
From my 20 years of experience, I’ve seen the same handful of mistakes ruin countless DIY flooring projects. Understanding these pitfalls is the best way to avoid them. Here’s what to watch out for.
Mistake #1: Forgetting the Expansion Gap
This is the cardinal sin of floating floor installation. The floor needs room to expand and contract with changes in temperature and humidity. Without this gap around the entire perimeter, the floor will press against the walls and buckle, creating unsightly and dangerous peaks.
- Why it Happens: Homeowners are eager to get a tight fit against the wall or simply forget to use the spacers.
- How to Prevent It: Use the manufacturer-recommended spacers (typically 1/4″ to 3/8″) on all sides of the room and against all vertical obstructions, including cabinets and pipes. The NWFA Installation Guidelines state this is a mandatory step for all floating floor systems [1]. The baseboard will cover this gap completely.
Mistake #2: Ignoring Subfloor Prep
As we covered earlier, this is the silent killer of new floors. A beautiful, expensive floor laid over a lumpy, dirty subfloor will fail.
- Why it Happens: It’s a tedious, unglamorous part of the job that people are tempted to rush through.
- How to Prevent It: Dedicate the necessary time to cleaning, scraping, and leveling your subfloor until it meets the 3/16″ in 10 feet flatness requirement. It’s the best investment you can make in the longevity of your floor.
Mid-Project Troubleshooting Guide
Even with the best planning, things can go wrong. Here’s how to solve common on-the-job problems.
- “I cut a board too short.”
Don’t panic. Save that piece for a closet or use it to start a different row where a shorter piece is needed. Never install a piece that leaves a gap at the end. - “I can’t get this plank to lock.”
First, check the groove for any debris. A tiny piece of sawdust can prevent a secure lock. Second, check your subfloor—you may have a high spot right at the joint. Finally, check that the previous row is perfectly straight. - “I damaged a plank in the middle of the floor.”
Replacing a plank in the middle of a click-lock floor is an advanced repair. For a small scratch, a wood-tone furniture marker or wax repair kit can work wonders. For a severe gouge, it’s often best to call a professional who has the tools to cut out and replace a single plank without disassembling the entire floor.
Advanced Topics: Basements, Stairs, and Long-Term Care
Your beautiful new floor is in, but the job isn’t quite done. Understanding how to handle special applications and proper long-term care will ensure your investment lasts a lifetime.
Installing in Basements: Special Considerations
Waterproof hybrid hardwood is an excellent choice for basements, but below-grade concrete slabs present a unique challenge: moisture vapor. Even if the slab feels dry, moisture can constantly wick up from the ground.
- Moisture Testing: Before installation, you must test your concrete slab for moisture. A simple method is to tape a 2’x2′ square of plastic sheeting to the floor on all four sides. After 48-72 hours, if you see condensation under the plastic, you have a moisture issue that needs to be addressed.
- Vapor Barrier: Per International Residential Code (IRC) best practices for below-grade installations, a 6-mil polyethylene vapor barrier should always be laid over the concrete subfloor before installing the flooring [4]. Overlap the seams by 8 inches and tape them with a waterproof tape. This will prevent moisture from becoming trapped under your new floor.
Post-Installation: Cleaning and Maintaining Your New Floor
Wait at least 24 hours before moving furniture back into the room, and always use felt pads on the bottom of chair legs and tables.
Do’s:
- Sweep, dust mop, or vacuum regularly (use a hard floor setting without a beater bar).
- Clean up spills immediately with a soft cloth.
- For deeper cleaning, use a pH-neutral cleaner recommended by your flooring manufacturer. Lightly mist the floor and wipe with a microfiber mop.
Don’ts:
- Never use a steam mop, as the high heat and pressure can damage the finish and wood veneer.
- Avoid wax, oil soap, or polish, as these can leave a dull film.
- Don’t use abrasive cleaners or scouring pads.
- Never flood the floor with water when mopping.
Frequently Asked Questions (FAQ)
How much does hybrid hardwood flooring cost?
Prices vary by brand, wood species, and veneer thickness, but you can generally expect to pay between $4 and $10 per square foot for the material.
How much money can you save with DIY installation?
Professional installation typically costs between $3 and $6 per square foot. For a 500-square-foot room, that’s a savings of $1,500 to $3,000 you can achieve by doing it yourself.
Do I need an underlayment for hybrid hardwood?
Most hybrid hardwood products come with an underlayment pad already attached to the back of each plank. If yours does, you do not need an additional underlayment, but you will still need a vapor barrier if installing over concrete.
Is hybrid hardwood flooring good for homes with pets?
Yes, it’s an excellent choice. The durable wear layer resists scratches from pet nails, and the waterproof core means accidents won’t damage the planks if cleaned up promptly.
You’re Ready to Transform Your Home
You now have the complete blueprint for a successful DIY waterproof hybrid hardwood installation. You understand the material, you know the critical importance of preparation, and you have a step-by-step guide to follow. By taking your time, following these instructions, and avoiding the common mistakes, you are fully equipped to achieve a beautiful, professional-looking floor that will stand the test of time.
You’ve got the blueprint for success. Now it’s time to start your flooring transformation. Share your project photos or ask any last-minute questions in the comments below!
This guide provides general instructions for DIY projects. Always consult your specific flooring manufacturer’s installation manual, as instructions may vary. Follow all safety precautions when using tools and materials. The author and publisher are not liable for any injuries, damages, or project failures.
References & Authoritative Sources
- National Wood Flooring Association. (n.d.). Installation Guidelines. NWFA.
- Shaw Floors. (n.d.). Hardwood Flooring Installation Guide. Shaw Floors.
- Mapei Corporation. (n.d.). Self-Leveler Plus Technical Data Sheet. Mapei.
- International Code Council. (2021). International Residential Code (IRC). Chapter 5: Floors.
