
You’ve made a significant investment in beautiful, durable hybrid hardwood floors. You love the classic look of wood combined with modern, waterproof technology. But now comes the critical part: protecting that investment. The internet is filled with conflicting advice—some for traditional hardwood, some for vinyl, and much of it vague or downright wrong. Using the wrong product or technique can lead to dullness, streaks, scratches, or even voiding your warranty.
This is not just another list of cleaning tips. This is a complete, expert-developed lifecycle system for your hybrid hardwood floors. We’ve cut through the noise to provide a single, trustworthy resource that empowers you to care for your floors with confidence. In this guide, you will learn to understand the unique material under your feet, implement a proactive care calendar, master the step-by-step science of safe cleaning, and troubleshoot common problems like a pro.
- First, Understand Your Investment: What Makes Hybrid Hardwood Unique?
- The Proactive Protection Plan: Your Hybrid Hardwood Care Calendar
- The Science of Safe Cleaning: Your Step-by-Step Guide
- Troubleshooting Common Problems: A Diagnostic Guide
- The 7 Deadly Sins: Common Hybrid Hardwood Cleaning Mistakes to Avoid
- Frequently Asked Questions (FAQ)
- Your Floors, Protected for a Lifetime
- References
First, Understand Your Investment: What Makes Hybrid Hardwood Unique?
Before you can properly care for your floors, it’s essential to understand what they are. Hybrid hardwood is an engineering marvel, distinct from both traditional solid hardwood and luxury vinyl plank (LVP). Its unique construction is the key to its beauty and resilience.
The primary difference lies in its layered structure. While traditional hardwood is a single piece of solid wood, and LVP is entirely synthetic, hybrid flooring combines the best of both worlds. Major manufacturers like Shaw Floors and Mohawk have perfected this technology to deliver floors that are both stunning and built for real life.
The Anatomy of a Hybrid Plank: Wear Layer, Core, and Backing
A hybrid hardwood plank is a sophisticated composite, with each layer serving a critical function:
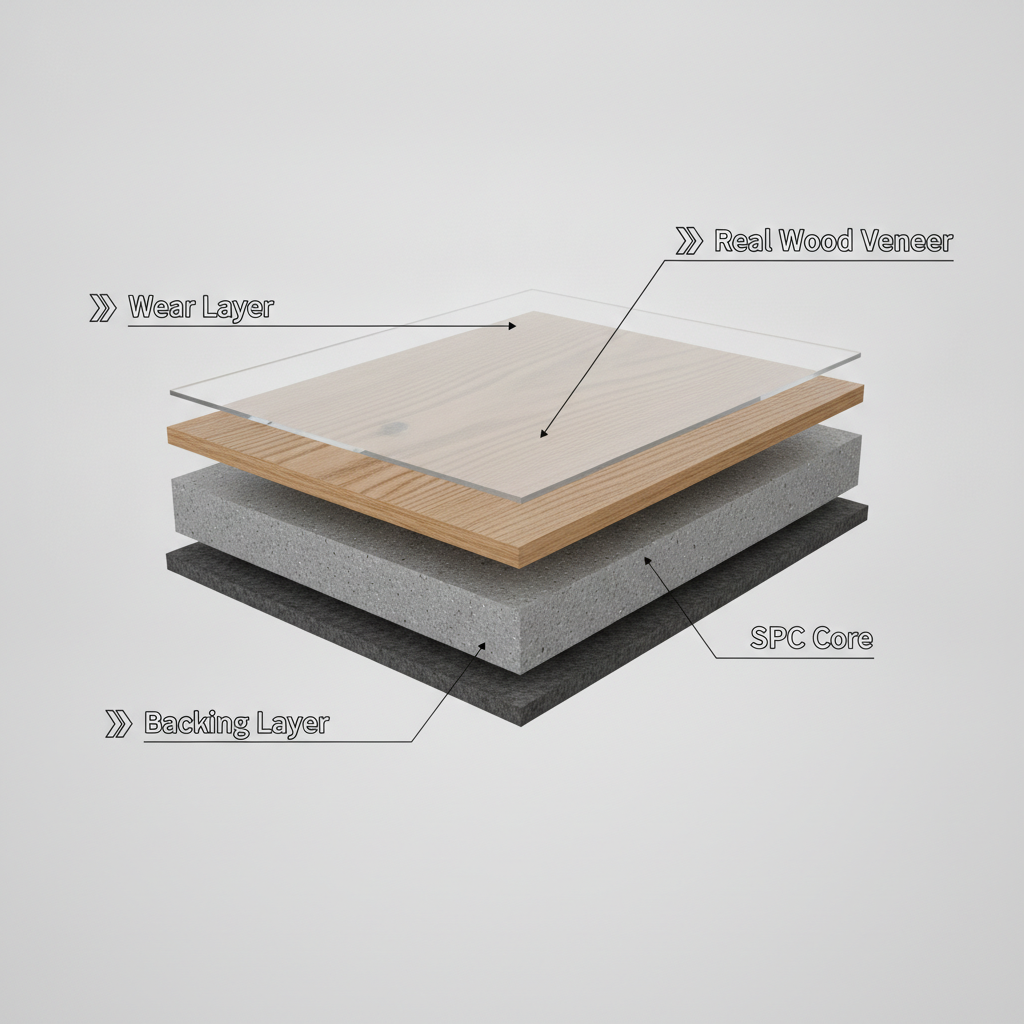
- Top Layer (Wear Layer): This is the floor’s invisible shield. It’s a transparent, highly durable coating, often enhanced with aluminum oxide, that protects the wood veneer below from scratches, stains, and fading. According to certified flooring installers, the thickness of this layer, measured in mils, is a key indicator of your floor’s long-term durability. A thicker wear layer (20 mil or higher) offers superior protection for busy households.
- Real Wood Veneer: Just beneath the wear layer is a thin slice of genuine hardwood. This is what gives the flooring its authentic look, grain, and texture.
- Core (SPC or WPC): This is the heart of the plank and the source of its “waterproof” superpower. The core is typically a Stone Plastic Composite (SPC) or Wood Plastic Composite (WPC), a rigid, dense material that will not swell, warp, or buckle when exposed to moisture.
- Backing Layer: The bottom layer, often made of cork or foam, provides sound insulation, underfoot comfort, and added stability.
Waterproof vs. Water-Resistant: What You Need to Know
The term “waterproof flooring” is a major selling point, but it’s crucial to understand what it means. The planks themselves are designed to be impervious to water; you could submerge one in a bucket with no ill effect. This performance is often verified through rigorous industry testing protocols, such as those established by the North American Laminate Flooring Association (NALFA) and ASTM International.
However, the installation is not a seamless, submarine-like barrier. The joints between planks are the weak points. While modern locking systems create a tight seal, it’s still possible for large spills, if left unattended, to seep between the cracks and reach the subfloor.
Waterproof Flooring: Myth vs. Fact
- Myth: I can let water sit on my waterproof floors indefinitely.
- Fact: While the planks won’t be damaged, prolonged exposure can allow moisture to reach the subfloor, potentially causing mold, mildew, or structural damage. Always wipe up spills promptly.
- Myth: Steam mops are great for deep cleaning waterproof floors.
- Fact: The high heat and pressurized steam can damage the wear layer and force moisture deep into the seams, potentially voiding your warranty.
- Myth: “Waterproof” and “water-resistant” mean the same thing.
- Fact: Water-resistant flooring can handle small spills if cleaned up quickly, but it will absorb water and swell over time. A truly waterproof core, like SPC, will not.
The Proactive Protection Plan: Your Hybrid Hardwood Care Calendar
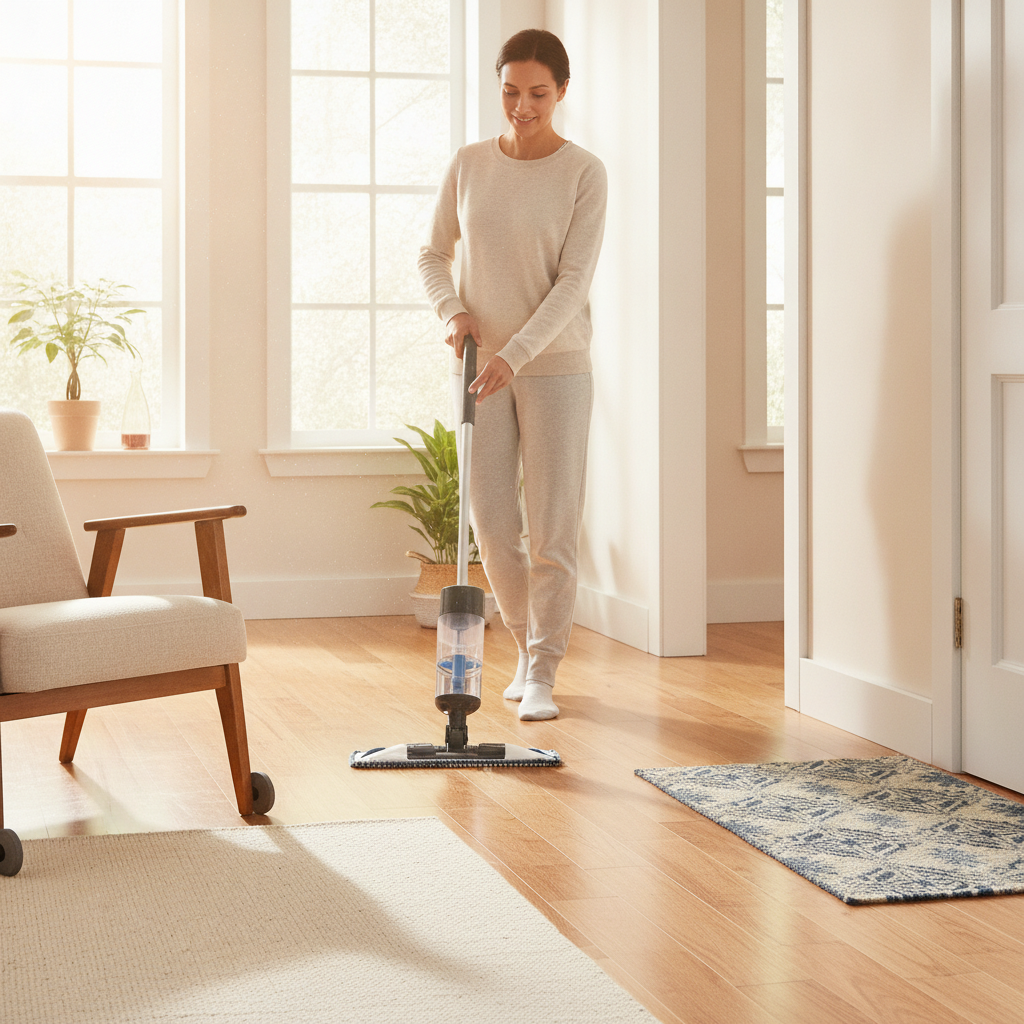
The best way to maintain hybrid hardwood floors is to prevent damage before it starts. Great floor care is not about intense, infrequent scrubbing; it’s about a simple, consistent routine. We’ve developed this easy-to-follow Care Calendar to take the guesswork out of maintenance. This proactive approach aligns with best practices recommended by industry leaders like the World Floor Covering Association (WFCA).
Daily Care (The 5-Minute Tidy)
The number one enemy of any floor finish is grit. Tiny particles of sand, dirt, and dust act like sandpaper underfoot, creating microscopic scratches that dull the surface over time.
- Task: Sweep or dust mop high-traffic areas like entryways, hallways, and kitchens.
- Tool: Use a microfiber dust mop. Its electrostatic properties are far more effective at trapping dust and pet hair than a traditional broom, which often just pushes debris around.
- Pro-Tip: Place high-quality mats both outside and inside every exterior door to trap the majority of dirt before it ever reaches your floor.
Weekly Care (The 20-Minute Clean)
This is your main cleaning session to remove grime and restore your floor’s natural beauty.
- Task: Vacuum and damp mop the floors.
- Tools: First, vacuum with a hard floor attachment (ensure the beater bar is turned off to prevent scratching). Then, use a microfiber spray mop or a flat-head mop with a washable microfiber pad.
- Solution: Use only a pH-neutral cleaner specifically formulated for hard-surface flooring. You can use a pre-mixed spray or dilute a concentrate according to the manufacturer’s instructions. The key is to use a minimal amount of liquid—the mop head should be damp, not soaking wet.
Essential Protective Measures to Prevent Damage
Prevention is always easier than repair. A few simple measures can save you from costly and frustrating damage.
- Furniture Pads: This is non-negotiable. Apply thick, high-quality felt pads to the bottom of every piece of furniture—chairs, tables, sofas, and entertainment centers. Check and replace them periodically as they wear down. A certified flooring pro once said, “The number one cause of preventable scratches I see is a three-dollar chair leg without a fifty-cent felt pad.”
- Area Rugs: Use area rugs in high-wear locations, such as under dining tables, in living room seating areas, and in children’s playrooms. Ensure you use a rug pad that is safe for your floor’s finish.
- Pet Care: Keep your pets’ nails trimmed regularly to minimize scratches. Place a mat under their food and water bowls to catch spills.
- No Shoes in the House: If possible, adopt a no-shoes policy. It drastically reduces the amount of abrasive grit and outdoor contaminants tracked onto your floors.
The Science of Safe Cleaning: Your Step-by-Step Guide
Cleaning hybrid hardwood isn’t complicated, but it is specific. Using the wrong products or methods can leave a dulling residue or even permanently damage the protective wear layer. The secret to a perfect, streak-free clean lies in understanding the science of what makes a cleaner safe.
According to resources from the Cleaning Institute, the key is using a pH-neutral solution. The pH scale runs from acidic (low pH) to alkaline (high pH). Harsh chemicals like vinegar (acidic) or ammonia (alkaline) can break down the floor’s finish over time. A pH-neutral cleaner (with a pH around 7) cleans effectively without harming the surface.
Your Safe Cleaner Litmus Test
Before using any cleaner on your floor, ask these questions:
- Is it pH-neutral? The label should state this clearly. If not, check the manufacturer’s website.
- Is it free of wax, oils, and acrylics? These ingredients don’t clean; they leave a film that builds up, attracts dirt, and creates a dull, hazy appearance.
- Is it manufacturer-approved? The safest bet is always a cleaner recommended in your flooring’s warranty and care guide.
Choosing Your Arsenal: Approved Cleaners and Essential Tools
Your cleaning kit should be simple and effective.
- The Right Cleaner: Look for reputable brands that produce pH-neutral, water-based cleaners for hard-surface floors. Some products are even tested and recommended by consumer advocacy groups like the Good Housekeeping Institute.
- The Best Mop: A flat-head microfiber mop is the gold standard. The fine fibers of microfiber are excellent at grabbing dirt and grime without being abrasive. They also require very little water, which is ideal.
- Avoid: Never use a steam mop, string mop (which uses too much water), or any abrasive scrub brushes or scouring pads.
The Perfect Clean: A 4-Step Process
Follow these steps for a flawless, streak-free finish every time. This process is in line with the official cleaning instructions provided by major manufacturers.
- Step 1: Dry Mop or Vacuum. Always remove all loose dirt, dust, and debris first. Cleaning a gritty floor with a damp mop is like rubbing it with wet sandpaper. Use a microfiber dust mop or a vacuum with the beater bar disengaged.
- Step 2: Prepare Your Solution. Lightly mist a 4×6 foot section of the floor with your pH-neutral cleaner. Alternatively, lightly dampen your microfiber mop pad with the solution. Never pour cleaner directly onto the floor.
- Step 3: Damp Mop in Sections. Mop the misted section, moving with the grain of the wood planks. The goal is a mop head that is just damp enough to clean but leaves behind minimal moisture, which should evaporate in under a minute.
- Step 4: Spot Treat Stains. For tougher spots like scuffs or sticky spills, spray a small amount of cleaner directly onto a microfiber cloth and gently rub the area.
Troubleshooting Common Problems: A Diagnostic Guide
Even with the best care, problems can arise. Here’s how to diagnose and fix the most common issues. For any deep cleaning or repair, it’s always wise to test your method in an inconspicuous area first, like inside a closet.
Problem #1: Why Are My Floors Dull, Hazy, or Streaky?
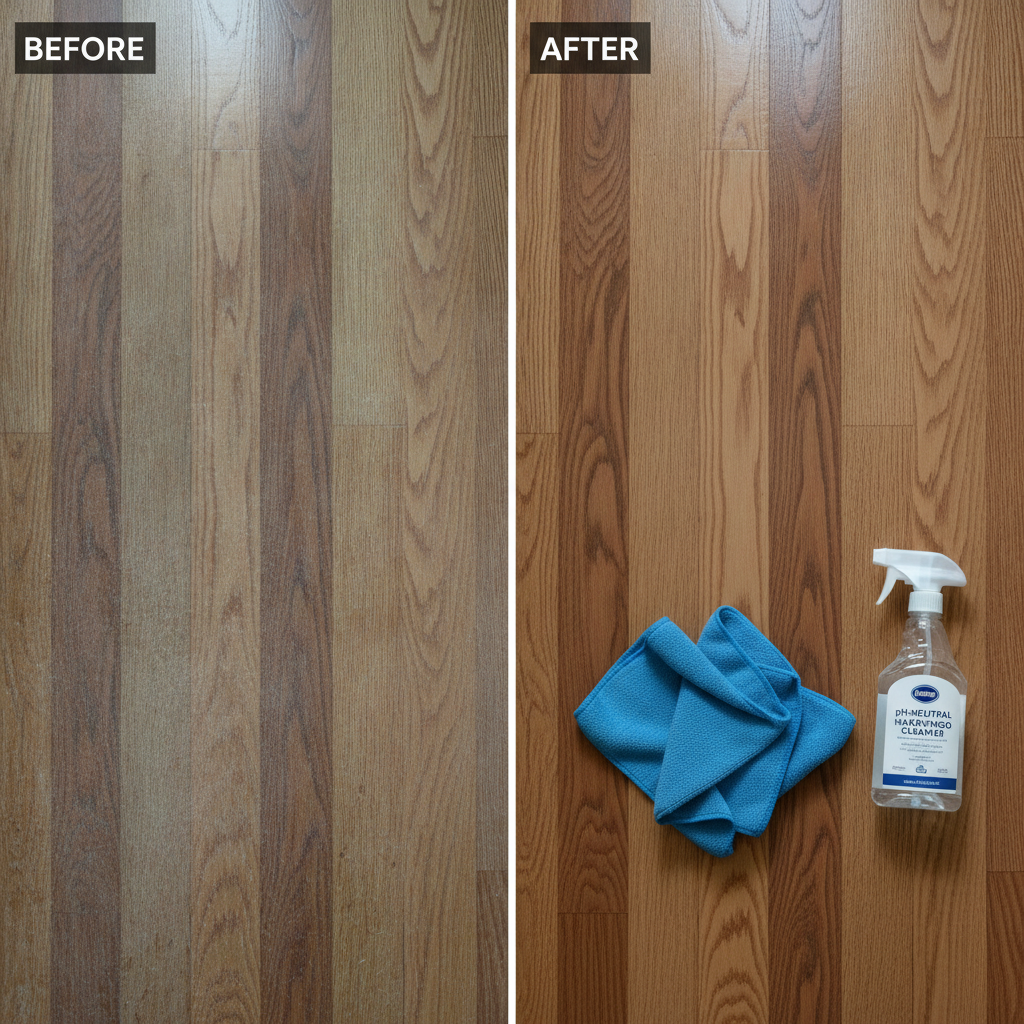
This is the most frequent complaint from homeowners, and it’s almost always caused by one thing: residue.
A Note on Factory Finishes: Restoring Luster, Not Adding Artificial Shine
First, it’s important to manage expectations. Most hybrid hardwood floors have a low-sheen, matte, or satin finish. They are not designed to have a high-gloss, mirror-like shine. The goal is to restore the floor’s original, intended luster by removing anything that is covering it up. Never use a “polish” or “restorer” that promises to add shine, as these products contain acrylics or waxes that will only worsen the problem.
The Floor Reset: How to Remove Buildup
If your floors are dull, you need to strip the residue from previous cleaners. This process is recommended by restoration experts at the Institute of Inspection, Cleaning and Restoration Certification (IICRC).
- Identify the Cause: The most likely culprit is using the wrong cleaner (like an oil soap), using too much cleaner, or cleaning with dirty water. Product chemists confirm that ingredients like acrylics are designed to stick to floors, creating a hazy buildup over time.
- Prepare a Stripping Solution: Mix a solution of 1 part non-sudsing ammonia to 10 parts water. (Note: This is for a one-time deep clean to remove buildup, not for regular cleaning). Ensure the room is well-ventilated.
- Work in Small Sections: Apply the solution with a microfiber cloth to a small, manageable area.
- Gently Agitate: Use a soft-bristled brush or another clean microfiber cloth to gently scrub the area and loosen the residue.
- Rinse and Dry: Immediately “rinse” the area using a separate mop or cloth dampened with clean, plain water. Finally, wipe the section completely dry with a third clean, dry cloth.
- Continue: Repeat this process section by section across the entire floor.
Problem #2: Fixing Scratches and Scuffs (The Scratch Repair Matrix)
Discovering a scratch is disheartening, but many can be fixed or minimized. The correct method depends on the severity of the damage.
| Scratch Type | Description | Repair Method | Difficulty |
|---|---|---|---|
| Surface Scuff | A mark on top of the finish, not into the wear layer. Often from rubber-soled shoes or furniture being pushed. | 1. Clean the area. 2. Use a tennis ball or a microfiber cloth to firmly buff the mark. Most scuffs will rub right off. | Easy |
| Light Scratch | A fine scratch that has penetrated the top finish but not the wear layer itself. You can feel it with a fingernail. | 1. Clean the area. 2. Use a manufacturer-approved scratch repair kit or concealer pen that matches your floor’s color. Apply sparingly and buff off excess. | Moderate |
| Deep Gouge | A scratch that has gone through the wear layer and into the wood veneer or even the core. The color is often different from the floor. | This level of damage requires professional attention. The only true fix is to replace the entire plank, a complex process best left to a certified flooring repair professional. | Difficult (Pro Only) |
The 7 Deadly Sins: Common Hybrid Hardwood Cleaning Mistakes to Avoid
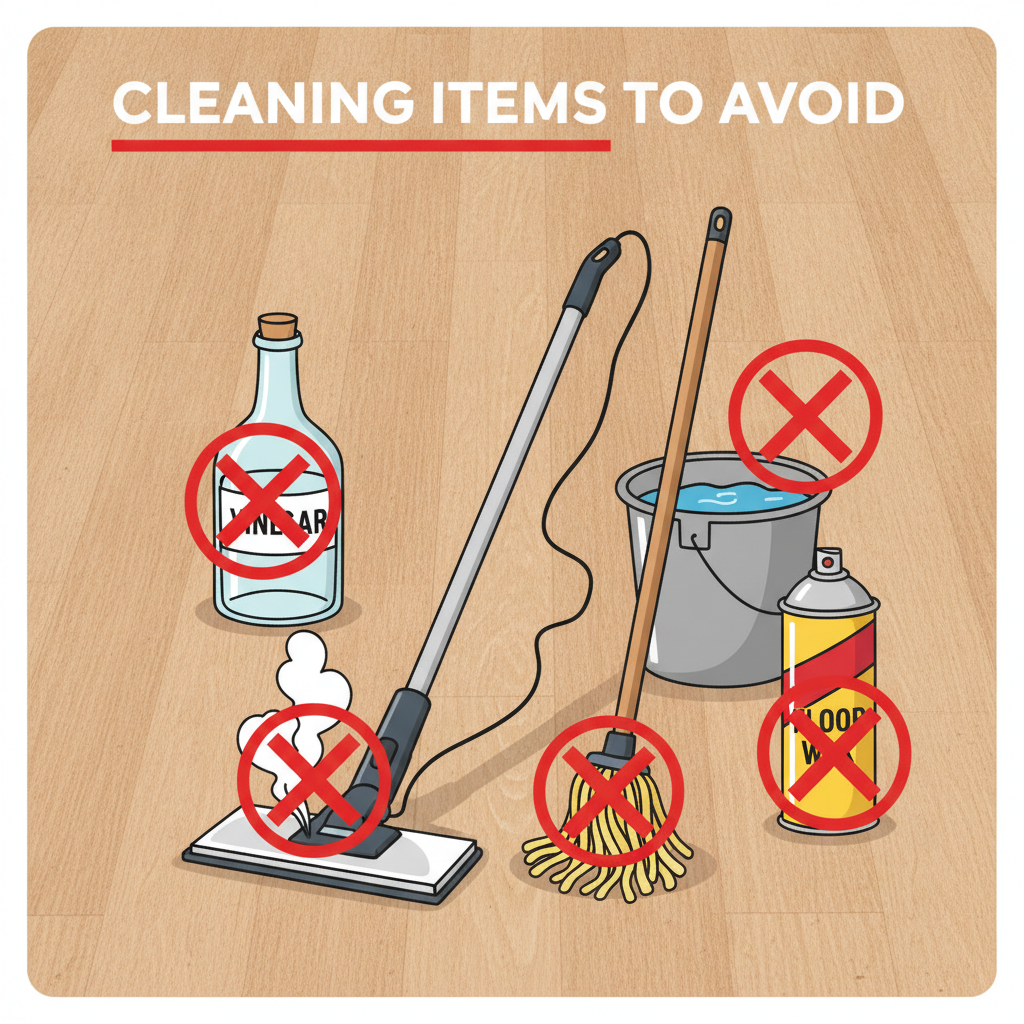
To protect your investment and your warranty, avoid these common but damaging mistakes at all costs.
Sin #1: Using a Steam Mop
Even on “waterproof” floors, the combination of high heat and intense pressure from a steam mop can damage the wear layer, dull the finish, and force moisture into the seams. Nearly every manufacturer’s warranty document explicitly states that the use of a steam cleaner will void all coverage.
Sin #2: Cleaning with Vinegar, Ammonia, or Oil-Based Soaps
DIY cleaners are popular, but they can be disastrous for modern floor finishes. Vinegar is an acid that can eat away at the finish over time. Ammonia is highly alkaline and can also dull the surface. Oil-based soaps, like Murphy Oil Soap, do not get rinsed off and leave a sticky, hazy residue that attracts dirt. Stick to pH-neutral cleaners, as recommended by the Cleaning Institute, to preserve your floor’s integrity.
Sin #3: Letting Spills Sit (Even on ‘Waterproof’ Floors)
The planks are waterproof, but the seams and your subfloor are not. A large spill that is left to sit can seep through the joints and cause hidden damage beneath your floor. Flooring installers always stress the importance of protecting the subfloor from moisture. Clean up all spills, big or small, as soon as you see them.
Sin #4: Using Abrasive Tools
Never use steel wool, scouring pads, or hard-bristled brushes. These will create a network of fine scratches that permanently dull your floor’s finish. A soft microfiber cloth or mop is all you need.
Sin #5: Forgetting Furniture Pads
Sliding a chair or table without felt protectors is one of the fastest ways to create a deep, ugly scratch. This is a simple, cheap, and absolutely essential preventative measure.
Sin #6: Using Too Much Water
More is not better when it comes to cleaning liquid. A soaking wet mop will leave streaks and can push excess water into the seams. Your mop pad should be merely damp to the touch.
Sin #7: Applying Wax or Polish
Never, ever apply wax, polish, Mop & Glo, or any acrylic “floor restorer” to your hybrid hardwood. These products are not compatible with the factory wear layer. They will not bond properly and will create a milky, hazy buildup that is extremely difficult to remove.
Frequently Asked Questions (FAQ)
Can I use a Swiffer WetJet on waterproof hybrid hardwood?
It depends on the cleaning solution. The Swiffer tool itself is fine, but many of the standard WetJet solutions are not pH-neutral and may contain ingredients that leave a residue. To be safe, you can either purchase a pH-neutral solution from a different brand that fits the Swiffer, or use a refillable cartridge with your own approved cleaner. Always check the Safety Data Sheet (SDS) for a product online to verify its pH level if you are unsure.
How often should I deep clean my hybrid hardwood floors?
A true deep clean, like the “Floor Reset” process to remove residue, should only be done when necessary. For regular maintenance, the weekly damp mopping is sufficient. Professional cleaning services often recommend a more thorough cleaning (like moving furniture to clean underneath) every 2-4 months for high-traffic homes with pets or kids, and perhaps annually for quieter, low-traffic households.
Can you polish or wax hybrid hardwood floors?
No. This is one of the most critical mistakes to avoid. The factory-applied wear layer is a non-porous, durable finish that is not designed to be coated. As flooring restoration professionals will attest, applying wax or acrylic polish will result in a sticky, hazy mess that ruins the floor’s appearance and is a nightmare to strip off. To improve the look of your floors, focus on cleaning them correctly to reveal their natural luster.
Your Floors, Protected for a Lifetime
Proper hybrid hardwood care is not a series of difficult chores; it’s a simple, proactive system that protects your beautiful floors for years to come. By embracing the three pillars of this system—Protect, Clean, and Repair—you are empowered to maintain the value and beauty of your investment. By following a consistent routine, using the right tools, and avoiding common mistakes, you can enjoy pristine, worry-free floors that look as good as the day they were installed.
Download our free Hybrid Hardwood Care Calendar Checklist to stay on track with your maintenance routine and keep your floors looking brand new!
This article may contain affiliate links. Always consult your specific flooring manufacturer’s care and warranty documents before using any new product or cleaning method.
References
- Shaw Industries Group, Inc. & Mohawk Industries, Inc. (N.D.). Manufacturer Care and Maintenance Guidelines. Retrieved from official company websites.
- Certified Flooring Installers. (N.A.). Industry Best Practices and Professional Experience.
- North American Laminate Flooring Association (NALFA). (N.D.). Performance Standards for Laminate Flooring. Retrieved from the NALFA official website.
- ASTM International. (N.D.). Standard Test Methods for Flooring Materials. Retrieved from the ASTM International official website.
- World Floor Covering Association (WFCA). (N.D.). Consumer Flooring Guide and Maintenance Tips. Retrieved from the WFCA official website.
- The Cleaning Institute. (N.D.). Science of Cleaning and Ingredient Information. Retrieved from the Cleaning Institute official website.
- Good Housekeeping Institute & Consumer Reports. (N.D.). Product Testing and Reviews for Floor Cleaners. Retrieved from official organization websites.
- Pergo, Armstrong Flooring, et al. (N.D.). Official Manufacturer Cleaning Instructions. Retrieved from official company websites.
- Institute of Inspection, Cleaning and Restoration Certification (IICRC). (N.D.). Standards for Hard Surface Floor Cleaning. Retrieved from the IICRC official website.
- Product Chemists and Formulators. (N.A.). Expert Knowledge on Chemical Interactions in Cleaning Products.
- Certified Flooring Repair Professionals. (N.A.). Industry Best Practices for Flooring Repair.
- Major Flooring Manufacturer Warranty Documents. (N.D.). Official Warranty Terms and Conditions.
- The Maids & Molly Maid. (N.D.). Professional Cleaning Advice and Blog Resources. Retrieved from official company websites.
- Flooring Restoration Professionals. (N.A.). Expert Knowledge on Floor Finish Damage and Restoration.
