
A bathroom renovation is an exciting investment in your home’s comfort and value. You’ve chosen the perfect vanity, a beautiful tile for the shower, and a color palette that feels like a spa retreat. But underneath it all lies a decision that can make or break your entire project: the flooring. The wrong choice doesn’t just lead to disappointment; it can lead to disaster. We’ve all heard the horror stories—warped planks, bubbling vinyl, and the creeping dread of a musty smell that signals hidden mold.
For years, homeowners who craved the warm, natural beauty of wood in their bathroom were told it was impossible. But what if it wasn’t? What if a material like hybrid hardwood, with its real wood veneer and waterproof core, could give you that dream look without the nightmare consequences?
Here’s the secret the pros know: a truly indestructible, waterproof bathroom floor isn’t just about the material you see on top. It’s about the entire installation system working in harmony, from the subfloor to the final bead of sealant.
This guide will demystify that system. We won’t just list options; we’ll give you a complete framework for building a beautiful, worry-free foundation. We’ll put hybrid hardwood to the test and compare it head-to-head against the other leading waterproof champions—Luxury Vinyl Plank (LVP) and porcelain tile—so you can make the right choice with total confidence.
- Why Most Bathroom Floors Fail: The Hidden Dangers of Water
- The Indestructible Floor: It’s a System, Not Just a Material
- Choosing Your Champion: Hybrid Hardwood vs. LVP vs. Tile
- Design & Maintenance: Keeping Your New Floor Flawless for Years
- Frequently Asked Questions (FAQ)
- Your Foundation for a Flawless Renovation
- Authoritative Sources & References
Why Most Bathroom Floors Fail: The Hidden Dangers of Water
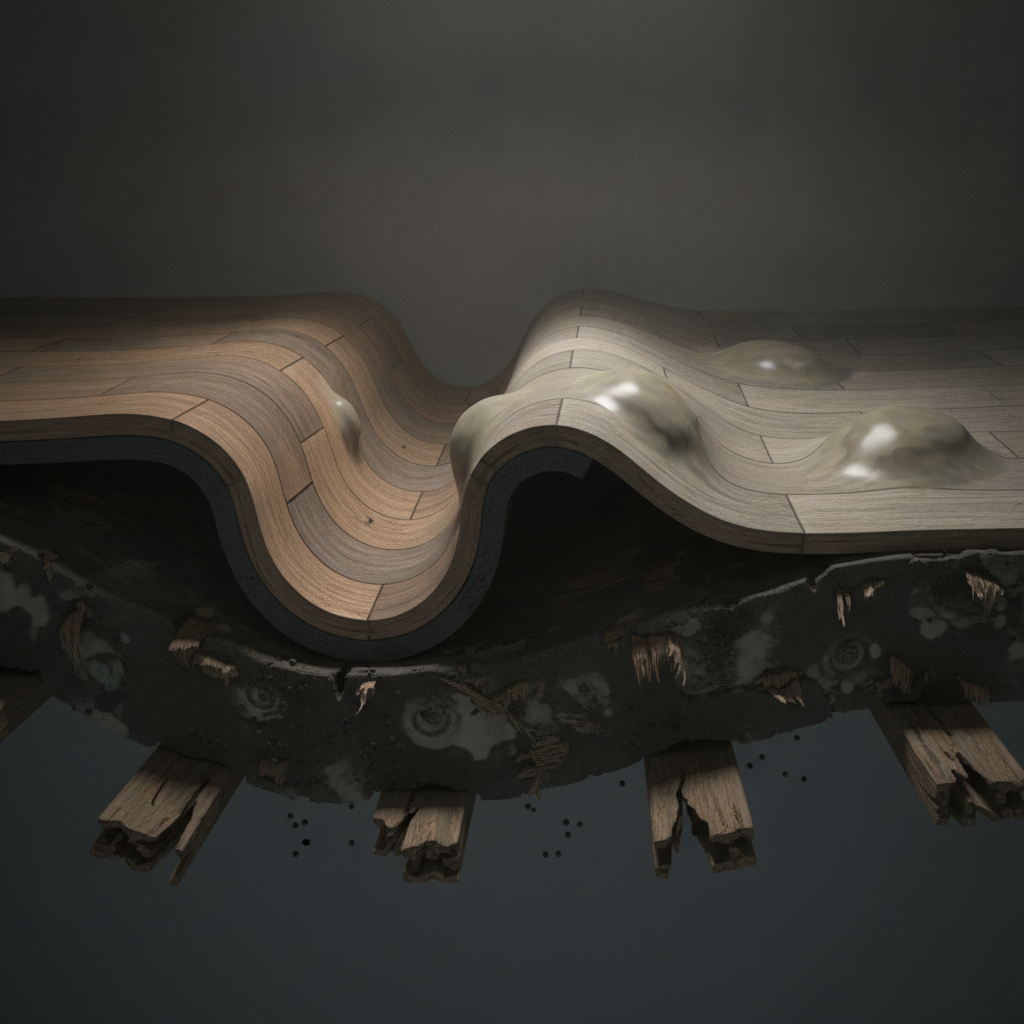
Before building an indestructible floor, you must understand how others fail. Water is a relentless force, and in a bathroom, it comes from everywhere: splashes from the tub, steam from the shower, condensation on the toilet, and the occasional overflow. When a flooring system isn’t prepared, the results can be costly and hazardous. The professional benchmark for dealing with these issues is the Institute of Inspection, Cleaning and Restoration Certification (IICRC) S500 standard, which outlines the proper procedures for water damage restoration.[1]
The consequences of water intrusion go beyond aesthetics. According to the U.S. Environmental Protection Agency (EPA), unchecked moisture is the primary ingredient for mold growth, which can lead to significant health issues.[2]
The Anatomy of Water Damage: From Warped Planks to Bubbling Vinyl
Water attacks different flooring materials in specific ways. Understanding these failure modes helps you see why a “system” approach is so critical.
- Warping, Cupping, and Crowning: These issues primarily affect flooring with a wood or composite core. When the material absorbs moisture, the wood fibers expand. If one part of the plank (like the bottom) absorbs more moisture than another, it swells unevenly, causing the edges to curl up (cupping) or the center to bulge (crowning). This is the classic cause of warped bathroom flooring.
- Bubbling and Lifting: This is common with improperly installed sheet vinyl or glue-down vinyl planks. Water seeping through seams or around the edges can destroy the adhesive. This breaks the bond with the subfloor, causing unsightly bubbles or lifting edges that allow even more water to get trapped underneath.
- Stained Grout and Loose Tiles: Grout is naturally porous. If it isn’t properly sealed, it will absorb dirty water, soap scum, and minerals, leading to permanent discoloration. In severe cases, water can penetrate the grout and get into the thin-set mortar, causing tiles to become loose.
The most catastrophic failures I see don’t come from a flood. They come from slow, hidden leaks that go unnoticed for months—a failing toilet wax ring or a tiny gap in the shower curb seal. By the time the homeowner notices a soft spot in the floor, the subfloor is already compromised.
Certified Flooring Inspector
The Silent Threat: How Mold Thrives Under a Failing Floor
Where there is persistent moisture, mold is almost certain to follow. A musty smell in your bathroom is a major red flag that you may have mold under your bathroom floor. The Centers for Disease Control and Prevention (CDC) warns that for sensitive individuals, mold exposure can cause symptoms like nasal stuffiness, throat irritation, coughing or wheezing, eye irritation, or skin irritation.[3] For people with mold allergies or compromised immune systems, the reactions can be more severe.
It’s crucial to take any sign of mold seriously. “Black mold” is a common term for types of mold that are dark green or black, and while not all are toxigenic, any extensive mold growth should be treated as a potential health hazard.
Mold Red Flag Checklist: When to Call a Professional
If you answer “yes” to any of the following, it is strongly recommended to consult a professional mold remediation specialist instead of attempting a DIY solution:
- Does the musty odor persist even after cleaning and airing out the room?
- Is there visible mold growth covering an area larger than 10 square feet?
- Is the flooring soft, spongy, or sagging, indicating the subfloor is saturated?
- Do you or your family members have asthma, allergies, or compromised immune systems?
- Do you suspect the mold is a result of a sewage leak?
The Indestructible Floor: It’s a System, Not Just a Material
This is the most important concept in this guide. You can buy the most expensive, 100% waterproof flooring material on the market, but if it’s installed improperly over a compromised subfloor, it will fail. A truly waterproof floor is a multi-layered system where each component plays a critical role.
The pretty stuff on top is the last 10% of the job. The subfloor preparation is the other 90%. If you get the foundation right, the floor will last a lifetime. If you don’t, you’ll be tearing it out in five years, guaranteed.
Veteran Certified Flooring Installer
Imagine a cross-section of the perfect waterproof floor system:
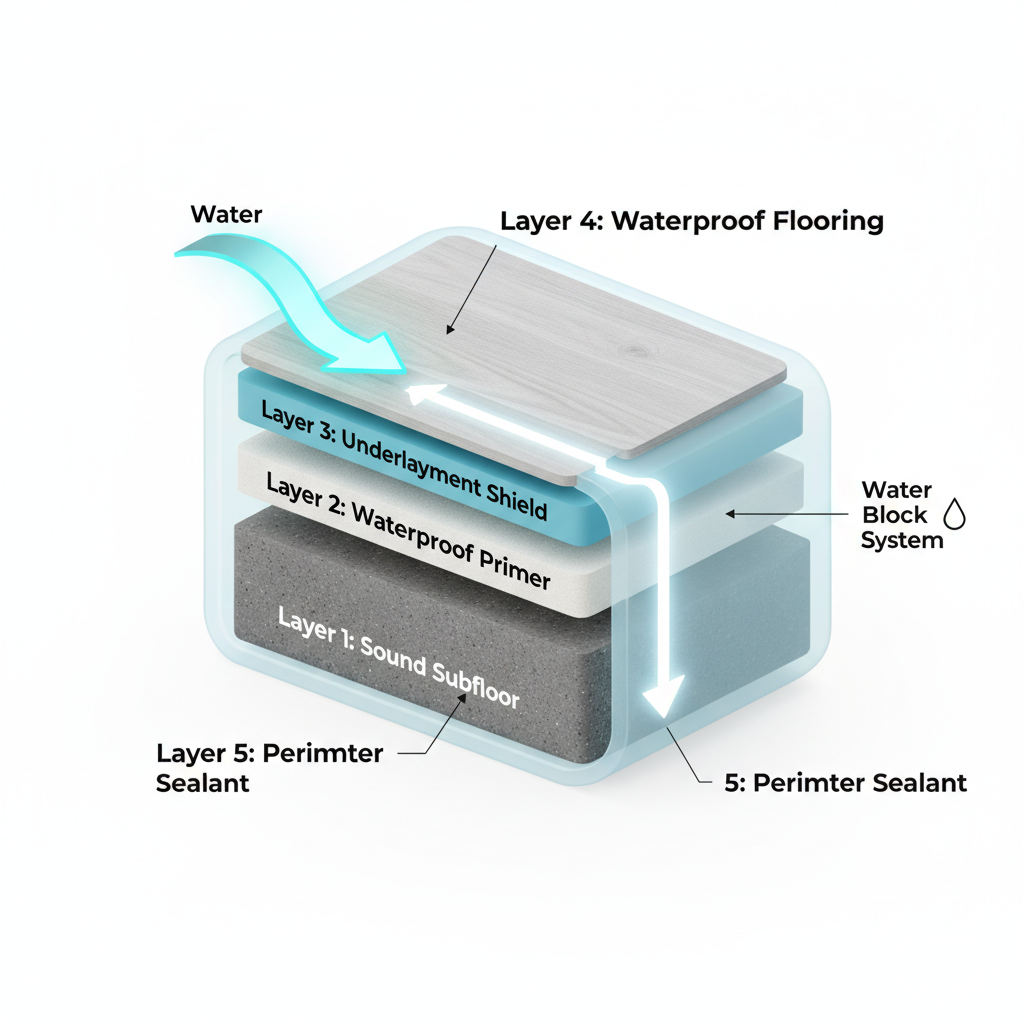
- Layer 5 (Top): The Sealant. A 100% silicone bead around the entire perimeter, sealing the gap between the floor and the walls/tub.
- Layer 4: The Flooring. Your chosen waterproof material (Hybrid Hardwood, LVP, or Tile).
- Layer 3: The Shield. A waterproof underlayment or membrane appropriate for the flooring.
- Layer 2: The Primer/Sealer. A waterproof coating applied to the subfloor.
- Layer 1 (Bottom): The Foundation. A clean, flat, and structurally sound subfloor.
Step 1: The Foundation – A Flat, Stable, and Sealed Subfloor
Everything starts here. Before a single plank or tile is laid, the subfloor must be perfect. According to the National Wood Flooring Association (NWFA) guidelines, subfloors must meet strict requirements for flatness and moisture content to prevent installation failure.[4]
Subfloor Assessment Checklist:
- Is it clean? Remove all old adhesive, staples, and debris. The subfloor should be scraped and vacuumed until spotless.
- Is it flat? Use a long, straight edge (like a 6-foot level) to check for high and low spots. Most flooring manufacturers require the floor to be flat within 3/16 of an inch over a 10-foot span. High spots should be sanded down, and low spots filled with a cementitious leveling compound.
- Is it dry? If there’s any sign of past water damage (stains, softness), the source of the leak must be found and fixed, and the damaged subfloor material must be cut out and replaced.
- Is it sealed? For a wood subfloor (plywood or OSB), applying a coat of a quality waterproof primer-sealer is a crucial, often-skipped step. This prevents the wood from absorbing ambient moisture from the bathroom environment.
Step 2: The Shield – Choosing the Right Underlayment or Membrane
The next layer of defense is the shield. This is not the same as the foam padding used for comfort under laminate flooring. For a bathroom, you need a true waterproof barrier.
- For Floating Floors (Hybrid Hardwood, LVP): A 6-mil polyethylene vapor barrier is the minimum requirement. The seams should be overlapped and taped with a waterproof tape to create a monolithic sheet that prevents any moisture from below from reaching the flooring.
- For Tile Floors: This is where a high-performance waterproof membrane is essential. The Tile Council of North America (TCNA) Handbook provides the industry standards for these systems.[5] Products like Schluter-KERDI or RedGard are applied directly to the subfloor, creating a completely waterproof and “uncoupling” layer that protects the tile from shifts in the subfloor.
Step 3: The Final Seal – Gaps, Grout, and Transitions
The final details are what make the system impenetrable.
- Perimeter Sealing: All floating floors require an expansion gap around the perimeter to allow for movement. In a bathroom, this gap is a superhighway for water. After the flooring is installed, this gap must be completely filled with 100% silicone caulk before any baseboards or shoe molding are installed. This creates a “bathtub” effect, ensuring that water spilled on the floor can’t get to the subfloor.
- Waterproof Grout: For tile, the choice of grout is critical. As a tile expert explains, “Standard cement grout is a sponge. For a bathroom, upgrading to an epoxy grout is the best investment you can make. It’s non-porous, so it’s 100% waterproof and stain-proof. It will look brand new a decade later.”
- Transitions: Pay close attention to where the flooring meets a bathtub, shower, or toilet flange. These areas must be meticulously sealed with silicone to block any potential water intrusion points.
Choosing Your Champion: Hybrid Hardwood vs. LVP vs. Tile
With the waterproof system in place, you can now confidently choose your surface material. Each of the top three contenders has unique strengths. An interior designer with the National Kitchen & Bath Association (NKBA) advises, “The choice often comes down to balancing three factors: the authentic feel you want, your budget, and how much warmth or softness underfoot matters to you. Thankfully, today’s technology means you don’t have to compromise on style for any of them.”[6]
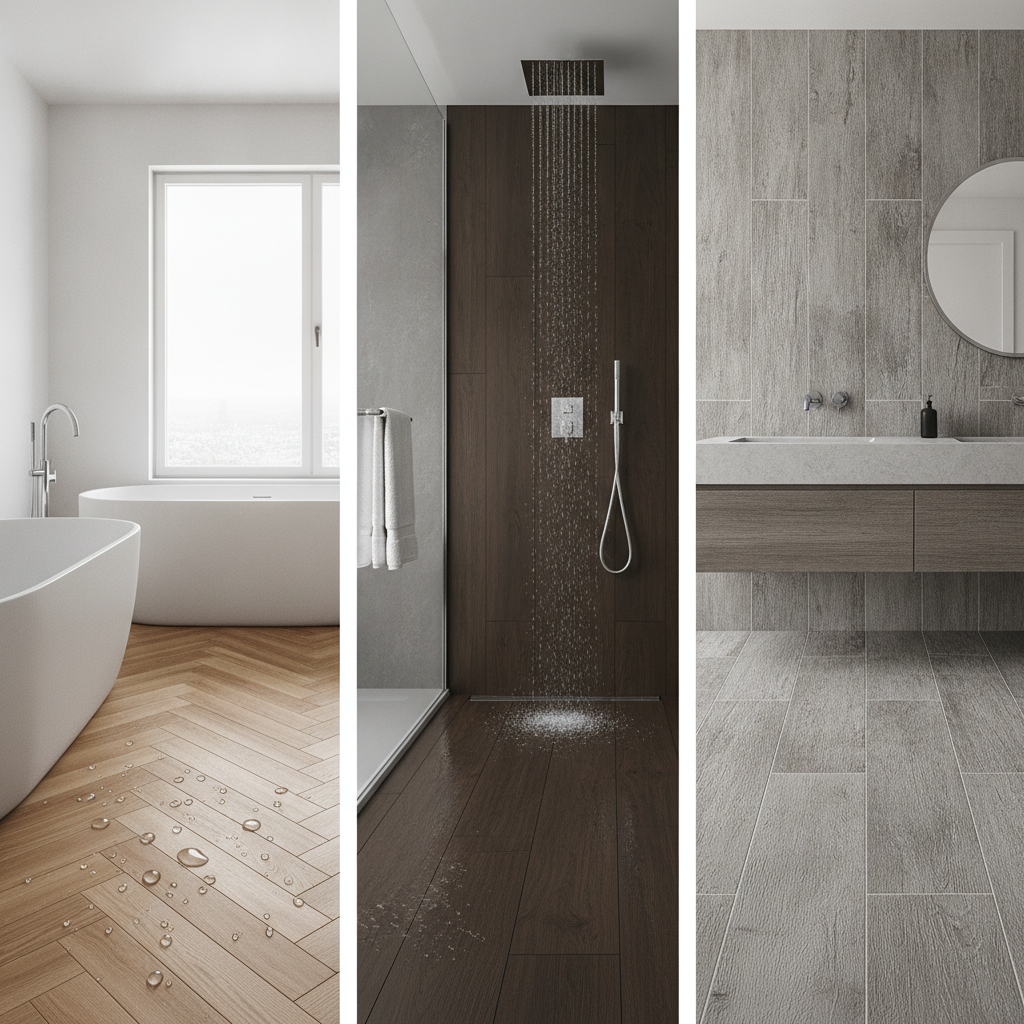
Waterproof Flooring Comparison Matrix
| Feature | Hybrid Hardwood | Luxury Vinyl Plank (LVP) | Porcelain Tile |
|---|---|---|---|
| Water Resistance | Excellent (Waterproof Core) | Excellent (100% Synthetic) | Superior (Virtually Impervious) |
| Authenticity/Look | Superior (Real Wood Veneer) | Excellent (Realistic Imaging & Texture) | Very Good (Highly Realistic Wood Grains) |
| Durability/Scratch | Good to Very Good | Very Good to Excellent (Depends on Wear Layer) | Superior (PEI Rating 3+) |
| Feel Underfoot | Warm, comfortable | Warm, comfortable | Hard, can be cold |
| Cost (Material Only) | $$$ (High) | $$ (Moderate) | $$ (Moderate) |
| DIY-Friendliness | High (Click-Lock System) | High (Click-Lock System) | Low (Requires Special Tools & Skills) |
| Maintenance | Easy | Easiest | Easy (Grout can require more effort) |
Option 1: Hybrid Hardwood – The Beauty of Wood, The Power of a Waterproof Core
So, can you put hybrid hardwood flooring in a bathroom? The answer is a confident “Yes, but only if you use the complete waterproof system.”
Hybrid hardwood is an innovative product that solves the age-old problem of wood and water. It’s constructed in layers:
- Top Layer: A thin veneer of real hardwood (like oak or hickory) protected by a durable, factory-applied finish.
- Core Layer: A high-density, 100% waterproof composite core. This is the magic ingredient that prevents the plank from swelling or warping when exposed to water.
- Bottom Layer: An attached underlayment, often made of cork or foam, for sound absorption and comfort.
Leading manufacturers like Shaw and Mohawk offer extensive warranties on their hybrid hardwood products, specifically covering topical water and installation in full bathrooms, provided their installation instructions are followed to the letter. This is the ultimate “best of both worlds” solution for those who refuse to compromise on the authentic look and feel of real wood.
Option 2: Luxury Vinyl Plank (LVP) – The King of Realism and Resilience
LVP has become one of the most popular flooring choices for a reason. It’s 100% waterproof, incredibly durable, and stunningly realistic. The technology that makes it look so much like real wood is called “Embossed In Register” (EIR), where the surface texture is perfectly aligned with the high-definition printed wood grain image, creating a convincing look and feel.
When shopping for LVP for a bathroom, the most important specification to look for is the wear layer. This is a clear top coat that protects the printed image from scratches and scuffs. For a high-traffic bathroom, look for a wear layer of at least 20 mil. The Resilient Floor Covering Institute (RFCI) provides standards for these products, ensuring quality and performance.[7] LVP offers a nearly endless variety of wood-look styles, from rustic barnwood to sleek modern oak, making it a versatile and budget-friendly choice.
Option 3: Porcelain & Ceramic Tile – The Time-Tested, 100% Waterproof Classic
For the ultimate peace of mind, nothing beats porcelain tile. Its durability is measured by the Porcelain Enamel Institute (PEI) rating, which indicates its resistance to abrasion and wear. For any bathroom floor, a tile with a PEI rating of 3 or higher is recommended.
The key difference between porcelain and ceramic is water absorption. According to ASTM International standards, porcelain tile must have a water absorption rate of 0.5% or less, making it virtually impervious to water.[8] This makes it the absolute best choice for extremely wet environments like a kids’ bathroom or a shower floor. Modern printing technology has enabled manufacturers to create wood-look porcelain planks that are remarkably realistic, offering the classic durability of tile with the warm aesthetic of hardwood.
Design & Maintenance: Keeping Your New Floor Flawless for Years
Once your indestructible floor is installed, the fun part begins: design and long-term care. “A beautiful floor is the anchor of a bathroom’s design,” says a professional interior designer. “The tone and style you choose will influence every other decision, from the vanity color to the metal finishes.”
How to Achieve the Perfect Wood Look
Achieving a convincing wood look goes beyond just picking a color.
- Plank Width and Length: Wider, longer planks can make a small bathroom feel larger and more open.
- Grout Color (for Tile): This is a critical design choice. Using a dark grout that matches a shadow line in the wood grain creates a seamless, realistic look. A contrasting light grout will create a grid-like pattern that emphasizes the tile shape, which can be a deliberate design choice but reduces the realism of the “wood” floor.
- Texture: Look for floors with texture. A hand-scraped finish on a hybrid hardwood or an EIR texture on LVP adds depth and realism that a flat, smooth surface lacks.
The Ultimate Low-Maintenance Cleaning Guide
One of the best parts of modern waterproof flooring is how easy it is to clean. A professional house cleaner’s top tip is to “use less product and less water. A simple microfiber mop dampened with water and a small amount of pH-neutral cleaner is all you need for 99% of cleaning jobs.”
Always follow the specific care and maintenance guides from your flooring’s manufacturer to avoid damaging the finish or voiding the warranty. The cleaning experts at the Good Housekeeping Institute consistently test and recommend cleaners that are safe and effective for various floor types.[9]
Simple Cleaning Recipes:
- Hybrid Hardwood & LVP: Mix 1-2 ounces of a pH-neutral, hard-surface floor cleaner in a gallon of warm water. Lightly dampen a microfiber mop, wring it out well, and clean. No rinsing is required.
- Porcelain Tile: Use the same pH-neutral cleaner solution. For a periodic deep clean of grout lines (if you don’t have epoxy grout), use a dedicated grout cleaner and a soft-bristled brush.
Frequently Asked Questions (FAQ)
How much does it cost to install waterproof flooring in a bathroom?
Costs vary widely based on location, material, and the condition of your subfloor. A licensed general contractor advises budgeting for both materials and labor. Generally, you can expect the following (per square foot):
- Luxury Vinyl Plank (LVP): $2 – $7 for material; $2 – $4 for installation.
- Porcelain Tile: $3 – $10 for material; $5 – $15 for installation (more for complex patterns).
- Hybrid Hardwood: $5 – $12 for material; $3 – $5 for installation.
Data from sources like the National Association of Home Builders (NAHB) shows that bathroom remodels remain one of the most popular home improvement projects, with flooring being a significant component of the overall budget.[10]
Can you refinish hybrid hardwood floors?
Generally, no. The top layer of hybrid hardwood is a very thin veneer of real wood. Unlike solid or traditional engineered hardwood, it is not thick enough to be sanded down and refinished. The durability comes from its factory-applied protective coating. If a plank gets severely damaged, the solution is to replace the individual plank, which is relatively easy with a click-lock floating floor.
Is wood-look tile cold on the feet?
Yes, like any tile product, porcelain can feel cold to the touch, especially in the winter. However, this is easily and luxuriously solved by pairing it with an in-floor radiant heating system. A professional from a leading radiant heating company explains, “Electric radiant heating systems are thin, easy to install under a new tile floor, and incredibly energy-efficient. They turn a cold tile floor into a warm, spa-like feature that adds significant comfort and value to your home.”
Your Foundation for a Flawless Renovation
Choosing a bathroom floor no longer has to be a compromise between the style you love and the durability you need. By understanding that a truly waterproof floor is a complete system, you unlock a world of possibilities. Innovative materials like hybrid hardwood are no longer off-limits; they become a fantastic and viable option to bring the authentic warmth of wood into your bathroom design.
You now have the expert knowledge to look past the surface and plan your bathroom renovation from the foundation up. You can confidently ask contractors the right questions, select the best materials for your needs, and ensure every detail is in place to build a beautiful, indestructible floor that will be free from water damage for years to come.
This article provides general guidance for bathroom flooring. Always consult the specific flooring manufacturer’s installation instructions and warranty details before purchasing or installing any product. For complex projects, water damage, or mold remediation, consult with a licensed and insured professional.
Authoritative Sources & References
- Institute of Inspection, Cleaning and Restoration Certification (IICRC). (n.d.). ANSI/IICRC S500 Standard for Professional Water Damage Restoration. Retrieved from https://www.iicrc.org/s500/
- United States Environmental Protection Agency. (2023). A Brief Guide to Mold, Moisture, and Your Home. Retrieved from https://www.epa.gov/mold/brief-guide-mold-moisture-and-your-home
- Centers for Disease Control and Prevention. (2022). Basic Facts about Mold and Dampness. Retrieved from https://www.cdc.gov/mold/faqs.htm
- National Wood Flooring Association (NWFA). (n.d.). Installation Guidelines. Retrieved from https://nwfa.org/
- Tile Council of North America (TCNA). (n.d.). TCNA Handbook for Ceramic, Glass, and Stone Tile Installation. Retrieved from https://www.tcnahandbook.com/
- National Kitchen & Bath Association (NKBA). (n.d.). Design Trends & Industry Insights. Retrieved from https://nkba.org/
- Resilient Floor Covering Institute (RFCI). (n.d.). Resources and Standards. Retrieved from https://rfci.com/
- ASTM International. (n.d.). Standard Test Methods for Water Absorption… of Ceramic Tile (ASTM C373-18). Retrieved from https://www.astm.org/
- Good Housekeeping Institute. (n.d.). Cleaning & Home Advice. Retrieved from https://www.goodhousekeeping.com/home/cleaning/
- National Association of Home Builders (NAHB). (n.d.). Economics & Housing Policy. Retrieved from https://www.nahb.org/economics-and-housing-policy
