
There’s a unique satisfaction that comes from transforming a room with your own two hands, and nothing makes a bigger impact than a beautiful new floor. Waterproof hybrid hardwood flooring offers the timeless elegance of real wood combined with the rugged, go-anywhere durability modern life demands. It’s the perfect project for an ambitious DIYer looking to add significant value and style to their home. But let’s be honest: the fear of a costly, irreversible mistake can be paralyzing. One wrong cut, one uneven spot on the subfloor, and the dream project can turn into a frustrating nightmare of buckled planks and unsightly gaps.
This is not another vague, incomplete guide. This is your definitive, mistake-proof roadmap. We will take you from the showroom to the subfloor, covering every critical detail needed for a flawless, professional-grade installation. We’ll demystify the product itself, give you the pro-level checklists for preparation, walk you step-by-step through the installation, and, most importantly, show you how to avoid the common pitfalls that trip up most DIYers. By the end of this guide, you’ll have the confidence and knowledge to install a beautiful, durable, and truly waterproof floor you can be proud of for years to come.
- What Exactly is Waterproof Hybrid Hardwood Flooring?
- Phase 1: Your Pre-Installation Project Planner
- Phase 2: The Critical Foundation: A Perfect Subfloor
- Phase 3: The Main Event: A Step-by-Step Installation Walkthrough
- Phase 4: The Professional Finish: Trim, Transitions, and Sealing
- The 7 Deadly Sins of DIY Flooring Installation (and How to Atone)
- Your Flawless Floor Awaits
- References
What Exactly is Waterproof Hybrid Hardwood Flooring?
Before you can install it, it’s crucial to understand what makes hybrid hardwood flooring so unique. It represents a significant evolution in flooring technology, blending the best attributes of different materials into one high-performance plank. At its core, it’s a composite product designed to give you the authentic look and feel of hardwood without its traditional vulnerability to water.
According to industry-leading organizations like the National Wood Flooring Association (NWFA), the proper classification of flooring is key to understanding its performance[1]. Hybrid flooring is an engineered product, but it stands in a category of its own due to its specialized waterproof core. When shopping, look for products with certifications like FloorScore®, which ensures the flooring meets strict indoor air quality standards, making it a healthier choice for your home[2].
The Anatomy of a Hybrid Plank: Real Wood Meets a Waterproof Core
To truly appreciate hybrid hardwood, you need to look at its layers. Each layer serves a specific purpose, working together to create a plank that is both beautiful and incredibly resilient.
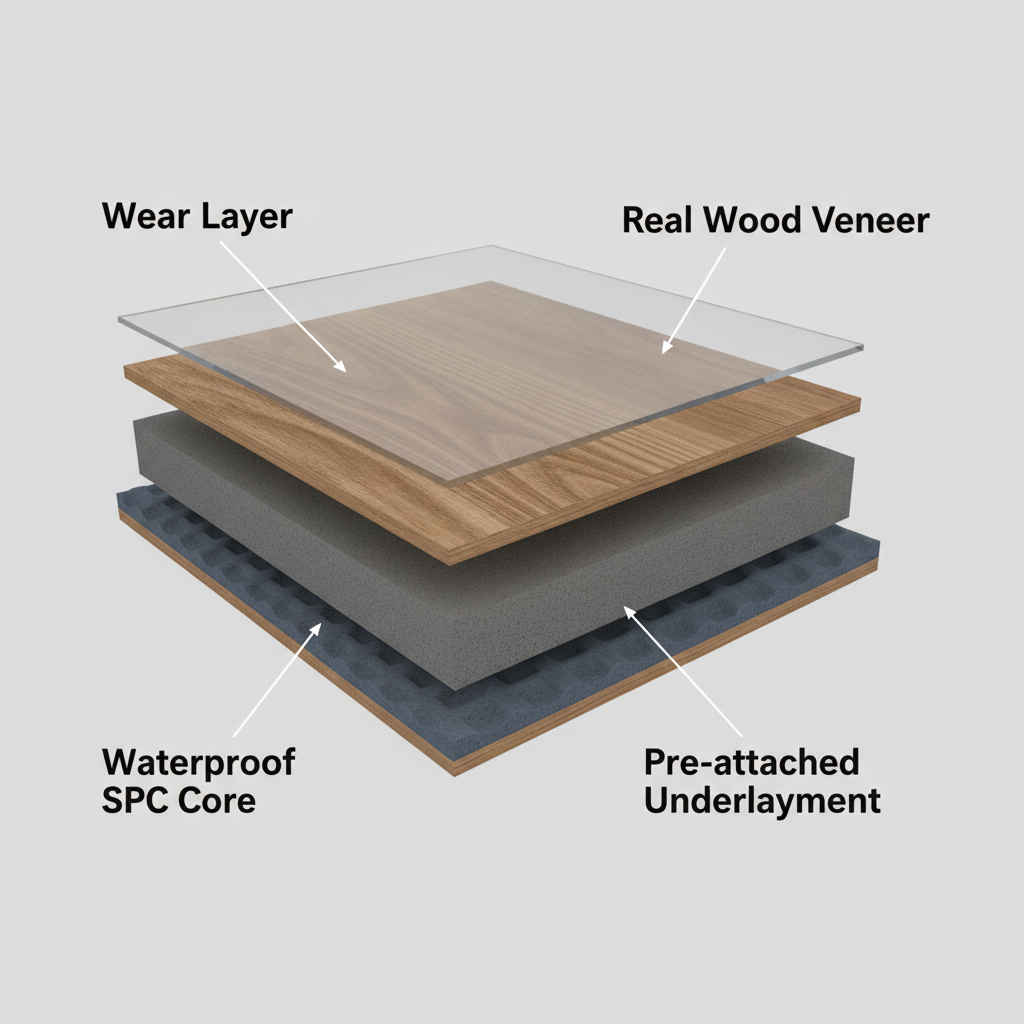
- Wear Layer: The topmost layer is a factory-applied finish, typically multiple coats of aluminum oxide, that protects the wood veneer from scratches, scuffs, and fading.
- Real Wood Veneer: This is the star of the show. Unlike laminate which has a printed image, hybrid flooring has a thin layer of actual hardwood. Hybrid flooring typically consists of a real wood veneer (0.6mm to 2.5mm thick) over a Stone Plastic Composite (SPC) or Wood Plastic Composite (WPC) core. The thickness of this veneer is important; thicker veneers (1.2mm and up) may offer the potential for a single, light refinishing down the line, adding to the floor’s long-term value.
- Waterproof Core: This is the engine of the plank. It’s what makes the “hybrid” concept work. This core is usually one of two types:
- SPC (Stone Plastic Composite): Made from a mixture of limestone, PVC, and stabilizers, SPC cores are incredibly dense, rigid, and durable. They offer superior resistance to dents from dropped objects. Underfoot, they feel very solid and sturdy, but slightly harder and cooler than WPC.
- WPC (Wood Plastic Composite): Made from a blend of recycled wood pulp, PVC, and a foaming agent, WPC cores are lighter and less dense than SPC. This makes them feel slightly softer, warmer, and quieter underfoot, offering more comfort.
- Pre-attached Underlayment: Most hybrid flooring planks come with a pre-attached pad, often made of cork or IXPE foam. This layer provides sound absorption, cushioning, and can act as a minor moisture barrier, simplifying the installation process.
Hybrid Hardwood vs. The Competition: A Head-to-Head Comparison
With so many flooring options on the market, it can be tough to choose. Here’s a clear breakdown of how waterproof hybrid hardwood stacks up against other popular choices.
| Feature | Waterproof Hybrid Hardwood | Luxury Vinyl Plank (LVP) | Laminate Flooring | Engineered Hardwood |
|---|---|---|---|---|
| Aesthetics | Authentic real wood veneer; each plank is unique. | High-definition printed image of wood; can be repetitive. | High-definition printed image of wood; can look less realistic. | Authentic real wood veneer; each plank is unique. |
| Water Resistance | Excellent. 100% waterproof core and top-down protection. Ideal for kitchens, basements. | Excellent. 100% waterproof core and surface. The top choice for bathrooms. | Varies. “Water-resistant” models exist, but the fiberboard core is vulnerable to standing water. | Poor to Fair. The wood veneer is susceptible to water damage, and core layers can delaminate. |
| Durability/Dent Resistance | Very Good. The dense SPC/WPC core provides excellent dent resistance. | Very Good. Resilient and can absorb impact, but can be gouged by sharp objects. | Good. The top wear layer is very scratch-resistant, but the core can chip. | Fair. Softer wood veneers can dent and scratch easily. |
| Cost (Material Only) | $$$ (High) | $$ (Moderate) | $ (Low to Moderate) | $$$ (High) |
| DIY-Friendliness | Excellent. Features a simple click-lock installation system. | Excellent. Easy to cut and install with a click-lock system. | Excellent. The original DIY-friendly click-lock flooring. | Good to Fair. Click-lock versions are DIY-friendly, but glue/nail-down types are for pros. |
Phase 1: Your Pre-Installation Project Planner
A successful DIY project is 90% preparation. Rushing into the installation without the right tools, materials, and plan is a recipe for frustration. This section will help you get organized and ensure you have everything you need before you lay the first plank.
Safety First!
Your safety is the top priority. Always wear safety glasses when cutting flooring. Use knee pads to protect your joints during the long hours on the floor. Read and understand the safety instructions for any power tools you use.
The Essential Toolkit: What You’ll Need to Buy, Borrow, or Rent
Having the right tools makes the job faster, easier, and safer. For expensive, single-use tools like a miter saw, renting is often a smart, cost-effective option.
Measurement & Layout:
- Tape Measure
- Pencil
- Chalk Line
- Combination Square
- Contour Gauge (for tracing irregular shapes)
Cutting:
- Miter Saw (for clean, straight cross-cuts)
- Jigsaw (for curved or notched cuts)
- Oscillating Multi-Tool (A pro-level game-changer for undercutting door jambs)
- Utility Knife
Installation:
- Flooring Installation Kit (includes a Tapping Block, Pull Bar, and Spacers)
- Rubber Mallet
- Knee Pads
- Safety Glasses
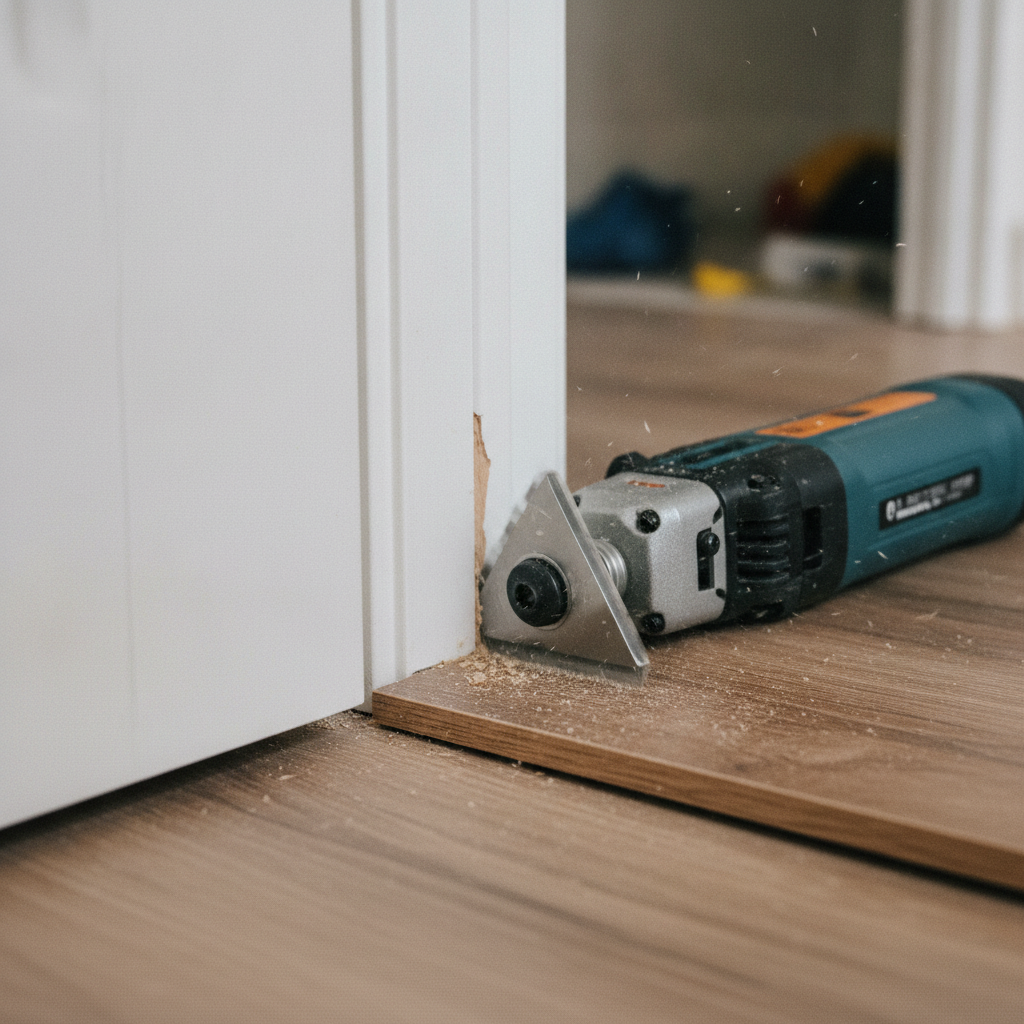
A professional installer’s number one tip is often to invest in an oscillating multi-tool. It allows you to cleanly cut the bottom of your door jambs so the flooring can slide underneath, creating a seamless, professional finish that’s nearly impossible to achieve otherwise.
How to Calculate Your Flooring Needs (and Avoid a Mid-Project Hardware Store Run)
There’s nothing worse than running out of flooring with only a few rows left to go. To avoid this, you need to calculate your needs accurately, including a “waste factor.” This extra material accounts for cuts, mistakes, and any damaged planks.
The Formula:
- Measure the length and width of your room in feet.
- Multiply these two numbers to get the total square footage. (Example: 10 ft x 12 ft = 120 sq ft)
- Add 10% for waste. Multiply your square footage by 1.10. (Example: 120 sq ft x 1.10 = 132 sq ft)
So, for a 10×12 foot room, you should purchase at least 132 square feet of flooring. For complex rooms with many angles or a diagonal layout, consider increasing the waste factor to 15%.
Phase 2: The Critical Foundation: A Perfect Subfloor
You can buy the most expensive flooring in the world, but if your subfloor isn’t properly prepared, the installation will fail. This is the single most important phase of the project. Peaking, gapping, and squeaking floors are almost always caused by subfloor issues.
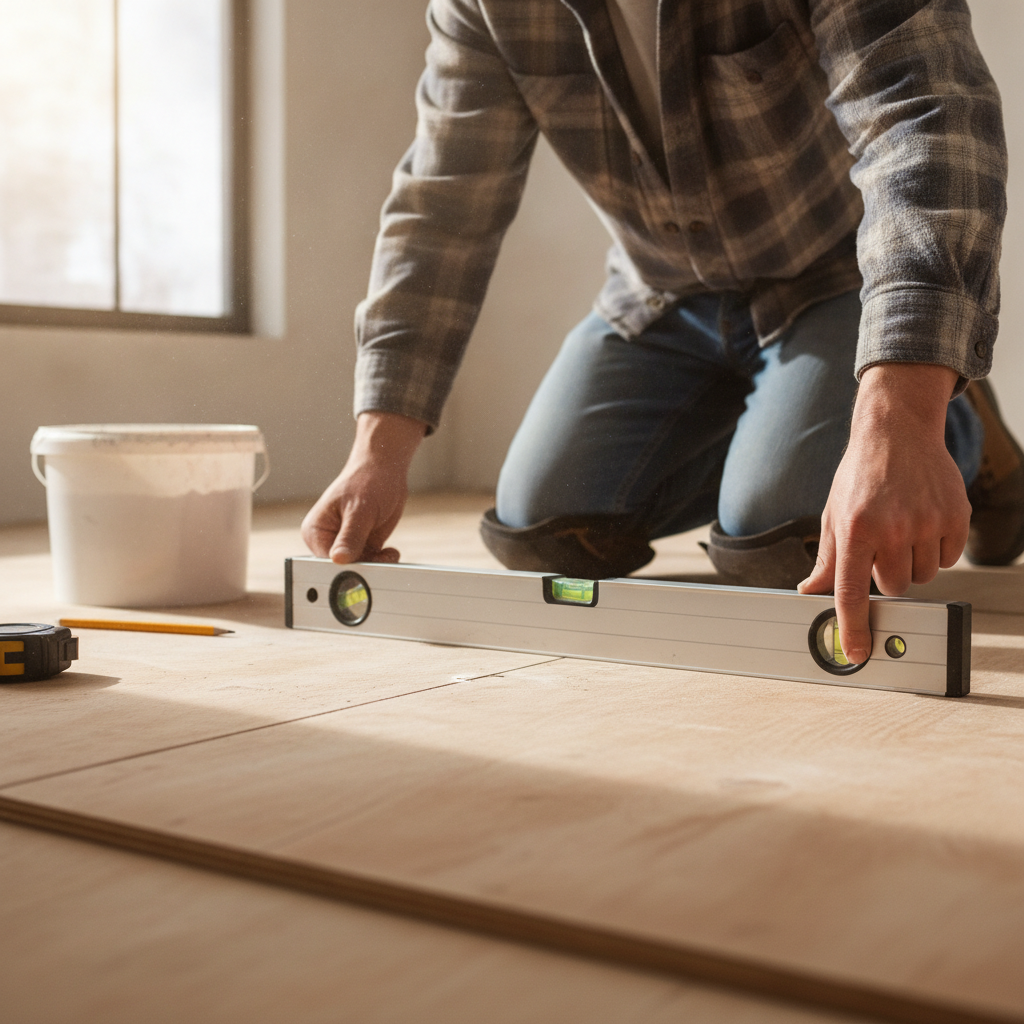
The industry standard for subfloor flatness is a tolerance of no more than a 3/16 inch deviation over a 10-foot span. For moisture, professional testing methods are defined by ASTM International, such as the ASTM F2170 standard for testing concrete slabs[3]. While you may not need to perform these specific tests, it highlights how seriously professionals take subfloor conditions.
How to Check if Your Subfloor is Flat and Level
You don’t need fancy laser levels to do this. All you need is a long, straight edge (like an 8-foot level or a very straight 2×4).
- Lay the straightedge on the subfloor in various spots and directions across the room.
- Look for any gaps between the straightedge and the floor.
- Use your tape measure to check the size of any gaps. If you find a dip greater than 3/16 of an inch, circle it with a pencil.
- Slide the straightedge across the floor. If it rocks back and forth, you’ve found a high spot. Circle these areas as well.
Fixing Imperfections: Sanding High Spots and Using Self-Leveling Compound
Once you’ve mapped your high and low spots, you can fix them.
- For High Spots: On a wood subfloor (plywood or OSB), you can use a belt sander to grind down the high areas. For concrete, you’ll need a concrete grinder, which can be rented.
- For Low Spots: The best solution for dips and low areas is a self-leveling compound. This cement-based product is mixed with water to a pancake-batter consistency and poured into the low spots. It flows to find its own level, creating a perfectly flat, smooth surface.
A crucial step many DIYers miss is priming. Before pouring the leveler, especially on porous wood or concrete subfloors, you must apply a primer. This prevents the subfloor from sucking the water out of the compound too quickly, which can cause it to dry improperly and fail to bond. Always follow the specific instructions from the compound manufacturer, like those from Ardex or Henry, for best results[4].
Acclimation: Don’t Skip This 48-Hour Step!
WARNING: Failure to acclimate your flooring is one of the leading causes of installation failure and will void your product warranty.
Your hybrid flooring needs to adjust to the normal temperature and humidity conditions of the room where it will be installed.
- Bring the unopened boxes of flooring into the installation room.
- Lay them flat on the floor, leaving air space between them.
- Let them sit for a minimum of 48-72 hours before you begin the installation.
Skipping this step can cause the planks to expand or contract significantly after installation, leading to severe buckling or gapping.
Phase 3: The Main Event: A Step-by-Step Installation Walkthrough
With all the preparation done, it’s time for the rewarding part: laying the floor. This guide provides a general process for a standard click-lock floating floor installation.
CRITICAL NOTE: Always read and follow the specific installation guide provided by your flooring manufacturer. Their manual is the final authority for your product and is required for warranty compliance. This guide is meant to supplement, not replace, those instructions[5].
Step 1: Laying the First Row (The Most Important Row)
A straight first row is the foundation for the entire floor.
- Plan Your Layout: Generally, you should lay planks parallel to the longest wall in the room.
- Check the Last Row: Measure the width of the room and divide it by the width of one plank. If the last row will be less than half the width of a plank, you should cut down (rip) your first row of planks to make the first and last rows more equal in size. This creates a more balanced, professional look.
- Establish a Straight Line: Do not assume your wall is straight. Measure out from the wall at both ends the width of one plank plus the expansion gap, and snap a chalk line between these points. This is your guide for the first row.
- Use Spacers: Place 1/4 inch to 1/2 inch spacers against the wall. This maintains the critical expansion gap, which allows the floor to expand and contract with seasonal changes.
- Lay the First Row: Lay the first plank in a corner with the tongue side facing the wall. Click the next plank into the short end of the first and continue across the room, ensuring the entire row is perfectly aligned with your chalk line.
Step 2: Cutting Planks Like a Pro
Clean, accurate cuts are essential.
- Cross-Cuts: A miter saw provides the fastest, cleanest, and most accurate way to cut planks to length at the end of a row.
- Rip-Cuts: For cutting planks lengthwise (for the last row), a table saw is best, but a jigsaw or circular saw with a guide can also work.
- Complex Cuts: For cutting around vents, pipes, or corners, use a jigsaw. A good tip is to make a cardboard template of the shape first, trace it onto the plank, and then cut. Remember the golden rule: measure twice, cut once.
Step 3: Clicking, Tapping, and Staggering Planks
This is where your floor will start to come together quickly.
- Stagger Your Seams: Start your second row with the piece you cut off from the last plank of the first row (as long as it’s at least 6-8 inches long). This ensures your end joints are staggered, which is crucial for both structural integrity and visual appeal. Avoid creating “H” patterns where joints line up close together.
- Connect the Planks: Insert the long tongue of the new plank into the groove of the plank in the previous row at a slight angle. Lower the plank until it locks into place.
- Tap it Tight: To close the gap on the short end, use your tapping block and rubber mallet. Place the block against the edge of the new plank and give it a few firm-but-controlled taps until the seam is tight and flush. A great pro tip is to use a small piece of scrap flooring as your tapping block; its groove will perfectly fit over the tongue of the new plank, preventing any damage.
Step 4: Conquering Obstacles: Door Jambs, Vents, and Odd Corners
Tricky spots are what separate a DIY job from a pro job.
- Door Jambs: This is where the oscillating multi-tool shines. Place a piece of scrap flooring next to the door jamb to act as a height guide. Rest the blade of the multi-tool flat on the scrap piece and cut horizontally through the jamb. This will remove a small section at the bottom, allowing your new flooring plank to slide underneath for a perfectly clean, seamless look.
- Odd Corners & Shapes: For pipes or other irregular shapes, a contour gauge is your best friend. This tool has a series of pins that conform to any shape. Press it against the obstacle, then transfer the outline onto your plank for a perfect cut with your jigsaw.
Phase 4: The Professional Finish: Trim, Transitions, and Sealing
The job isn’t done until the finishing touches are in place. These final steps hide expansion gaps, create smooth transitions, and complete the waterproof system.
Installing Baseboards and Quarter Round
After the floor is laid, you can remove the spacers. The expansion gap you left will now be covered by molding.
- Baseboards: If you removed your baseboards before installation, you can now reinstall them using a brad nailer. Make sure the baseboard sits snugly on top of the new floor but is nailed into the wall, not the floor.
- Quarter Round: If you left your baseboards in place, you will need to install quarter-round molding to cover the gap. This small, curved trim piece sits at the base of the baseboard and is also nailed into the baseboard/wall, never into the floating floor.
Creating a Truly Waterproof System in Bathrooms and Kitchens
While the planks themselves are waterproof, the perimeter is a potential weak point in wet areas like bathrooms and kitchens. To create a complete waterproof system, you must seal the edges. The principles for creating a watertight seal are well-established by experts in waterproofing, such as those outlined in the Tile Council of North America (TCNA) handbook[6].
After your molding is installed, apply a thin bead of 100% silicone sealant in the small gap between the molding and the floor. Also, apply sealant around any fixtures like toilets, tubs, or cabinet bases. This crucial final step prevents water from getting under the floor at the edges, ensuring the integrity of your installation for years to come.
The 7 Deadly Sins of DIY Flooring Installation (and How to Atone)
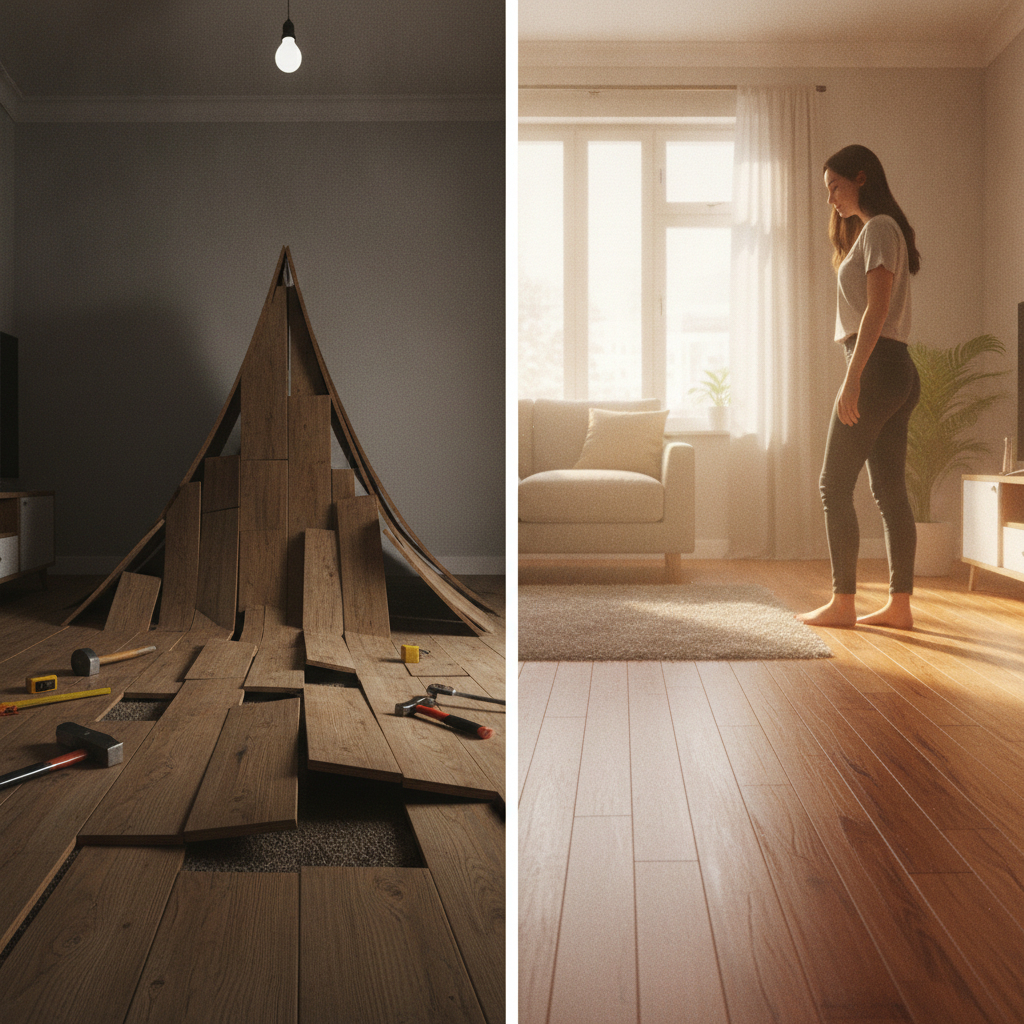
We’ve consulted with certified flooring installers to compile the most common—and costly—mistakes DIYers make. Avoid these sins to ensure your project is a success.
Sin #1: Ignoring the Subfloor. Sin #2: Skipping Acclimation…
- Bad Subfloor Prep: Cause: Rushing to install. Symptom: Bouncy spots, squeaks, and broken plank joints over time. An uneven subfloor can cause planks to flex, squeak, and break. Prevention: Follow the subfloor prep phase meticulously. A flat subfloor is non-negotiable.
- Skipping Acclimation: Cause: Impatience. Symptom: Severe gapping in winter (contraction) or buckling/peaking in summer (expansion). Prevention: Acclimate the flooring in the room for at least 48 hours. No exceptions.
- Forgetting the Expansion Gap: Cause: Laying planks tight against the walls. Symptom: A buckled, tent-like floor as it expands with nowhere to go. Failure to leave a proper expansion gap is the #1 cause of floor buckling. Prevention: Use 1/4″ to 1/2″ spacers on all sides.
- A Crooked First Row: Cause: Trusting that the starting wall is straight. Symptom: Gaps that get progressively wider as you move across the room, resulting in a crooked and unprofessional finish. Prevention: Use a chalk line to ensure a perfectly straight start.
- Not Staggering Seams: Cause: Using a predictable pattern or not planning cuts. Symptom: A weak floor with visible “H” patterns that looks cheap and amateur. Prevention: Stagger end joints by at least 6-8 inches between rows.
- Damaging Planks During Install: Cause: Using a hammer directly on the plank or an improper tapping block. Symptom: Chipped or broken tongues and grooves, leading to weak seams and gaps. Prevention: Use a proper tapping block or a piece of scrap flooring.
- Not Reading the Instructions: Cause: Assuming all click-lock floors are the same. Symptom: Voiding the warranty by using the wrong underlayment, not putting down a vapor barrier on concrete, or using an unapproved cleaning method. Prevention: Read the manufacturer’s installation guide from start to finish before you begin. It is the ultimate rulebook for your specific product. Insights from the Certified Flooring Installers Association confirm that this is a primary source of installation failures[7].
Your Flawless Floor Awaits
By investing in meticulous preparation, following a methodical step-by-step process, and adding those professional finishing touches, you have successfully navigated the path to a flawless DIY flooring installation. You’ve done more than just lay a floor; you’ve enhanced your home’s beauty, increased its value, and gained the immense satisfaction of a job well done. You are now equipped with the knowledge to create a durable, beautiful, and truly waterproof floor that you and your family will enjoy for years.
Feeling confident? Explore our full range of waterproof hybrid hardwood flooring to find the perfect style for your home. Don’t forget to share your finished project photos with us on social media!
Disclaimer: This article provides general guidance. Always follow the specific installation instructions provided by your flooring manufacturer to ensure warranty compliance. Use appropriate safety gear, including safety glasses and knee pads, when using power tools.
References
- National Wood Flooring Association. (N.D.). Installation Guidelines and Specifications. Retrieved from the official NWFA website.
- SCS Global Services. (N.D.). FloorScore®. Retrieved from the official SCS Global Services website.
- ASTM International. (N.D.). ASTM F2170 – 19 – Standard Test Method for Determining Relative Humidity in Concrete Floor Slabs Using in situ Probes. Retrieved from www.astm.org.
- Ardex Americas. (N.D.). Technical Data Sheets for Self-Leveling Underlayments. Retrieved from the official Ardex website.
- Flooring Manufacturer Installation Guidelines (e.g., Mohawk, Shaw). (N.D.). Retrieved from the respective manufacturers’ official websites.
- Tile Council of North America. (N.D.). TCNA Handbook for Ceramic, Glass, and Stone Tile Installation. Retrieved from the official TCNA website.
- Certified Flooring Installers Association. (N.D.). Installation Standards and Resources. Retrieved from the official CFI website.
