
Choosing the right flooring for your kitchen or bathroom is one of the most high-stakes decisions you’ll make as a homeowner. These aren’t just high-traffic areas; they’re high-moisture battlegrounds where the wrong choice can lead to costly disasters. The fear of water damage, warped planks, peeling seams, and the creeping dread of hidden mold is real. You’re bombarded with marketing hype about “water-resistant” versus “waterproof,” leaving you uncertain and afraid of making a mistake that could cost you thousands.
This is not another list of pretty pictures. This is your definitive homeowner’s playbook for selecting, installing, and bulletproofing your kitchen and bathroom floors. We’re cutting through the noise to give you data-driven comparisons, expert-backed checklists, and the pro-level advice you need to make a confident, failure-proof flooring investment.
We will explore why “waterproof” is the only standard that matters in these rooms, compare the top material contenders side-by-side, take a deep dive into innovative options like Bravewood hybrid hardwood, and provide you with the essential installation knowledge and emergency guides to protect your home for years to come.
- Why ‘Waterproof’ is Non-Negotiable in Kitchens and Bathrooms
- The Material Showdown: Top Waterproof Flooring Options Compared
- Deep Dive: Is Bravewood Hybrid Hardwood Right for Your Bathroom?
- Installation is Everything: How to Bulletproof Your New Floor
- Emergency Guide: Diagnosing and Fixing Water Damaged Floors
- Frequently Asked Questions (FAQ)
- Your Foundation for a Worry-Free Home
- References & Authoritative Sources
Why ‘Waterproof’ is Non-Negotiable in Kitchens and Bathrooms
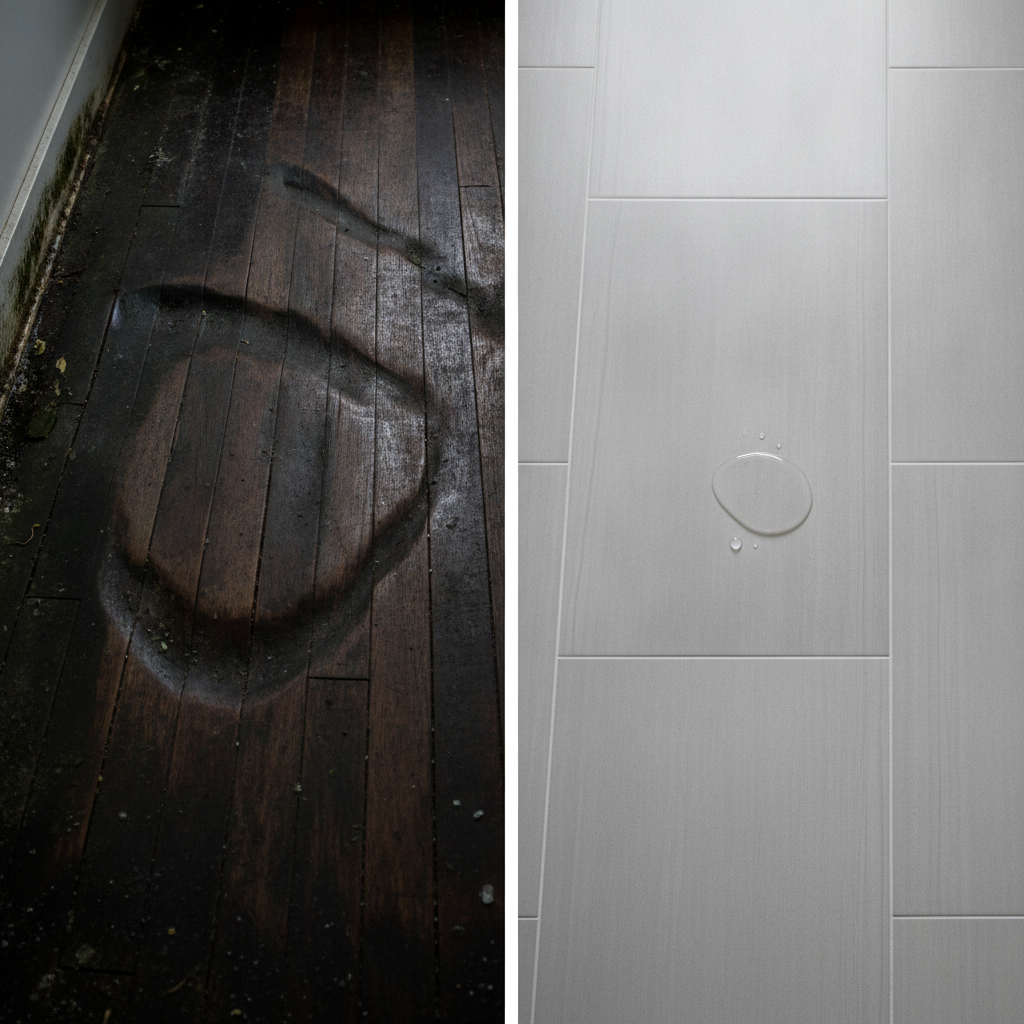
In the world of flooring, the terms “water-resistant” and “waterproof” are not interchangeable. Water-resistant flooring can handle topical spills if they’re wiped up quickly, but it has a breaking point. Waterproof flooring, on the other hand, is designed to be impervious to water from the top down, providing a critical line of defense against the unique challenges of kitchens and bathrooms. Ignoring this distinction can lead to a cascade of expensive and stressful problems.
The financial toll of water-related issues is staggering. Across the country, water damage and subsequent mold growth cost the insurance industry an estimated $2.5 billion every year.1 What starts as a small leak from a dishwasher or a splash from the tub can quickly escalate. According to guidelines from restoration experts like the Institute of Inspection, Cleaning and Restoration Certification (IICRC), mold can begin to grow on damp surfaces within just 24 to 48 hours.2
For homeowners who choose traditional wood flooring, the results of moisture intrusion are visually alarming. You may notice your floorboards beginning to change shape. This is typically either “cupping,” where the edges of the board are higher than its center, or “crowning,” where the center of the board is bowed upward. According to the National Wood Flooring Association (NWFA), cupping is usually caused by a moisture imbalance where the bottom of the board is wetter than the top (often from a damp subfloor), causing the underside to expand. Crowning is often the reverse, caused by surface moisture, or sometimes as a result of sanding a cupped floor before it has fully dried.3 Both are clear signs of kitchen floor water damage or bathroom flooring moisture problems that a truly waterproof material is designed to prevent.
The Hidden Culprits: Beyond Spills and Splashes
While a burst pipe or overflowing sink is an obvious disaster, the more common enemy of your floors is often slow and silent. Chronic moisture issues, if left unchecked, can cause just as much damage over time. This is a critical content gap many guides overlook, but it’s essential for preventing long-term failure.
One of the most frequent questions homeowners ask is, “Why is my bathroom floor always wet around the toilet?” A licensed plumber will tell you this is often a sign of a slow, persistent leak from a faulty wax ring or loose supply line connections. These small drips can saturate the subfloor, leading to rot and creating a perfect environment to prevent mold under flooring.
Beyond leaks, high ambient humidity is a major threat. A bathroom without proper ventilation can trap steam from hot showers, leading to condensation that settles on every surface, including the floor. The Environmental Protection Agency (EPA) recommends keeping indoor humidity levels between 30% and 50% to prevent mold growth.4 A simple way to check if your bathroom exhaust fan is doing its job is the “tissue test.” Turn the fan on and hold a single square of toilet tissue up to the vent. If the fan can hold the tissue in place, it’s likely working effectively. If the tissue falls, your fan is not moving enough air, and it may be time for a cleaning or replacement.
The Material Showdown: Top Waterproof Flooring Options Compared
Navigating the world of waterproof flooring can be overwhelming. To simplify your decision, we’ve broken down the top three contenders, rating them on the key performance indicators that matter most in a kitchen or bathroom. This data-driven approach will help you choose the best waterproof flooring for your specific needs.
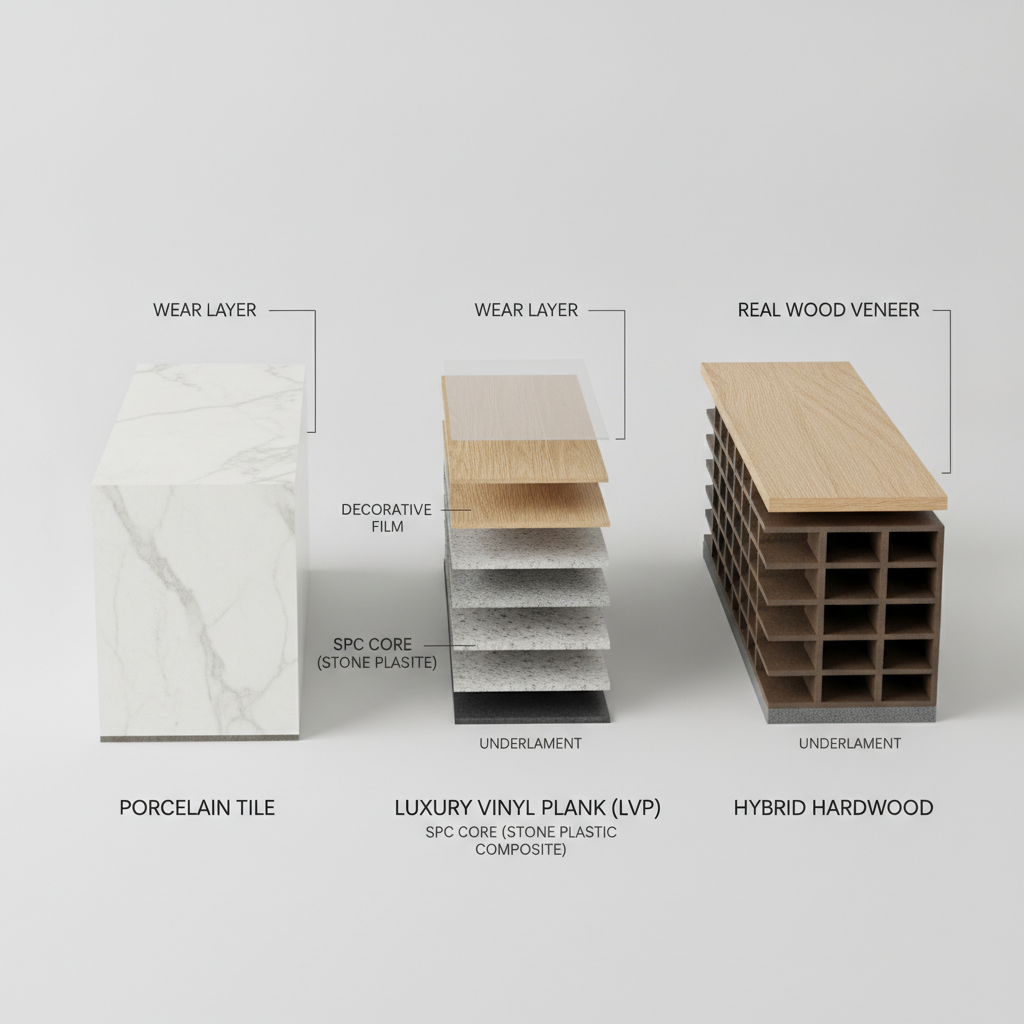
Kitchen & Bathroom Flooring Durability Scorecard
Here’s how our top materials stack up. (Ratings are on a 1-5 scale, with 5 being the best).
- Porcelain Tile:
- Waterproof Rating: 5/5 (Impervious)
- Scratch Resistance: 5/5
- Dent/Impact Resistance: 4/5 (Can crack with heavy impact)
- Stain Resistance: 5/5
- Luxury Vinyl Tile/Plank (LVT/LVP):
- Waterproof Rating: 5/5 (With SPC/WPC core)
- Scratch Resistance: 4/5 (Dependent on wear layer)
- Dent/Impact Resistance: 4/5
- Stain Resistance: 5/5
- Hybrid Hardwood:
- Waterproof Rating: 5/5 (Core is waterproof; veneer is wood)
- Scratch Resistance: 3.5/5 (Veneer can scratch like real wood)
- Dent/Impact Resistance: 4/5
- Stain Resistance: 4/5
Option 1: Porcelain & Ceramic Tile
For decades, tile has been the undisputed king of wet areas, and for good reason. It offers unmatched durability and is completely unaffected by water. However, not all tile is created equal.
Porcelain and ceramic are the two main choices. The key difference lies in their water absorption rate. According to standards from the Tile Council of North America (TCNA), porcelain tile has a water absorption rate of less than 0.5%, making it truly impervious to water and the superior choice for any bathroom or kitchen.5
When selecting tile for a high-traffic kitchen, look for its PEI rating, a scale developed by the Porcelain Enamel Institute that measures the abrasion resistance of the glaze.6 A PEI rating of 4 is suitable for heavy residential traffic, while a rating of 5 is tough enough for commercial use, making either an excellent choice for a durable kitchen flooring.
A common failure point for tile isn’t the tile itself, but the grout. Traditional cement-based grout is porous and can stain or harbor mildew. For maximum durability, consider using an epoxy grout, which is non-porous, chemically resistant, and far more difficult to stain.
Option 2: Luxury Vinyl Flooring (LVT/LVP)
Luxury vinyl has exploded in popularity, now holding over 32% of the resilient flooring market, largely due to its combination of stunningly realistic visuals and 100% waterproof performance. It offers a warmer, more comfortable feel underfoot compared to tile.
The durability of luxury vinyl plank is primarily determined by its top “wear layer,” which is measured in mils (one-thousandth of an inch). For a busy kitchen or primary bathroom, a wear layer of 20 mil or higher is recommended. This commercial-grade thickness provides superior protection against scratches, scuffs, and dents.
The core of the plank is also critical. Modern LVT features either a WPC (Wood Polymer Composite) or SPC (Stone Polymer Composite) core. While both are waterproof, SPC is denser and more rigid, offering better resistance to dents from dropped pots or heavy appliances. The average cost for professionally installed LVT is between $6 and $14 per square foot, making it a competitive option.
Option 3: Waterproof Hybrid Hardwood
For homeowners who love the timeless beauty of real wood but fear its vulnerability to water, hybrid hardwood is a game-changing innovation. This flooring category perfectly answers the question, “Is hybrid hardwood good for bathrooms?” with a resounding “Yes, when chosen and installed correctly.”
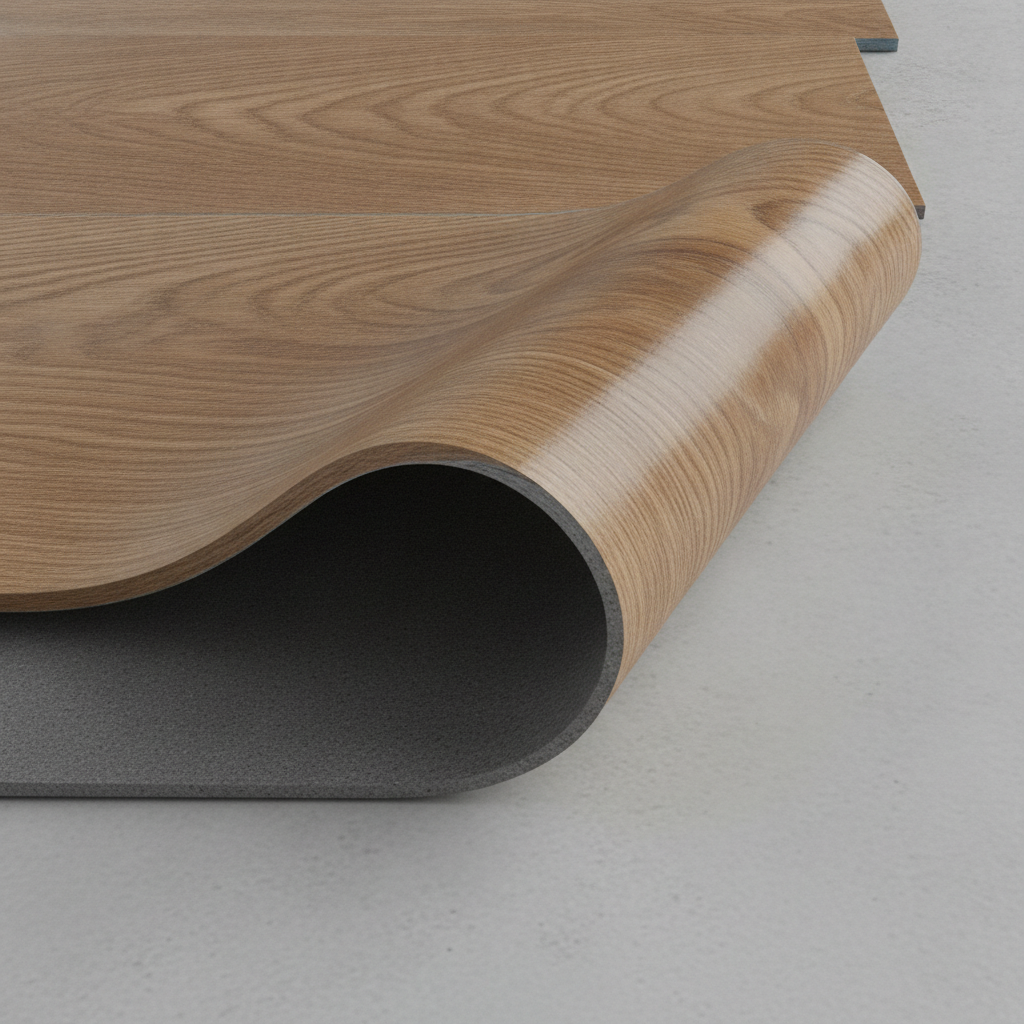
A hybrid hardwood plank is constructed with a thin veneer of real hardwood bonded to a 100% waterproof SPC core. This multi-layer design, which can be validated by organizations like the World Floor Covering Association (WFCA), provides the authentic look and feel of wood on a dimensionally stable, waterproof foundation.7 You get the best of both worlds: the organic beauty of oak, hickory, or maple without the risk of warping or cupping that plagues solid hardwood in wet environments.
Deep Dive: Is Bravewood Hybrid Hardwood Right for Your Bathroom?
Bravewood is one of the prominent brands in the hybrid hardwood space, promising the elegance of wood with waterproof peace of mind. But does it live up to the hype? We’ve analyzed specifications and aggregated homeowner reviews to give you a clear, unbiased picture.
To determine if any hybrid hardwood, including Bravewood, is right for your project, use this suitability checklist:
Hybrid Hardwood Bathroom Suitability Checklist
- Core Material: Is the core 100% SPC (Stone Polymer Composite)? This provides the best rigidity and is completely waterproof. (Bravewood uses an SPC core).
- Veneer Thickness: How thick is the real wood layer? Thicker veneers (e.g., 1.2mm) may offer a more premium feel but can be more susceptible to surface scratches than the protective coating on LVT.
- Locking System: Does it have a high-quality, tight-locking click system designed to prevent water from seeping between planks to the subfloor?
- Manufacturer Warranty: Read the fine print. Does the warranty explicitly cover installation in a full bathroom? Does it require specific installation methods, like a full-trowel moisture barrier adhesive, to be valid?
Bravewood vs. Competitors: Spec Sheet Comparison
| Feature | Bravewood (Typical) | Competitor A (e.g., Flooret) | Competitor B (e.g., Cali) |
|---|---|---|---|
| Core Type | SPC | SPC | SPC |
| Total Thickness | ~7.5 mm | ~9 mm | ~9.5 mm |
| Wear Layer | N/A (Wood Veneer) | 40 mil (Vinyl) | N/A (Wood Veneer) |
| Veneer | Real Hardwood | N/A (Printed Vinyl) | Real Hardwood |
| Warranty | Lifetime Residential | Lifetime Residential | 50-Year Residential |
Real-World Performance: What Homeowners Are Saying
To get past the marketing, we synthesized reviews from flooring-focused consumer forums like Houzz and retailer product pages.8 The consensus on Bravewood and similar hybrid products is largely positive, with some important nuances.
Pros:
- Unbeatable Aesthetics: Users consistently praise the product for looking and feeling like real hardwood, something LVT cannot fully replicate.
- Waterproof Core: Homeowners report peace of mind, noting that spills and splashes from tubs and sinks do not affect the planks.
Common Complaints & Considerations:
- Surface Scratches: The most common complaint is that the real wood veneer, while protected by a factory finish, can scratch more easily than a high-quality LVT with a 20+ mil wear layer. It behaves like a prefinished engineered hardwood floor on the surface.
- Installation Sensitivity: Some negative reviews stem from installation errors, not product failure. This highlights the absolute necessity of a perfectly flat subfloor and adherence to expansion gap requirements.
Long-term (3-5 year) performance reviews suggest that in bathrooms with controlled humidity and careful use, the product holds up well. However, in high-traffic kitchens with pets and kids, surface wear may become more apparent over time compared to premium LVT or porcelain tile.
Installation is Everything: How to Bulletproof Your New Floor
Even the most advanced waterproof flooring can fail if not installed correctly. The difference between a floor that lasts a lifetime and one that fails in a year often comes down to proper preparation and technique. This advice, curated from certified flooring installers, is your guide to success.
Before you begin, ensure you have the right equipment.
DIY Installation: Tools & Materials Checklist
- Safety: Safety Glasses, Gloves
- Measurement: Tape Measure, Carpenter’s Square
- Cutting: Jigsaw or Miter Saw (with appropriate blade), Utility Knife
- Installation: Tapping Block, Pull Bar, Spacers (1/4″ – 1/2″)
- Subfloor Prep: Level, Moisture Meter, Floor Scraper, Leveling Compound (if needed)
Step 1: Subfloor Preparation – The Foundation of Success
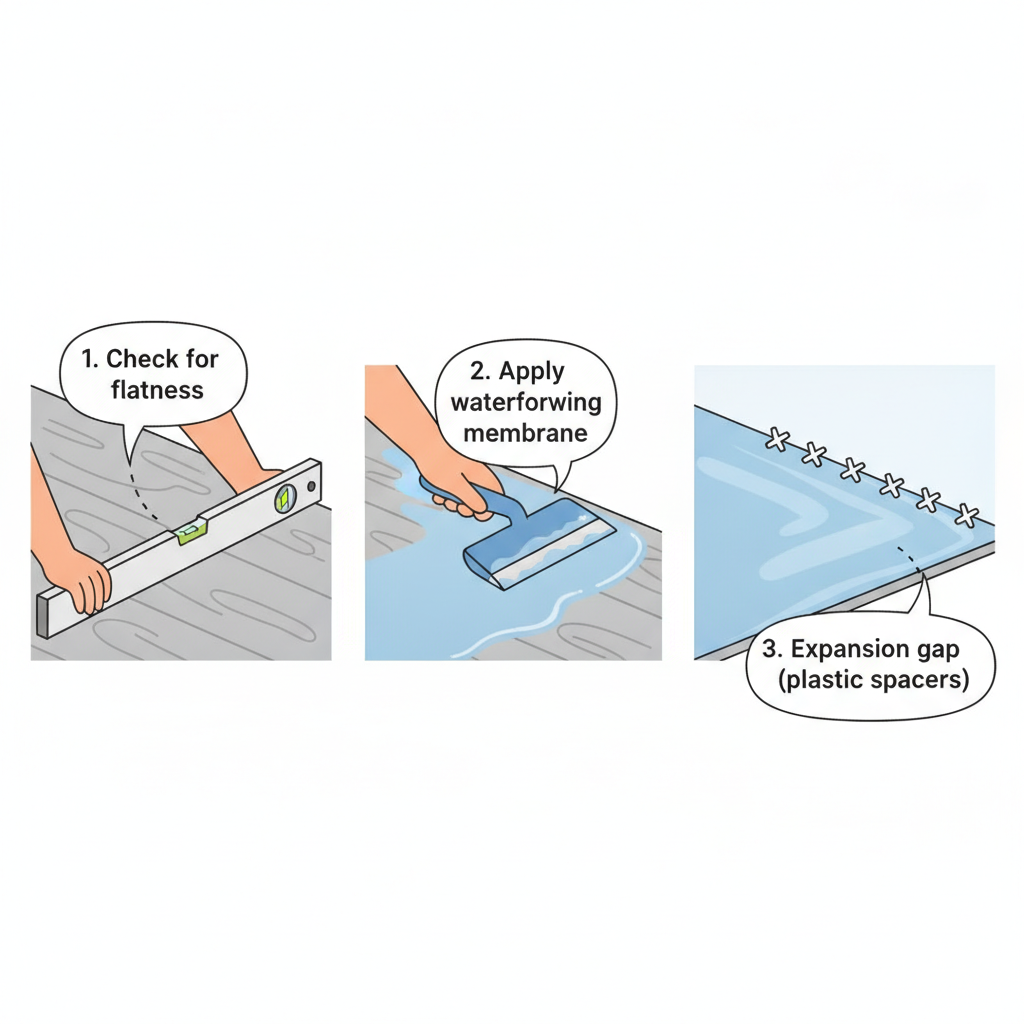
This is the most important step. Your new flooring is only as good as the surface it’s installed over. The subfloor must be clean, flat, and dry.
- Clean: Scrape away any old adhesive, paint, or debris. Vacuum thoroughly.
- Flat: According to NWFA guidelines, the subfloor should be flat to within 3/16 of an inch over a 10-foot span.3 Use a long, straight level to check for high and low spots. Grind down high spots and use a self-leveling compound to fill in low spots.
- Dry: Use a moisture meter to test your subfloor. Concrete and wood subfloors have different acceptable moisture content levels; check your flooring manufacturer’s specifications.
For bathrooms, adding a waterproofing membrane (like Schluter-DITRA or a liquid-applied membrane) over the subfloor is a professional best practice. This creates a fully waterproof “pan” that ensures even if water gets through a seam, it will never reach your home’s structure. This is a critical step often missed in basic DIY guides.
Step 2: Acclimation and Expansion Gaps
Every floating floor, including hybrid hardwood and LVT, needs to adjust to the temperature and humidity of its new environment. Most manufacturers require a 48-72 hour acclimation period. Skip this, and you risk the floor buckling or gapping after installation.
Equally important is the expansion gap. All floors expand and contract with temperature changes. You must leave a 1/4 to 1/2 inch gap between the flooring and all walls and vertical obstacles (like cabinets or pipes). This gap will be covered by baseboards or quarter-round trim. Without this space, the floor can buckle dramatically when it expands. Always refer to the specific manufacturer’s installation guide, as it is the ultimate authority for that product.
Emergency Guide: Diagnosing and Fixing Water Damaged Floors
If you’re already facing a water damage crisis, act quickly and methodically. This triage checklist can help you assess the situation and decide on the next steps.
Triage Checklist: Assess Your Kitchen Floor Water Damage in 5 Minutes
- Stop the Source: First, find and stop the source of the water.
- Assess the Water Type: Is it clean water (Category 1, from a supply line), grey water (Category 2, from a dishwasher), or black water (Category 3, from a sewage backup)? According to IICRC standards, anything other than clean water requires professional remediation due to contamination risks.2
- Check the Floor Surface:
- If your floor is tile, LVT, or hybrid hardwood: Remove all surface water immediately. Use fans to dry the area. Check for water coming up through the seams, which indicates it has gotten underneath.
- If your floor is laminate or hardwood: Is it cupping, crowning, or buckling? Is it soft or spongy to the touch?
- Check the Subfloor: If possible and safe, check the basement or crawlspace below the leak. Do you see staining or feel dampness?
- Make the Call:
- If the water was clean, the area is small, and the floor feels solid: You may be able to handle drying yourself.
- If the water was grey/black, the floor feels soft/spongy, or the leak has been active for more than 24 hours: Call a certified water damage restoration professional immediately.
If you need to file an insurance claim, document everything. Take photos and videos of the damage before any cleanup begins. Keep a log of all communication with your insurance company and any contractors.
Frequently Asked Questions (FAQ)
What is the average cost to install waterproof flooring in a kitchen?
The cost varies widely by material. For professionally installed flooring, you can expect to pay approximately $6-$14 per square foot for luxury vinyl, $8-$20 for porcelain tile, and $9-$18 for hybrid hardwood.
Can you install waterproof flooring over an existing floor?
In many cases, yes. LVT and hybrid hardwood are often installed as “floating floors” over existing hard surfaces like old vinyl or tile, provided the existing floor is clean, flat, and well-adhered. However, you should never install a new floor over a damaged or moisture-compromised floor. Always check the manufacturer’s specific instructions.
Are there any eco-friendly waterproof flooring options?
Yes. Porcelain tile is made from natural clay and is extremely long-lasting. Many LVT and hybrid hardwood brands are also focusing on sustainability by using recycled materials in their cores and achieving certifications like FloorScore for low-VOC (volatile organic compound) emissions, which contributes to better indoor air quality.
Your Foundation for a Worry-Free Home
Choosing the right flooring for your kitchen and bathroom is an investment in your home’s longevity and your own peace of mind. The key takeaways are clear: select a material that is truly waterproof, not just resistant; recognize that the best product is only as good as its installation; and understand what makes a floor truly durable.
By moving beyond the marketing brochures and using data-driven comparisons, you can confidently choose between the impenetrable durability of porcelain tile, the versatile and warm luxury of LVT, or the authentic wood beauty of hybrid hardwood. This guide has equipped you to make a smart, long-term decision that will protect your home from water damage for decades.
Ready to start your project? Use our ‘Material Durability Scorecard’ to compare your top choices and download the ‘Installation Checklist’ to ensure a perfect, waterproof result.
This article provides informational guidance. Always consult with a certified flooring professional and follow manufacturer-specific installation instructions for your chosen product. Recommendations are not a substitute for professional advice tailored to your home’s specific conditions.
References & Authoritative Sources
- Insurance Information Institute. (n.d.). Facts + Statistics: Water and fire damage. Retrieved from https://www.iii.org/fact-statistic/facts-statistics-water-and-fire-damage
- Institute of Inspection, Cleaning and Restoration Certification (IICRC). (n.d.). IICRC Standard for Water Damage Restoration (S500). Retrieved from https://www.iicrc.org/
- National Wood Flooring Association (NWFA). (n.d.). Technical Publication C200: Problems, Causes, and Cures. Retrieved from https://www.nwfa.org/
- Environmental Protection Agency (EPA). (n.d.). A Brief Guide to Mold, Moisture, and Your Home. Retrieved from https://www.epa.gov/mold/brief-guide-mold-moisture-and-your-home
- Tile Council of North America (TCNA). (n.d.). ANSI A137.1 American National Standard Specifications for Ceramic Tile. Retrieved from https://www.tcnatile.com/
- Porcelain Enamel Institute (PEI). (n.d.). PEI Rating System for Ceramic Tile.
- World Floor Covering Association (WFCA). (n.d.). Flooring Resources and Information. Retrieved from https://wfca.org/
- Houzz Inc. (n.d.). Discussions and Reviews. Retrieved from https://www.houzz.com/discussions
