
Do you love the timeless, elegant look of hardwood floors but dread the reality of scratches, dents, and the constant fear of water damage? For decades, homeowners have faced this frustrating dilemma: choose the beauty of wood and accept its fragility, or sacrifice aesthetics for the durability of a less authentic alternative. That compromise is now a thing of the past.
Enter waterproof hybrid hardwood flooring—the modern, innovative solution that delivers the best of both worlds. It combines a genuine layer of real hardwood with a technologically advanced waterproof core, creating a floor that is as resilient as it is beautiful. This article is your definitive, end-to-end playbook for mastering this revolutionary flooring. We will guide you through every step of the journey, from understanding its unique construction and choosing the right product to executing a flawless DIY installation and mastering its simple, long-term care. By the end, you’ll be a confident expert, ready to enjoy a lifetime of stunning, worry-free floors.
- What is Waterproof Hybrid Hardwood? The Ultimate Durable Hardwood Alternative
- The Ultimate Pre-Installation Checklist: Preparing for a Flawless DIY Project
- How to Install Waterproof Hybrid Hardwood: A Step-by-Step DIY Guide
- Long-Term Care: Keeping Your Hybrid Hardwood Floors Pristine
- Waterproof Hybrid Hardwood in Action: Best Use Cases
- Frequently Asked Questions (FAQ)
- Conclusion
- References & Authoritative Sources
What is Waterproof Hybrid Hardwood? The Ultimate Durable Hardwood Alternative
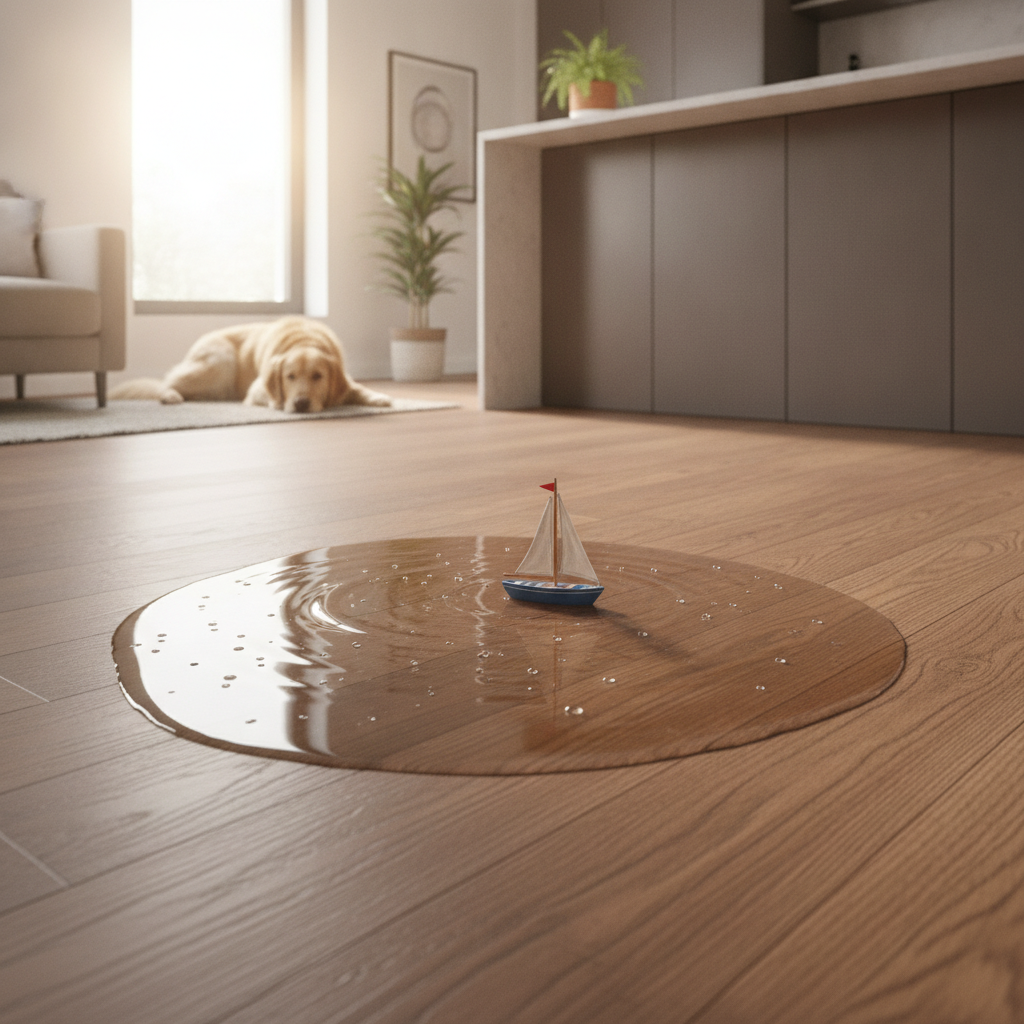
Waterproof hybrid hardwood is an engineered flooring product designed to solve the biggest problems of traditional solid hardwood. It offers the authentic grain, texture, and beauty of real wood because the top layer is real wood. However, this thin veneer is bonded to a rigid, 100% waterproof core, making the entire plank impervious to water from top to bottom. This construction creates a durable hardwood alternative that stands up to the demands of modern life, from kitchen spills and pet accidents to the ambient moisture of a basement. It effectively eliminates the risk of water damaged wood floors, a common and costly issue with traditional materials.
Pro-Panel Insight: Why Experts Recommend Hybrid
“Clients always ask for the look of hardwood in their kitchens and basements, but I used to hesitate to recommend it. With waterproof hybrid hardwood, that hesitation is gone. It provides the seamless, high-end wood look they want with the performance and peace of mind they need. It’s a true problem-solver for modern, open-concept living.”
– A leading interior designer
The Anatomy of a Hybrid Plank: Deconstructing the Layers of Durability
The remarkable performance of hybrid hardwood flooring comes from its multi-layered construction. Each layer serves a specific purpose, working together to create a floor that is beautiful, stable, and incredibly tough.
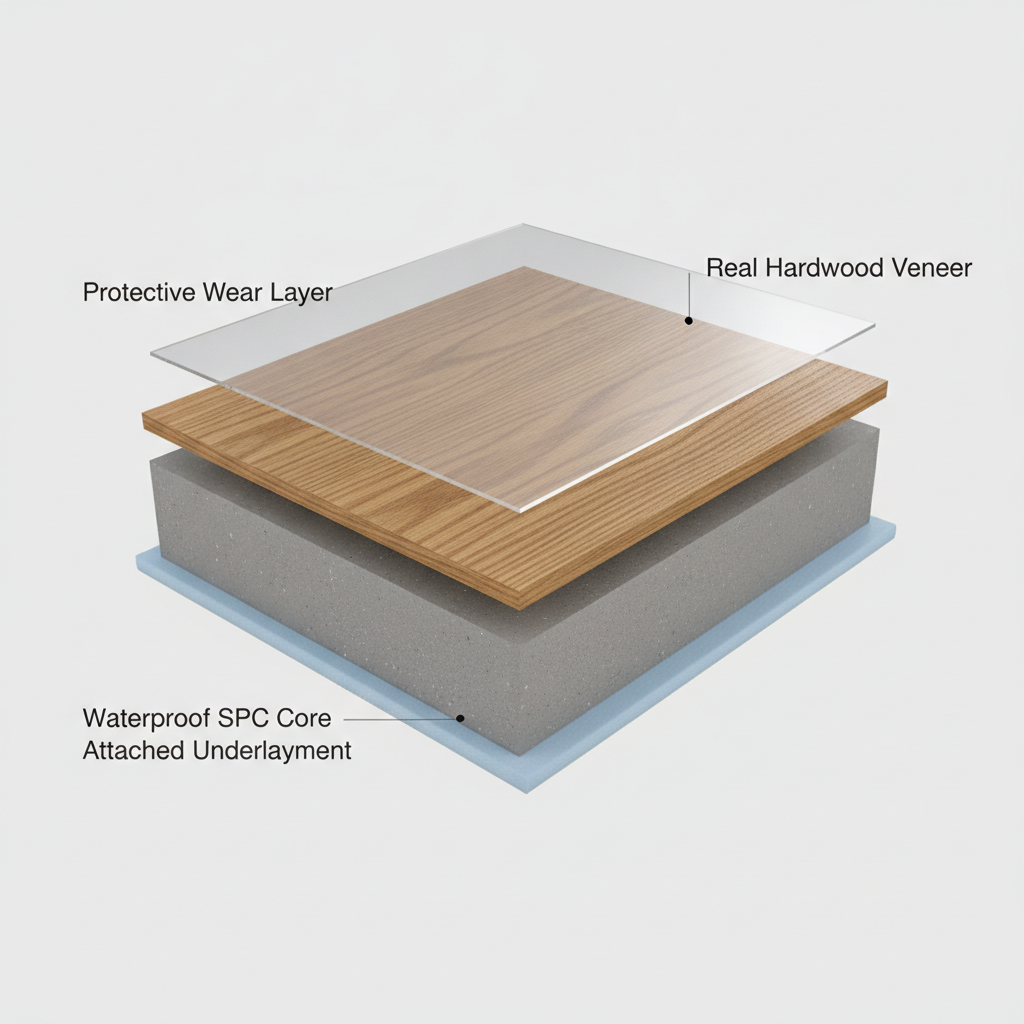
- Protective Wear Layer: The top is finished with multiple coats of a highly durable, UV-cured aluminum oxide finish. This transparent layer is the floor’s first line of defense against scratches, scuffs, stains, and fading.
- Real Hardwood Veneer: Just beneath the finish is a thin but authentic layer of real hardwood (e.g., oak, hickory, maple). This is what gives the floor its unique character, grain patterns, and natural beauty—something printed vinyl floors can only imitate.
- Waterproof Composite Core: This is the heart of the plank and the source of its “hybrid” nature. The wood veneer is bonded to a high-density core, typically an SPC (Stone Polymer Composite) or WPC (Wood Polymer Composite) core. This core is 100% waterproof, will not swell or warp when exposed to moisture, and provides exceptional dimensional stability and dent resistance.
- Attached Underlayment (Optional): Many hybrid hardwood products come with a pre-attached acoustic pad. This layer provides cushioning for comfort underfoot, reduces sound transmission, and can save a step during installation.
The durability of the wear layer is often measured in mils (thousandths of an inch). High-quality residential products typically feature wear layers of 12 to 20 mils or more. Furthermore, these products are often subjected to rigorous testing according to standards set by organizations like ASTM International to ensure they meet claims for abrasion and impact resistance[1].
Hybrid Hardwood vs. The Competition: A Head-to-Head Comparison
When choosing a durable hardwood alternative, the options can be overwhelming. To clarify your choice, here is a head-to-head comparison—our Flooring Performance Scorecard—pitting waterproof hybrid hardwood against its main competitors.
Flooring Performance Scorecard
| Feature | Waterproof Hybrid Hardwood | Luxury Vinyl Plank (LVP) | Engineered Hardwood | Solid Hardwood |
|---|---|---|---|---|
| Water Resistance | ⭐⭐⭐⭐⭐ (100% Waterproof Core) | ⭐⭐⭐⭐⭐ (100% Waterproof) | ⭐⭐ (Water-resistant top, but wood core can swell) | ⭐ (Highly susceptible to damage) |
| Scratch Durability | ⭐⭐⭐⭐ (Strong wear layer, but wood can scratch) | ⭐⭐⭐⭐ (Very strong wear layer, but can be gouged) | ⭐⭐⭐ (Varies by finish; wood can scratch) | ⭐⭐ (Scratches and dents easily) |
| DIY-Friendliness | ⭐⭐⭐⭐ (Click-lock system is straightforward) | ⭐⭐⭐⭐⭐ (Very easy to cut and install) | ⭐⭐⭐ (Can be click-lock, glue, or nail-down) | ⭐ (Requires professional tools and skill) |
| Feel Underfoot | ⭐⭐⭐⭐ (Solid, quiet feel, especially with attached pad) | ⭐⭐⭐ (Can feel thin and less substantial) | ⭐⭐⭐⭐ (Feels like real wood) | ⭐⭐⭐⭐⭐ (The gold standard for feel and sound) |
| Maintenance Ease | ⭐⭐⭐⭐ (Easy to clean, no special products needed) | ⭐⭐⭐⭐⭐ (Extremely easy to clean) | ⭐⭐ (Requires specific wood cleaners, careful with water) | ⭐ (High maintenance, sensitive to cleaners and water) |
| Authenticity | ⭐⭐⭐⭐⭐ (Real wood top layer) | ⭐⭐ (Realistic photo layer, but not real wood) | ⭐⭐⭐⭐⭐ (Real wood top layer) | ⭐⭐⭐⭐⭐ (100% real wood) |
As industry publications like Floor Trends Magazine note, the key differentiator for hybrid hardwood is its ability to deliver true wood authenticity without the moisture vulnerability of engineered or solid hardwood[2].
The Ultimate Pre-Installation Checklist: Preparing for a Flawless DIY Project
A successful DIY flooring installation is 90% preparation. Rushing this stage is the most common mistake homeowners make. By taking the time to gather the right tools and properly prepare your subfloor, you set the stage for a smooth, professional-looking result that will last for decades.
To help you get started, we’ve created a comprehensive, downloadable DIY Installation Project Planner. Link to downloadable PDF checklist
According to the National Wood Flooring Association (NWFA), “a properly prepared subfloor is the foundation of any successful flooring installation. Skipping steps like leveling or moisture testing can lead to floor failure, regardless of the quality of the flooring material itself”[3].
Essential Tools and Materials You’ll Need
Having the right tools on hand before you begin will save you time and frustration. Here’s what you’ll need for a typical click-lock hybrid hardwood installation:
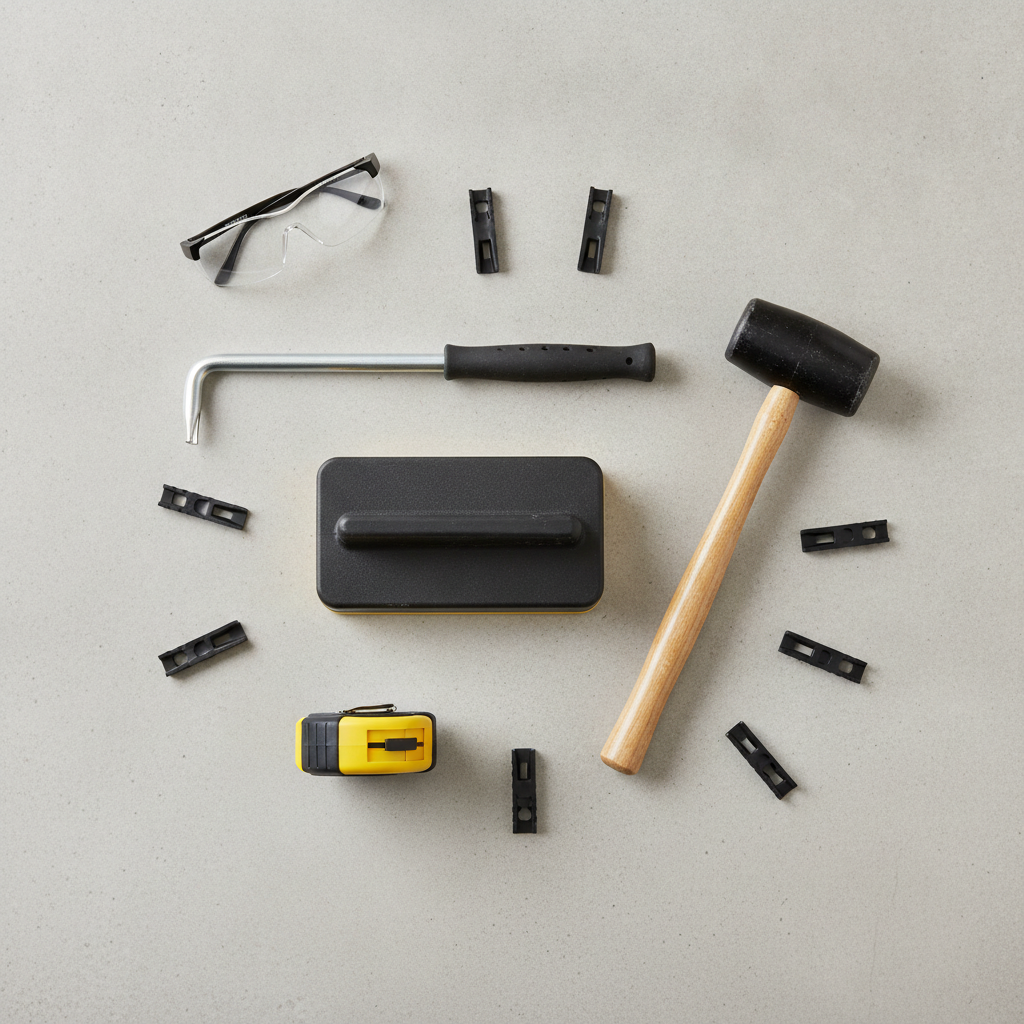
- Safety Gear: Safety glasses and gloves are essential.
- Measuring & Marking: Tape measure, pencil, combination square.
- Cutting: Miter saw (for clean, straight cuts), jigsaw (for curved or L-shaped cuts), and a jamb saw or oscillating multi-tool (for undercutting door casings). A simple utility knife can also be used for some cuts on certain products.
- Installation: Tapping block, pull bar, rubber mallet, and 1/4″ spacers for expansion gaps.
- Subfloor Prep: Floor scraper (for removing old adhesive), level or long straightedge, and a shop vacuum.
- Moisture Testing: A concrete moisture meter (for basement installations).
For tips on using specialized tools like a jamb saw, resources like Family Handyman offer excellent video tutorials and guides[4].
Subfloor Preparation: The Most Critical Step for Success
Your new floor is only as good as the surface it’s installed over. The goal is a subfloor that is perfectly clean, flat, and dry.
- Clean: Scrape away any old glue, drywall compound, or debris. Sweep and vacuum the entire area thoroughly.
- Flat: The subfloor must be level to within a certain tolerance, typically 3/16 of an inch over a 10-foot span. Use a long level or straightedge to check for high and low spots. Sand down high spots and use a self-leveling compound to fill in low spots.
- Dry: This is especially critical for concrete subfloors in basements. According to The Concrete Network, concrete is porous and can transmit moisture vapor from the ground, which can get trapped under flooring[5]. Use a moisture meter to test the slab. If moisture levels are high, a 6-mil polyethylene vapor barrier must be laid down before the flooring.
You can install waterproof hybrid hardwood over existing tile, provided the tile is secure, clean, and flat. You will need to fill in the grout lines with a leveling compound to create a smooth surface.
Pro-Panel Insight: The Hidden Danger of a Damp Subfloor
“We see it all the time in our restoration work. A homeowner installs a beautiful new ‘waterproof’ floor over a concrete slab that wasn’t properly moisture-tested. The floor itself might be fine, but the trapped moisture creates a perfect breeding ground for mold and mildew underneath. Taking the time to test and install a vapor barrier isn’t just about protecting the floor; it’s about protecting your home’s air quality.”
– An IICRC-certified Water Damage Restoration Professional[6]
How to Install Waterproof Hybrid Hardwood: A Step-by-Step DIY Guide
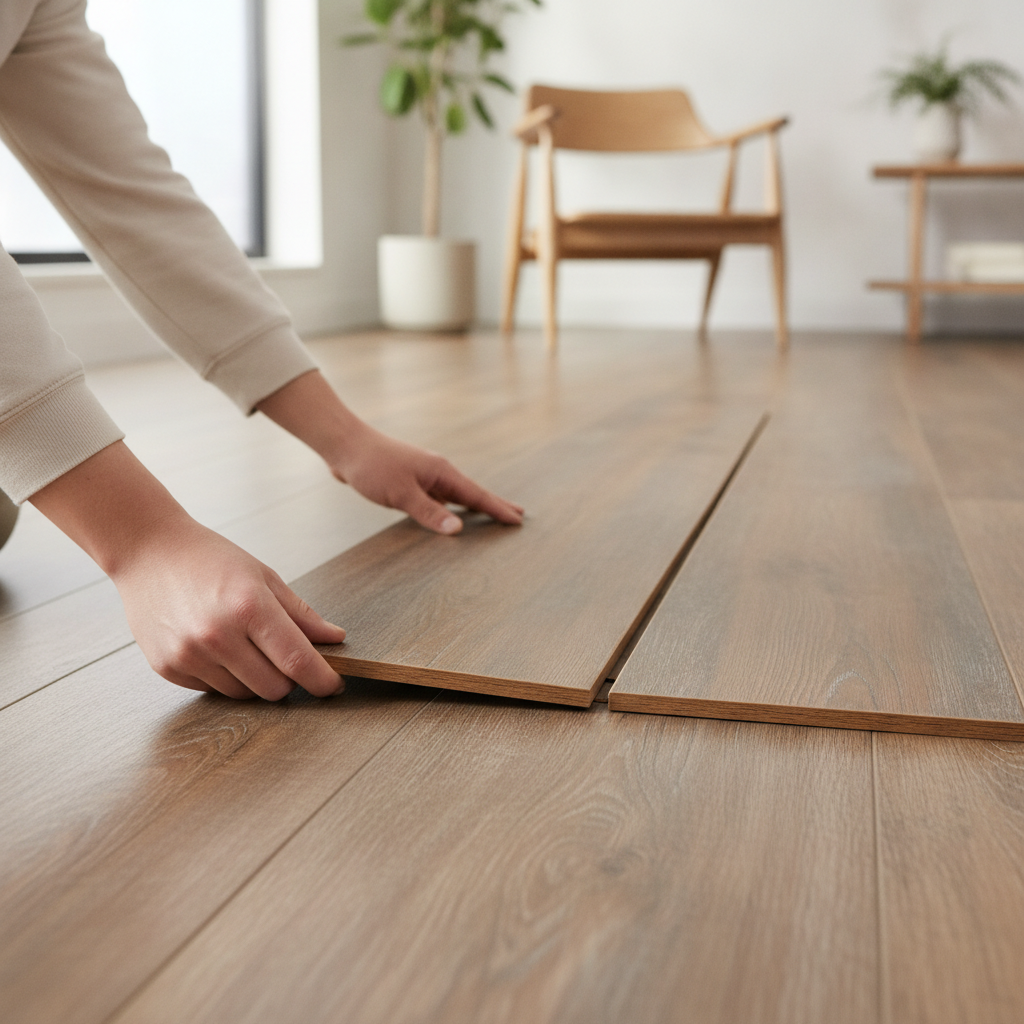
With your subfloor prepped and your tools ready, you’re ready for the most rewarding part: the installation. The click-lock system used on most hybrid hardwood makes it an excellent DIY flooring installation project. Always read the manufacturer-specific instructions that come with your flooring, but these steps cover the universal best practices recommended by the NWFA and major retailers[3].
Step 1: Acclimation and Layout Planning
Do not skip this step. The flooring needs to adjust to the normal temperature and humidity of the room where it will be installed. Most manufacturers require an acclimation period of 48-72 hours[7]. Lay the unopened boxes flat in the room, away from direct sunlight or HVAC vents.
During this time, plan your layout.
- Measure the width of the room and divide by the width of a plank. If the last row will be less than one-third of a plank’s width, you should trim the first row to make the first and last rows more equal in size.
- Decide which wall to start on. It’s usually best to lay the planks parallel to the longest wall or the main light source in the room.
- Open several boxes and mix the planks to ensure a natural-looking blend of colors and grain patterns.
Step 2: Installing the First and Subsequent Rows
The first row is the most important for a straight installation.
- Place 1/4″ spacers against the starting wall.
- Lay the first plank in a corner with the tongue side facing the wall (some installers prefer to trim the tongue off the first row for a flush fit against the spacers).
- Connect the next plank by inserting its tongue into the groove of the first plank at a slight angle and lowering it into place. Use a tapping block and mallet to gently tap the joint for a tight fit.
- Continue to the end of the row. Cut the last plank to fit, leaving a 1/4″ expansion gap.
- Start the second row with the piece you cut off from the first row (if it’s at least 6-8 inches long). This staggers the seams for a stronger, more visually appealing floor. Continue laying the floor, row by row, ensuring all seams are tight.
A professional installer’s tip: After laying the first three rows, stop and check them with a string line to ensure they are perfectly straight before continuing.
Step 3: Cutting Planks and Handling Obstacles
For most cuts, a miter saw will provide the fastest, cleanest results. The process for cutting hybrid hardwood planks is straightforward. For more complex cuts around obstacles, you’ll need a few extra tools and techniques.
- Straight Cuts: Mark your line with a pencil and square, and cut with a miter saw or jigsaw.
- Doorways: The most professional way to handle a doorway is to undercut the casing with a jamb saw. This allows you to slide the plank underneath the casing for a seamless look. For guidance on this technique, home improvement experts at This Old House provide excellent tutorials[8].
- L-Cuts & Notches: For cutting around vents, cabinets, or corners, use a jigsaw to carefully cut out the required shape.
Step 4: Managing Expansion Gaps and Finishing Touches
You must leave a 1/4-inch expansion gap around the entire perimeter of the room—along all walls, door frames, pipes, and any other fixed object. This gap allows the floor to expand and contract slightly with temperature changes. Failing to do so can cause the floor to buckle and is a common reason for manufacturers to void a warranty[7]. The spacers you placed in Step 2 will help you maintain this gap.
Once the entire floor is installed, remove all the spacers. Install your baseboards or quarter-round molding to cover the expansion gap. Install transition strips in doorways that lead to other flooring types.
Long-Term Care: Keeping Your Hybrid Hardwood Floors Pristine
One of the best features of waterproof hybrid hardwood is how easy it is to maintain. With a simple routine and the right products, you can keep your floors looking brand new for years. This is the ultimate easy to clean wood floors solution.
Pro-Panel Insight: A Professional Cleaner’s Take
“For hybrid hardwood, less is more. The biggest mistake I see is homeowners using the wrong cleaners—things with wax, oil, or vinegar—that leave a dulling residue. All you really need is a good microfiber mop and a pH-neutral cleaning solution. It’s one of the lowest-maintenance floors I work on.”
– A professional house cleaner
Your Daily, Weekly, and Monthly Cleaning Routine
A consistent routine is the best way to care for hybrid hardwood.
- Daily: Sweep with a soft-bristle broom or vacuum to remove dust and grit. If vacuuming, use a hard floor setting or a vacuum head without a beater bar, as rotating bristles can damage the finish over time.
- Weekly: Damp-mop the floor to remove any accumulated grime. Use a microfiber mop with a spray bottle of pH-neutral floor cleaner. Lightly mist a section of the floor and wipe it clean. Do not saturate the floor.
- As Needed: Clean up spills immediately with a soft cloth. While the planks are waterproof, it’s always best practice not to let liquids sit on the surface.
Experts at Consumer Reports recommend microfiber flat-head mops for their ability to effectively clean with minimal water[9].
Safe vs. Unsafe: Cleaning Products and Tools to Use (and Avoid)
Using the wrong products can damage the finish, leave a residue, or even void your warranty.
DO USE:
- Soft-bristle brooms
- Vacuums on a hard floor setting (no beater bar)
- Microfiber mops
- pH-neutral, manufacturer-approved floor cleaners. The Good Housekeeping Institute often tests and recommends gentle, effective cleaners for modern flooring surfaces[10].
DO NOT USE:
- Steam Mops: This is the number one rule. The combination of high heat and moisture can damage the wood veneer and the finish. Using a steam mop on hybrid hardwood will almost always void the manufacturer’s warranty[7].
- Abrasive Cleaners: Avoid scouring powders or harsh chemicals.
- Oil Soaps or Wax Polishes: These products will leave a dull, hazy film that is difficult to remove.
- Vinegar or Ammonia-Based Cleaners: These can break down the protective finish over time.
- Soaking Wet Mops: Never flood the floor with water.
How to Fix Scratches, Scuffs, and Minor Damage
While the finish is tough, heavy or sharp objects can still cause scratches. The good news is that minor damage is often easy to repair.
- Light Scuffs: Often, scuffs from shoes can be buffed out with a clean, dry tennis ball or a microfiber cloth.
- Minor Scratches: For small scratches that haven’t gone through the finish, a simple repair kit or stain marker designed for wood floors can work wonders. Companies like Bona, a leader in floor finishes, offer touch-up kits that can effectively conceal these minor blemishes[11].
- Deeper Gouges: For deeper scratches that have penetrated the wood veneer, you can use a colored wood filler or wax stick that matches your floor’s color. Fill the scratch, wipe away the excess, and allow it to dry.
Waterproof Hybrid Hardwood in Action: Best Use Cases
The unique properties of hybrid hardwood make it the perfect flooring for areas of the home where traditional wood was once a risky choice.
The Ultimate Basement Flooring Solution
For years, finding a suitable wood-look flooring for basements has been a challenge. Hybrid hardwood is the answer. Its 100% waterproof core means it won’t be damaged by the ambient moisture common in below-grade spaces. In the event of a minor leak or water intrusion, the planks themselves will not swell, cup, or buckle like other wood-based flooring.
Pro-Panel Insight: Resilience in a Crisis
“In a basement, you have to plan for the possibility of water. A truly waterproof floor like a hybrid with an SPC core is a resilient material. After a minor flood, the flooring can often be uninstalled, the subfloor dried out completely, and the same planks reinstalled. That’s impossible with traditional wood or even some engineered products. This aligns with FEMA’s guidance on using flood-damage-resistant materials in high-risk areas.”
– An IICRC-certified Water Damage Restoration Professional[6], referencing FEMA principles[12]
A Champion for Kitchens, Bathrooms, and Mudrooms
These high-traffic, high-moisture areas are where hybrid hardwood truly shines. It allows for a seamless flow of beautiful hardwood from the living room directly into the kitchen, a popular trend noted by experts at Homebuilding & Renovating Magazine[13]. Spills from cooking, splashes from the sink, or tracked-in snow from the mudroom are no longer a cause for panic. The durable, waterproof surface is easy to clean and won’t stain or warp, making it perfect for busy households with kids and pets.
Frequently Asked Questions (FAQ)
Can waterproof hybrid hardwood be refinished?
No. This is an important distinction from solid hardwood. The real wood veneer layer is too thin to be sanded down and refinished. However, the advanced protective topcoat is designed to last for decades with proper care, and minor scratches can be repaired with touch-up kits.
How does the cost compare to other flooring?
Generally, the material cost for waterproof hybrid hardwood falls between high-end luxury vinyl plank and traditional engineered hardwood. It is typically more expensive than laminate but less expensive than solid hardwood. According to data from major home improvement retailers, you can expect the price to vary based on the thickness of the wood veneer and the brand[14]. Remember to factor in potential savings from a DIY installation.
Is underlayment required for waterproof hybrid hardwood?
It depends on the specific product and your subfloor. Many hybrid hardwood planks come with a pre-attached underlayment pad, which provides sound insulation and comfort. In this case, an additional underlayment is not needed. However, as the National Wood Flooring Association (NWFA) guidelines recommend, if you are installing over a concrete subfloor (especially in a basement), you must use a 6-mil polyethylene vapor barrier to block moisture, even if the flooring has an attached pad[3].
Conclusion
Waterproof hybrid hardwood flooring represents a true evolution in home design, finally closing the gap between the timeless beauty of wood and the demands of modern life. It offers the authentic look and feel of real hardwood with the worry-free, waterproof durability that was once only available in synthetic alternatives.
You are now equipped with the knowledge to confidently select the right product for your home, prepare your space like a professional, execute a flawless installation, and maintain your floors for a lifetime of beauty. You no longer have to compromise. You can have the stunning wood floors you’ve always wanted, everywhere in your home.
Ready to transform your home with a beautiful, durable, and waterproof floor? Explore our selection of hybrid hardwood flooring today or contact our flooring experts to get a personalized recommendation for your project.
This article contains DIY installation advice. Always prioritize safety, wear appropriate personal protective equipment (PPE), and consult manufacturer-specific instructions for your particular product. This post may contain affiliate links.
References & Authoritative Sources
- ASTM International. (N.D.). ASTM Standards for Resilient Floor Coverings. ASTM.org.
- Floor Trends Magazine. (N.D.). Industry analysis on flooring materials and performance characteristics.
- National Wood Flooring Association (NWFA). (N.D.). Installation Guidelines and Specifications. nwfa.org.
- Family Handyman. (N.D.). Expert-vetted instructions for DIY home projects.
- The Concrete Network. (N.D.). Guides on concrete moisture testing and preparation.
- Institute of Inspection, Cleaning and Restoration Certification (IICRC). (N.D.). Standards for water damage restoration.
- Manufacturer Guidelines (e.g., Shaw Floors, Mohawk Flooring). (N.D.). Official Installation and Warranty Documentation. Product-specific information.
- This Old House. (N.D.). Expert-led tutorials on home improvement techniques.
- Consumer Reports. (N.D.). Unbiased testing of consumer products, including cleaning appliances.
- Good Housekeeping Institute. (N.D.). Testing and recommendations for consumer cleaning products.
- Bona. (N.D.). Recommendations for hardwood floor finish repair and care products.
- Federal Emergency Management Agency (FEMA). (N.D.). Guides on post-flood cleanup and flood-resistant materials.
- Homebuilding & Renovating Magazine. (N.D.). Expert advice on home improvement projects and product trends.
- Major Retailers (e.g., Lowe’s, Floor & Decor). (N.D.). Publicly available cost data for flooring materials.
