
You love the timeless, elegant look of hardwood floors, but you live in the real world. A world of kitchen spills, muddy pet paws, and the constant worry that one tipped glass of water could lead to costly, heartbreaking damage. For years, homeowners faced a tough choice: get the stunning aesthetics of real wood or opt for the practical durability of a waterproof alternative. What if you didn’t have to choose?
Enter waterproof hybrid hardwood flooring. This innovative product offers the holy grail of flooring: a genuine wood surface combined with a completely waterproof core. It’s the perfect solution for achieving that classic hardwood look in high-moisture areas like kitchens, basements, and bathrooms without the constant fear of water damage.
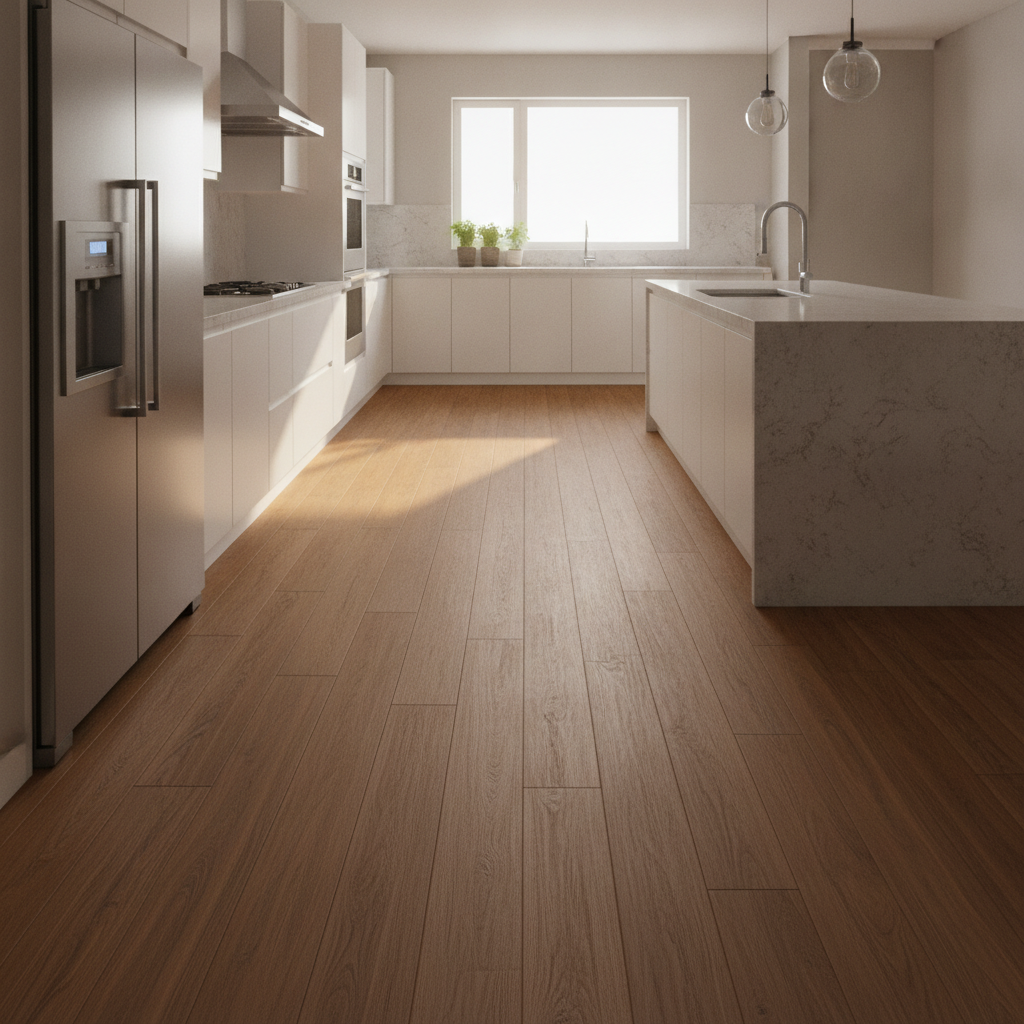
This is your ultimate all-in-one guide to transforming your home with waterproof hybrid hardwood. We will take you from understanding what this flooring is, to comparing it against the alternatives, to a foolproof, step-by-step plan that will give you the confidence to flawlessly install it yourself—saving you thousands on professional labor costs.
- What Is Waterproof Hybrid Hardwood Flooring?
- Hybrid Hardwood vs. The Alternatives: A Head-to-Head Comparison
- The Complete Step-by-Step DIY Installation Guide
- Common DIY Mistakes to Avoid
- Budgeting Your Project: Cost and Savings
- Frequently Asked Questions (FAQ)
- Your Perfect Floor Awaits
- References
What Is Waterproof Hybrid Hardwood Flooring?
Waterproof hybrid hardwood is a marvel of modern flooring engineering. It’s a multi-layered plank designed to give you the authentic beauty of a real wood surface on top of a high-performance, 100% waterproof foundation. Unlike traditional solid or engineered hardwood, which use wood-based cores susceptible to swelling and warping, hybrid flooring uses a composite core that water simply can’t penetrate.
The Anatomy of a Hybrid Plank: A Layer-by-Layer Breakdown
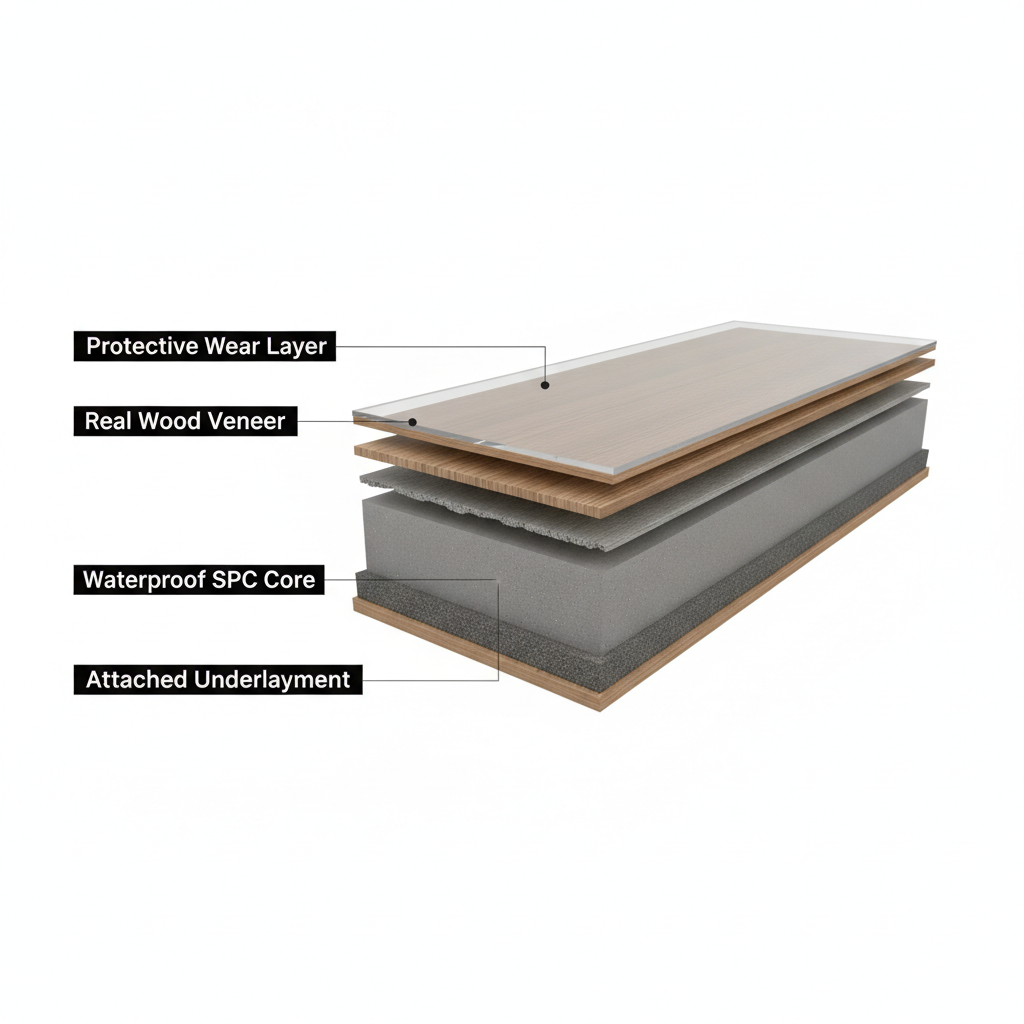
To truly understand its benefits, you need to look inside the plank. While specific construction can vary by brand, most waterproof hybrid hardwood planks consist of four key layers:
- Protective Wear Layer: The top layer is a commercial-grade urethane or aluminum oxide finish. This transparent coat provides robust protection against scratches, scuffs, and fading, making it ideal for active households.
- Real Wood Veneer: This is the star of the show. A thin but authentic layer of real hardwood (typically ranging from 1.2mm to 3mm thick) gives the flooring its unique grain, texture, and natural beauty. The thickness of this veneer often impacts the product’s price and durability.
- Waterproof Composite Core: The secret to its durability lies in the core. This is typically made from either Stone Plastic Composite (SPC) or Wood Plastic Composite (WPC). According to industry resources like the Floor Covering Institute, SPC cores are denser and more rigid, offering superior dent resistance, while WPC cores are slightly softer and provide more comfort and sound insulation[1]. Both are completely impervious to water.
- Attached Underlayment: Most hybrid hardwood products come with a pre-attached pad made of cork or foam. This layer simplifies installation, provides cushioning underfoot, absorbs sound, and acts as a moisture barrier.
Myth vs. Fact: Is It Truly 100% Waterproof?
This is one of the most critical questions homeowners ask, and the answer requires a bit of nuance.
Fact: The core materials (SPC/WPC) and the surface of a hybrid hardwood plank are 100% waterproof. If you submerge a single plank in water, it will not swell, warp, or degrade. This is what makes it fundamentally different from traditional wood flooring.
Myth: A hybrid hardwood floor makes your entire room “flood-proof.” While the planks themselves can handle topical spills with ease, a major event like a burst pipe or a flooded basement can still cause significant problems. Water can get underneath the flooring and become trapped, leading to mold and mildew growth on the subfloor.
Think of it this way: the flooring is designed to handle everyday life. Most manufacturer warranties offer protection against topical moisture, often specifying a window like “up to 72 hours” for standing water to be cleaned up without damaging the floor[2]. However, for more severe events, the Institute of Inspection, Cleaning and Restoration Certification (IICRC) guidelines for water damage restoration would still apply, as the issue becomes about the entire structure, not just the flooring surface[3].
The Pros and Cons of Hybrid Wood Flooring
To help you make an informed decision, here’s a balanced look at the advantages and potential drawbacks.
Pros:
- Authentic Wood Beauty: You get the genuine grain, knots, and character of real wood because it is real wood on top.
- Completely Waterproof: Perfect for kitchens, bathrooms, laundry rooms, and basements where traditional hardwood is a risky choice.
- Highly Durable: The rigid core provides excellent dent resistance, and the wear layer protects against scratches.
- DIY-Friendly Installation: Most products use a simple click-lock system for a “floating floor” installation, requiring no glue or nails.
- Easy Maintenance: Simple sweeping and damp-mopping are all that’s needed to keep it looking great.
Cons:
- Cannot Be Refinished: The wood veneer is too thin for traditional sanding and refinishing. Deep scratches cannot be sanded out.
- Cost: It is often more expensive than LVP and laminate flooring, though typically less than high-end solid or engineered hardwood.
- Pattern Repeat: As it’s a manufactured product, be mindful of mixing planks from different boxes to avoid noticeable pattern repetition.
Who is this for? Waterproof hybrid hardwood is an ideal choice for families with kids and pets, homeowners finishing a basement, or anyone who wants the undeniable look of real wood in a kitchen or bathroom without the worry.
Hybrid Hardwood vs. The Alternatives: A Head-to-Head Comparison
With so many realistic wood-look floors on the market, it’s easy to get confused. Here’s how waterproof hybrid hardwood stacks up against the most popular alternatives.
Hybrid Hardwood vs. Luxury Vinyl Plank (LVP)
This is the most common comparison. LVP is a 100% synthetic product with a printed image of wood on its surface.
- Appearance: Hybrid hardwood wins on authenticity because it has a real wood veneer. High-end LVP, however, uses advanced “Embossed in Register” (EIR) technology to create textures that match the printed grain, making it incredibly realistic.
- Durability: Both are highly durable and waterproof. Hybrid’s SPC core is often more dent-resistant than LVP’s vinyl core.
- Cost: LVP is generally more budget-friendly than hybrid hardwood.
- Verdict: Choose hybrid hardwood if you want the unmatched, unique look of real wood. Choose LVP for a slightly lower cost and a massive range of style options.
Hybrid Hardwood vs. Waterproof Laminate
Modern laminate flooring has come a long way, now featuring water-resistant cores and realistic visuals.
- Appearance: Again, hybrid’s real wood veneer gives it the edge in authenticity.
- Core Material: Laminate typically uses a high-density fiberboard (HDF) core with water-repellent coatings, making it water-resistant but not fully waterproof like hybrid’s SPC/WPC core. Its durability is measured by an AC Rating (e.g., AC4 for light commercial use).
- Sound & Feel: Laminate can sometimes have a hollow sound underfoot, whereas the denser core of hybrid flooring often feels more solid.
- Verdict: Choose hybrid hardwood for superior water protection and a more solid feel. Choose waterproof laminate for a durable, scratch-resistant option that is often very budget-friendly.
Hybrid Hardwood vs. Engineered Hardwood
This comparison is crucial, as the products look very similar. The key difference is in the core.
- Core Material: Engineered hardwood uses a core made of cross-laminated layers of plywood or HDF. While more stable than solid hardwood, this core is still made of wood products and is only water-resistant, not waterproof. It will swell and delaminate with prolonged water exposure. Hybrid’s core is fully synthetic and waterproof.
- Installation Location: Because of its core, hybrid hardwood can be installed below grade (in basements) and in wet areas. Most engineered hardwood warranties are voided if installed in such environments.
- Refinishing: Some engineered hardwood with a thick enough veneer (3mm+) can be sanded and refinished once or twice. Hybrid hardwood cannot.
- Verdict: Choose hybrid hardwood for any area with moisture risk. Choose engineered hardwood if you want the ability to refinish your floors and are installing in a dry, stable environment.
Summary: Which Waterproof Floor Is Right for You?
Use this scorecard to quickly compare your options. (Rated on a scale of 1 to 5, with 5 being the best).
| Feature | Hybrid Hardwood | Luxury Vinyl (LVP) | Waterproof Laminate | Engineered Hardwood |
|---|---|---|---|---|
| Aesthetics/Realism | 5 | 4 | 3 | 5 |
| Water Resistance | 5 | 5 | 3 | 2 |
| Durability (Dents) | 5 | 4 | 4 | 3 |
| Cost | 3 | 4 | 5 | 2 |
| DIY-Friendliness | 5 | 5 | 5 | 3 |
The Complete Step-by-Step DIY Installation Guide
Ready to roll up your sleeves? This detailed guide will walk you through every step of the process. Remember, while these are industry best practices, your manufacturer’s installation manual is the ultimate authority. Always read and follow it to protect your warranty.
Step 0: Essential Tools & Materials Checklist
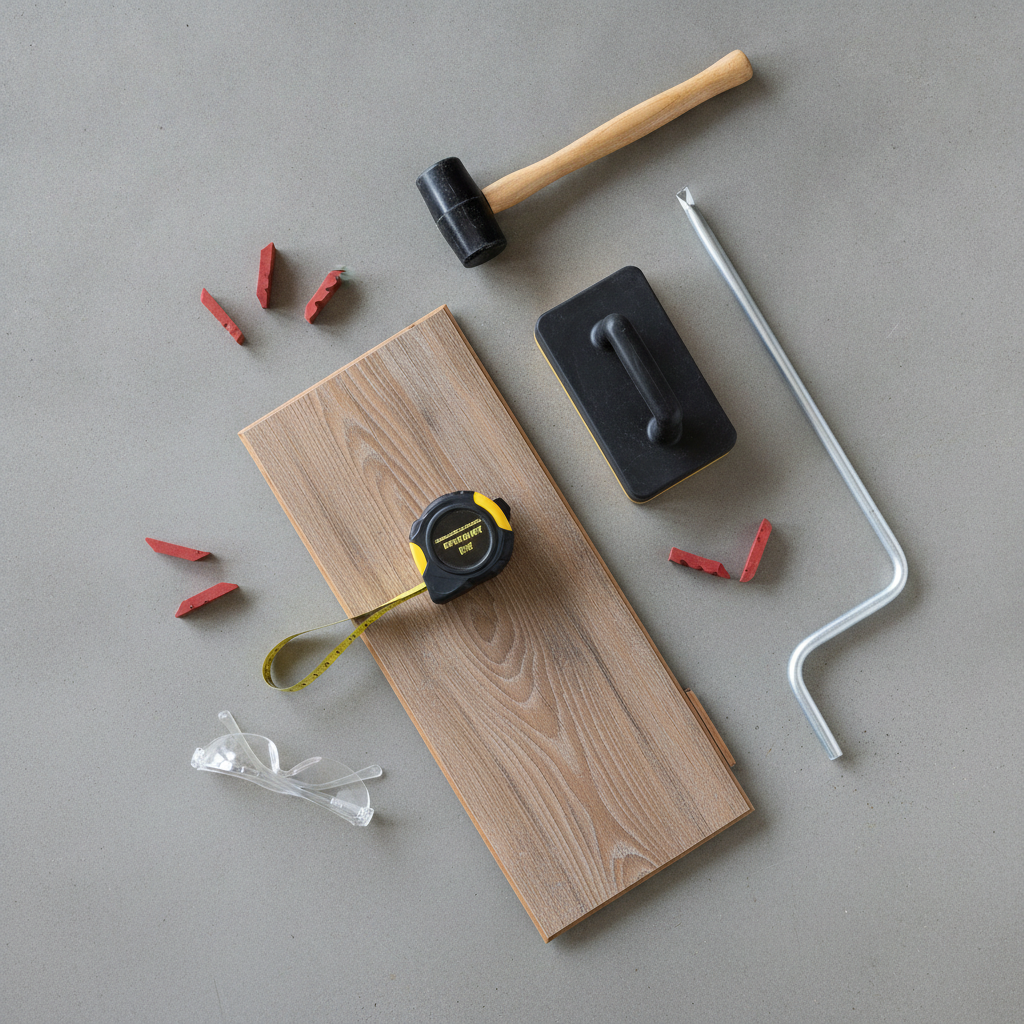
Gathering everything you need before you start is the key to a smooth project.
Materials:
- Waterproof Hybrid Hardwood Flooring (plus 10% extra for cuts and waste)
- Transition Strips (T-molding, reducers, etc.)
- Quarter-Round or Shoe Molding
- Painter’s Tape
Tools:
- Tape Measure
- Pencil
- Utility Knife
- Safety Glasses & Gloves
- Knee Pads
- Miter Saw or Circular Saw (with a 40-tooth or higher carbide-tipped blade for clean cuts)
- Jigsaw (for complex cuts)
- Flooring Installation Kit (Tapping Block, Pull Bar, Spacers)
- Rubber Mallet
- Level or Straightedge (at least 6 feet long)
- Pry Bar
Step 1: Subfloor Preparation – The Foundation of Your Project
This is the most important step. Do not skip it. A poor subfloor will result in a failed installation.
- Remove Old Flooring: Tear out any soft flooring like carpet and padding. You can often install hybrid flooring over existing hard surfaces like tile or sheet vinyl, but check your manufacturer’s instructions first.
- Clean Thoroughly: Scrape up any old glue or paint. Sweep and vacuum the subfloor until it is completely free of dust and debris.
- Check for Flatness: This is critical. According to the National Wood Flooring Association (NWFA), your subfloor must be flat to within 3/16 of an inch over a 10-foot span[4]. Lay your straightedge on the floor in several spots. If you see any gaps larger than 3/16″, you’ll need to sand down high spots or use a self-leveling compound to fill in low spots.
- Ensure it’s Dry: The subfloor must be completely dry. For concrete slabs, you may need to perform a moisture test to ensure it’s suitable for installation.
Step 2: Acclimation and Planning Your Layout
- Acclimate the Flooring: Move the unopened boxes of flooring into the room where they will be installed. Let them sit for at least 48 hours. This allows the planks to adjust to the temperature and humidity of your home, preventing expansion or contraction issues after installation.
- Plan Your Direction: Decide which way you want the planks to run. Typically, they run parallel to the longest wall or in the direction of the main light source.
- Measure and Calculate: Measure the width of the room and divide by the width of a plank. This tells you how wide your last row will be. If it’s less than 1/3 of a plank’s width, you should trim your first row narrower to make the last row wider and create a more balanced look.
- Plan Your Stagger: To avoid an unnatural, brick-like pattern, you must stagger the end joints of the planks from one row to the next. The industry standard is to ensure end joints are at least 6-8 inches apart. A good pro tip is to open several boxes and mix the planks to ensure a good blend of colors and patterns, avoiding obvious repeats.
Step 3: Cutting and Fitting Planks
You’ll need to make several types of cuts for a professional finish.
- Straight Cuts: Use your miter saw for clean, fast, and perfectly square cuts at the end of each row.
- Rip Cuts: For the first and last rows that run parallel to the wall, you’ll need to cut planks lengthwise. A circular saw with a guide or a table saw works best.
- Complex Cuts: For cutting around vents or corners, use a jigsaw.
- Door Jambs: Don’t try to cut the plank to fit around the door jamb. Instead, use a handsaw or oscillating multi-tool to cut the bottom of the jamb itself. This allows you to slide the plank underneath for a seamless, professional finish.
Step 4: Installing the Main Floor and Final Row
This is where your floor comes to life.
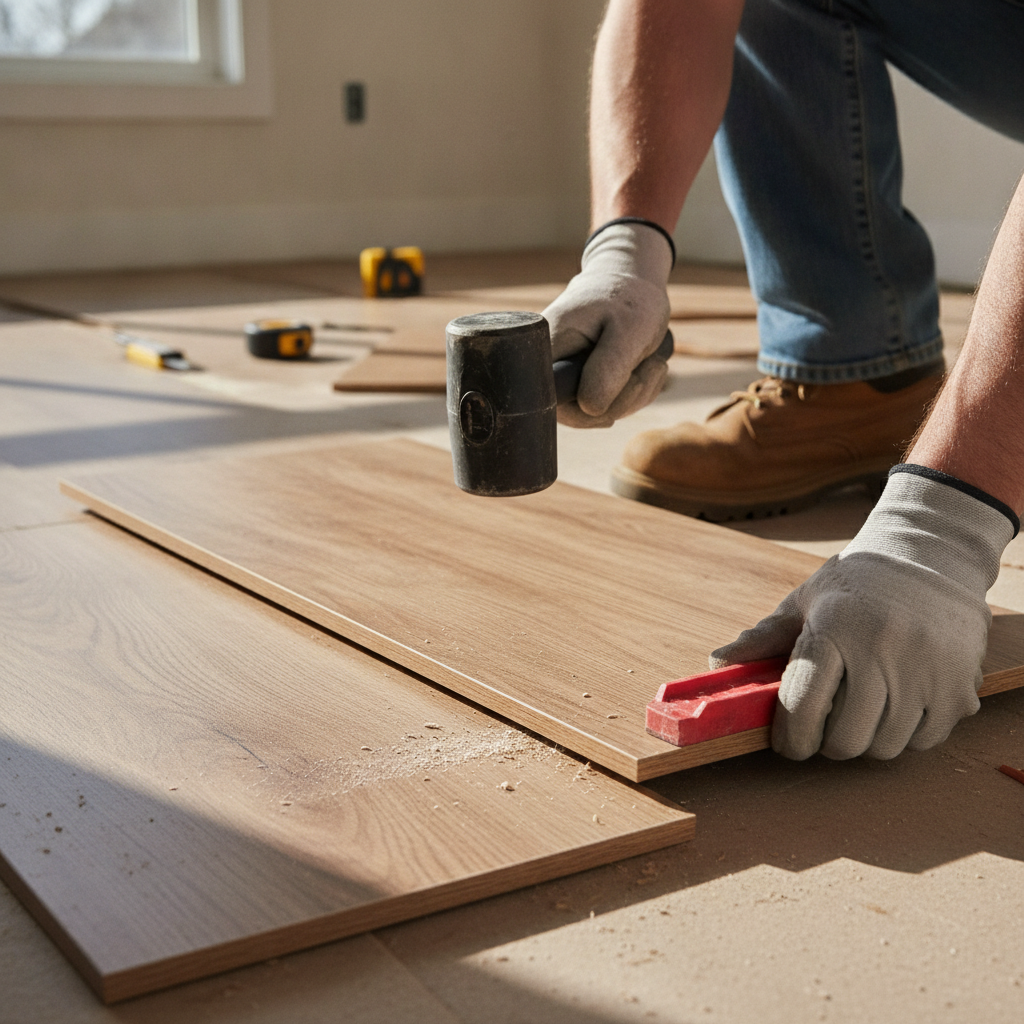
- Set Your Spacers: Place 1/4-inch to 3/8-inch spacers along the starting wall. This creates the critical expansion gap, which allows the entire floor to expand and contract with seasonal changes without buckling.
- Lay the First Row: Lay your first row of planks with the tongue side facing the wall. Click the short ends of the planks together.
- Start the Second Row: Use the piece you cut off from the end of the first row to start your second row (as long as it’s at least 6-8 inches long). This naturally creates the stagger.
- Engage the Planks: Insert the long tongue of the new plank into the long groove of the plank in the first row at a slight angle. Lower the plank until it locks into place. You may need to gently tap the long edge with your tapping block and mallet to ensure a tight fit.
- Continue Across the Floor: Work your way across the room, row by row, maintaining the expansion gap on all sides and staggering your end joints.
- The Final Row: This can be tricky. You’ll likely need to rip-cut the last row of planks to the correct width (remembering to account for the expansion gap). Use your pull bar and mallet to lock this final row into place.
Step 5: Finishing Touches – Baseboards and Transitions
- Remove Spacers: Once the floor is fully installed, you can remove all the spacers from the perimeter.
- Install Molding: Install your quarter-round or shoe molding along the baseboards to cover the expansion gap. Use a nail gun to attach the molding to the baseboard, not the floor.
- Add Transitions: Install the appropriate transition strips in doorways or where the new floor meets another flooring type (like carpet or tile).
Common DIY Mistakes to Avoid
Even with a click-lock system, rookie mistakes can compromise your beautiful new floor. Here are the top three to watch out for.
Mistake #1: Ignoring Subfloor Prep
We can’t say it enough: a perfectly flat, clean, and dry subfloor is non-negotiable. Skipping this step is the number one cause of flooring failures, leading to bouncy spots, planks that won’t lock properly, and joints that separate over time.
Mistake #2: Forgetting the Expansion Gap
It might seem small, but that 1/4-inch gap around the perimeter is essential. Without it, when the floor naturally expands due to changes in humidity, the planks will press against the walls, causing the floor to buckle or “peak” in the middle of the room.
Mistake #3: Not Planning Your Layout
Jumping right in without a plan can lead to aesthetic disasters. You might end up with a tiny, awkward-looking sliver of a plank against the far wall or create repeating “H” patterns where the joints line up, which screams “amateur installation.” Take the extra hour to plan your layout for a result that looks truly professional.
Budgeting Your Project: Cost and Savings
One of the biggest motivations for a DIY project is the cost savings. Let’s break down the numbers.
How Much Does Waterproof Hybrid Hardwood Cost?
The material cost for waterproof hybrid hardwood typically ranges from $4 to $9 per square foot. The price is influenced by the brand, the thickness of the wood veneer, and the type of core (SPC is often slightly more expensive than WPC).
Calculating Your DIY Savings
The real savings come from avoiding labor costs. According to data from cost aggregators like Angi, professional installation for a floating floor typically costs between $2.00 and $5.00 per square foot[5].
Here’s a simple way to estimate your savings:
(Your Room’s Square Footage x $3.50 Average Labor Cost) – Cost of Any New Tools = Your Total Savings
For a 500-square-foot project, that’s a potential savings of around $1,750. Data from the Bureau of Labor Statistics on flooring installer wages confirms that labor is a significant portion of any flooring budget, making DIY a financially attractive option[6].
Frequently Asked Questions (FAQ)
Can you refinish the wood veneer on hybrid hardwood floors?
No. Due to the very thin real wood veneer (1.2mm-3mm), you cannot sand and refinish this type of flooring like you would with solid hardwood. A deep gouge that penetrates the wear layer and veneer cannot be sanded out.
Do I need an underlayment for waterproof hybrid flooring?
Probably not. The vast majority of waterproof hybrid hardwood products come with a high-quality underlayment already attached to the back of each plank. Adding a second underlayment can make the floor feel too spongy and may even void the warranty. Always check the manufacturer’s specific instructions.
How durable is hybrid flooring against scratches from pets?
It is very durable. The top aluminum oxide wear layer is designed to resist scratches from pet claws, furniture, and daily foot traffic. It is significantly more scratch-resistant than most traditional hardwood floors. However, no floor is completely scratch-proof, so it’s still wise to use felt pads on furniture and keep your pets’ nails trimmed.
Your Perfect Floor Awaits
Waterproof hybrid hardwood truly represents the best of both worlds: the authentic, unmatched beauty of real wood and the worry-free, waterproof durability needed for modern life. It’s a premium flooring solution that can handle anything your family throws at it.
By combining the right product with a little bit of planning and patience, a stunning, professional-quality floor is well within your reach. With this guide, you now have the expert knowledge and the step-by-step confidence to choose the right materials, budget effectively, and successfully tackle this project yourself.
Ready to start your project? Browse our selection of waterproof hybrid hardwood flooring or use our project calculator to estimate your material needs today.
This guide provides general instructions for DIY installation. Always consult and follow the specific installation manual provided by your flooring manufacturer to ensure proper installation and to avoid voiding your warranty. Safety precautions should be taken when using power tools.
References
- Floor Covering Institute. (N.D.). Flooring Types and Definitions.
- Shaw Floors. (N.D.). Sample Limited Lifetime Warranty Document for Floorté Hardwood.
- Institute of Inspection, Cleaning and Restoration Certification. (N.D.). IICRC S500 Standard for Professional Water Damage Restoration. Retrieved from iicrc.org.
- National Wood Flooring Association. (N.D.). Installation Guidelines.
- Angi. (2024). True Cost Guide: Flooring Installation. Angi.com.
- U.S. Bureau of Labor Statistics. (2024). Occupational Outlook Handbook: Flooring Installers and Tile and Marble Setters. Retrieved from bls.gov/ooh.
