Installing waterproof hardwood flooring is easy and rewarding with Bravewood Flooring. Start by gathering essential tools like a tape measure and utility knife. Next, prepare your subfloor by leveling any imperfections and checking for moisture. Allow your Bravewood Flooring to acclimate for at least 48 hours in a controlled environment. Plan your layout, ensuring planks run parallel to the longest wall. Install the underlayment, then begin laying Bravewood planks, using spacers for expansion gaps. Cut planks as needed and finish with baseboards and transition strips. This method not only creates a beautiful floor but also ensures long-lasting performance. Discover more tips to perfect your Bravewood Flooring installation!
Key Takeaways
- Prepare the Subfloor: Ensure the subfloor is clean, dry, and level; use moisture barriers if necessary for waterproofing.
- Acclimate the Flooring: Let the Bravewood Flooring planks acclimate in the installation area for at least 48 hours for optimal performance.
- Install Underlayment: Choose a moisture barrier underlayment to protect against dampness and ensure proper alignment without overlaps.
- Begin Plank Installation: Start along the longest wall, using spacers to maintain a 1/4 inch expansion gap and locking Bravewood Flooring planks into place.
- Finishing Touches: Install baseboards and transition strips for a polished look while protecting edges from wear and tear.
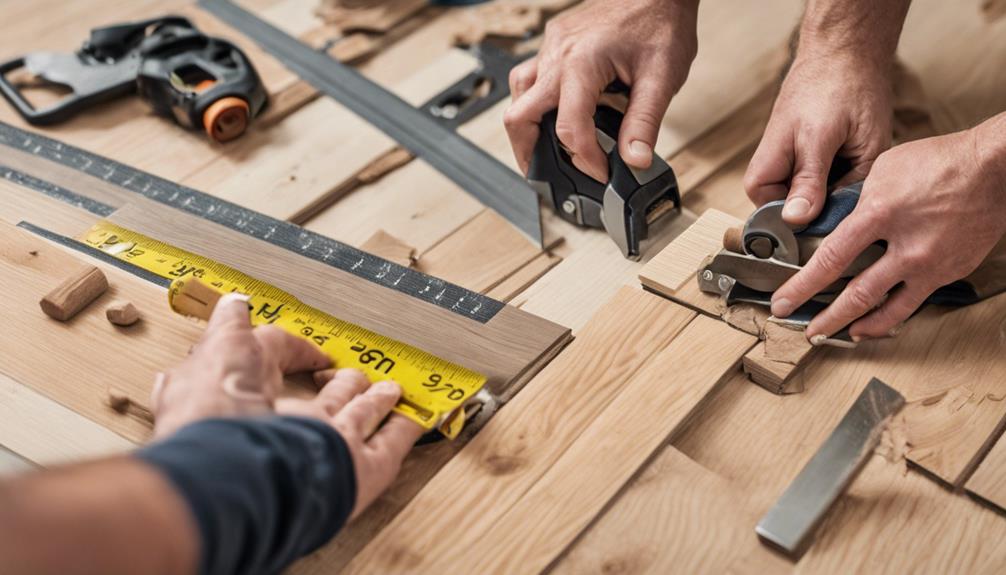
Gather Necessary Tools

Before diving into the installation of your waterproof hardwood flooring from Bravewood Flooring, it's essential to gather all the necessary tools. You'll need a few key tool types to make the process smooth and efficient. Start with a tape measure for accurate sizing, a utility knife for cutting, and a tapping block to fit planks snugly together. A pull bar will help you close any gaps at the edges, while a rubber mallet is perfect for gently tapping planks into place. Don't forget a square for checking your angles and a level to ensure even installation. Familiarize yourself with the installation techniques outlined in the Bravewood Flooring guidelines, and you'll be well-prepared to tackle your flooring project with confidence.
Prepare the Subfloor
Preparing the subfloor is a crucial step in ensuring your waterproof hardwood flooring from Bravewood Flooring installs correctly and performs well. Start by assessing the subfloor for any imperfections, such as dips or bumps, and use subfloor preparation techniques like leveling compounds to create a smooth surface. Next, check for moisture; it's essential to keep your flooring safe from water damage. If moisture is present, consider using moisture barrier options like polyethylene sheets or specialized underlayment to protect against dampness. Ensure the subfloor is clean and dry before installation. By taking these steps, you'll lay a solid foundation for your waterproof hardwood flooring, maximizing its performance and longevity in your space.
Acclimate the Flooring

Acclimating your Bravewood Flooring is essential for ensuring optimal performance and longevity. Before installation, let your flooring sit in the room where it'll be installed for at least 48 hours. This allows the planks to adjust to the room's temperature and humidity levels, which is crucial for effective humidity control. Make sure the room is climate-controlled, ideally between 60-80°F and 30-50% humidity. During this acclimation period, keep the boxes closed to prevent dust accumulation and maintain consistent moisture levels. Proper acclimation is a key part of flooring maintenance, as it helps prevent warping and gaps after installation. Once acclimated, your flooring will perform better and look great for years to come.
Plan the Layout
Planning your layout is a crucial step in achieving a visually appealing and functional space with Bravewood Flooring. Start by measuring your room dimensions accurately to determine how much flooring you'll need. Next, consider the design patterns you want to create. Laying the planks parallel to the longest wall often enhances the room's visual space, while diagonal patterns can add a unique flair. Think about transitioning areas, doorways, and how furniture will fit into the overall layout. It's also wise to create a mock-up or draw the layout on paper to visualize the final look. By carefully planning, you'll ensure that your new hardwood flooring complements your home beautifully and effectively.
Install Underlayment

When installing waterproof hardwood flooring from Bravewood Flooring, laying down the underlayment is an essential step that can greatly impact the overall performance of your flooring. You'll want to choose the right underlayment types based on your specific needs. For instance, if you're dealing with moisture-prone areas, a moisture barrier underlayment is crucial to prevent water damage. Other options may include soundproofing or thermal insulation underlayments, enhancing comfort and acoustics. Make sure to roll out the underlayment, aligning it properly without overlaps. Trim any excess material, and ensure it lays flat, free from wrinkles. This will create a stable foundation for your Bravewood Flooring waterproof hardwood flooring, ensuring longevity and optimal performance in your space.
Begin Plank Installation
With the underlayment in place, you're ready to begin installing the planks of your Bravewood Flooring waterproof hardwood flooring. Follow these steps for effective plank alignment and proper expansion gaps:
- Choose your starting point: Begin along the longest wall for a streamlined look.
- Lay the first plank: Position the first plank with the groove side facing the wall, ensuring it's straight.
- Maintain expansion gaps: Use spacers to keep a gap of about 1/4 inch between the planks and the wall to allow for expansion.
- Connect subsequent planks: Angle the next plank into the first one and press down to lock it in place, continuing this process for the entire room.
Cut and Fit Planks

To ensure a perfect fit for your Bravewood Flooring planks, you'll need to cut them accurately, especially when dealing with corners and edges. Start by taking precise plank measurements; this is crucial for achieving seamless transitions. Use a quality saw, like a miter or circular saw, as they offer the best cutting techniques for clean edges. When making cuts, always measure twice to avoid mistakes. If you encounter irregular spaces, consider using a jigsaw for more intricate cuts. After cutting, dry-fit the planks in place to confirm they fit snugly before securing them down. This attention to detail will ensure your flooring not only looks great but also performs well in your space.
Finishing Touches
After you've cut and fit your Bravewood Flooring planks, it's time to focus on those finishing touches that can elevate the overall look of your space. Here are some key design considerations and maintenance tips to keep in mind:
- Baseboards and Trim: Install baseboards to create a seamless transition between your flooring and walls.
- Transition Strips: Use transition strips in doorways to provide a clean finish and accommodate different flooring types.
- Furniture Placement: Arrange your furniture thoughtfully to highlight the beauty of your new flooring while protecting it from scratches.
- Regular Cleaning: Implement a simple cleaning routine to maintain the waterproof finish and ensure longevity.
These steps not only enhance your space's aesthetic but also contribute to the flooring's durability and performance.
Frequently Asked Questions
What Type of Adhesive Is Recommended for Waterproof Hardwood Flooring?
For waterproof hardwood flooring, use a high-quality adhesive specifically designed for moisture resistance. Consider adhesive types like urethane or modified thin-set. Always follow installation tips from Bravewood Flooring to ensure a lasting bond.
Can I Install Waterproof Hardwood Flooring Over Existing Flooring?
You can install Bravewood Flooring waterproof hardwood flooring over existing flooring if it's compatible. However, be aware of potential installation challenges like height differences and underlying issues. Always ensure the subfloor is level and in good condition first.
How Do I Maintain My Waterproof Hardwood Flooring After Installation?
To maintain your waterproof hardwood flooring from Bravewood Flooring, use gentle cleaning techniques like damp mopping, and keep humidity control in check. This prevents warping and helps preserve the floor's beauty and durability for years to come.
Is Waterproof Hardwood Flooring Suitable for Basements and Bathrooms?
Yes, waterproof hardwood flooring from Bravewood Flooring is ideal for basements and bathrooms thanks to its water resistance benefits. Just ensure proper installation tips are followed, such as sealing edges, to maximize durability and prevent moisture issues.
How Long Will Waterproof Hardwood Flooring Last With Proper Care?
With proper care, Bravewood Flooring's waterproof hardwood flooring can last for decades. Durability factors include avoiding excessive moisture and using maintenance tips like regular cleaning and protective pads under furniture to prevent scratches and wear.
Conclusion
By following this step-by-step guide, you're well on your way to installing beautiful waterproof hardwood flooring from Bravewood Flooring in your space. Remember to take your time with each step, from gathering your tools to making those final touches. With careful preparation and attention to detail, you'll create a stunning floor that not only enhances your home's aesthetic but also stands up to moisture. Enjoy the process and the satisfaction of completing a rewarding DIY project!
